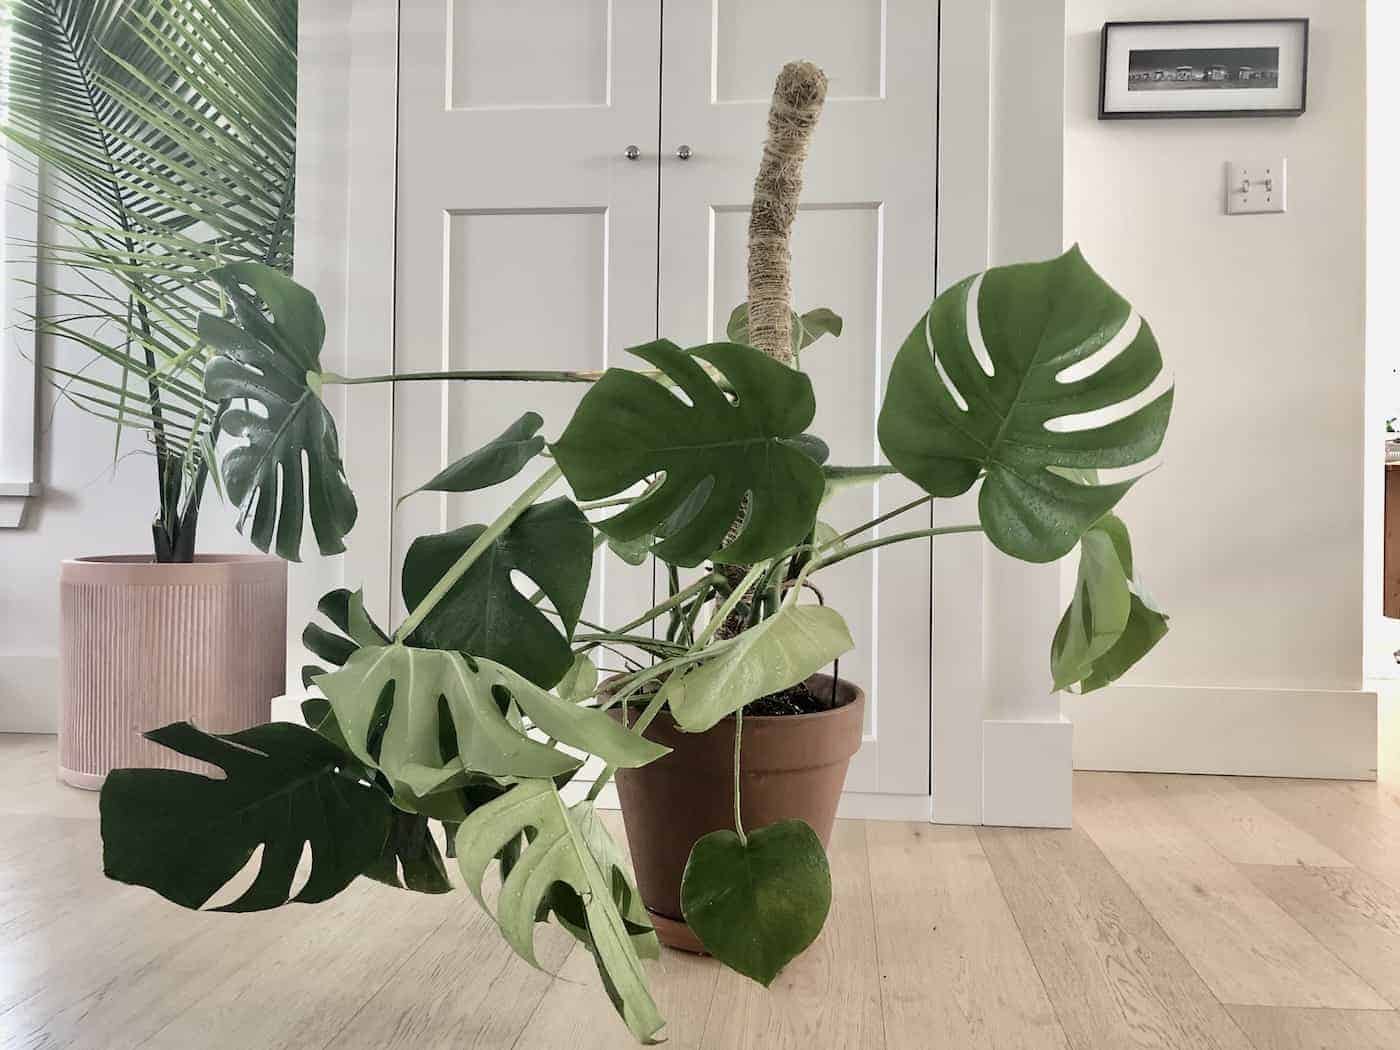
Is your Monstera plant growing all over the place in every direction? If so, it might be time to add vertical support and turn your plant into a Moss pole Monstera.
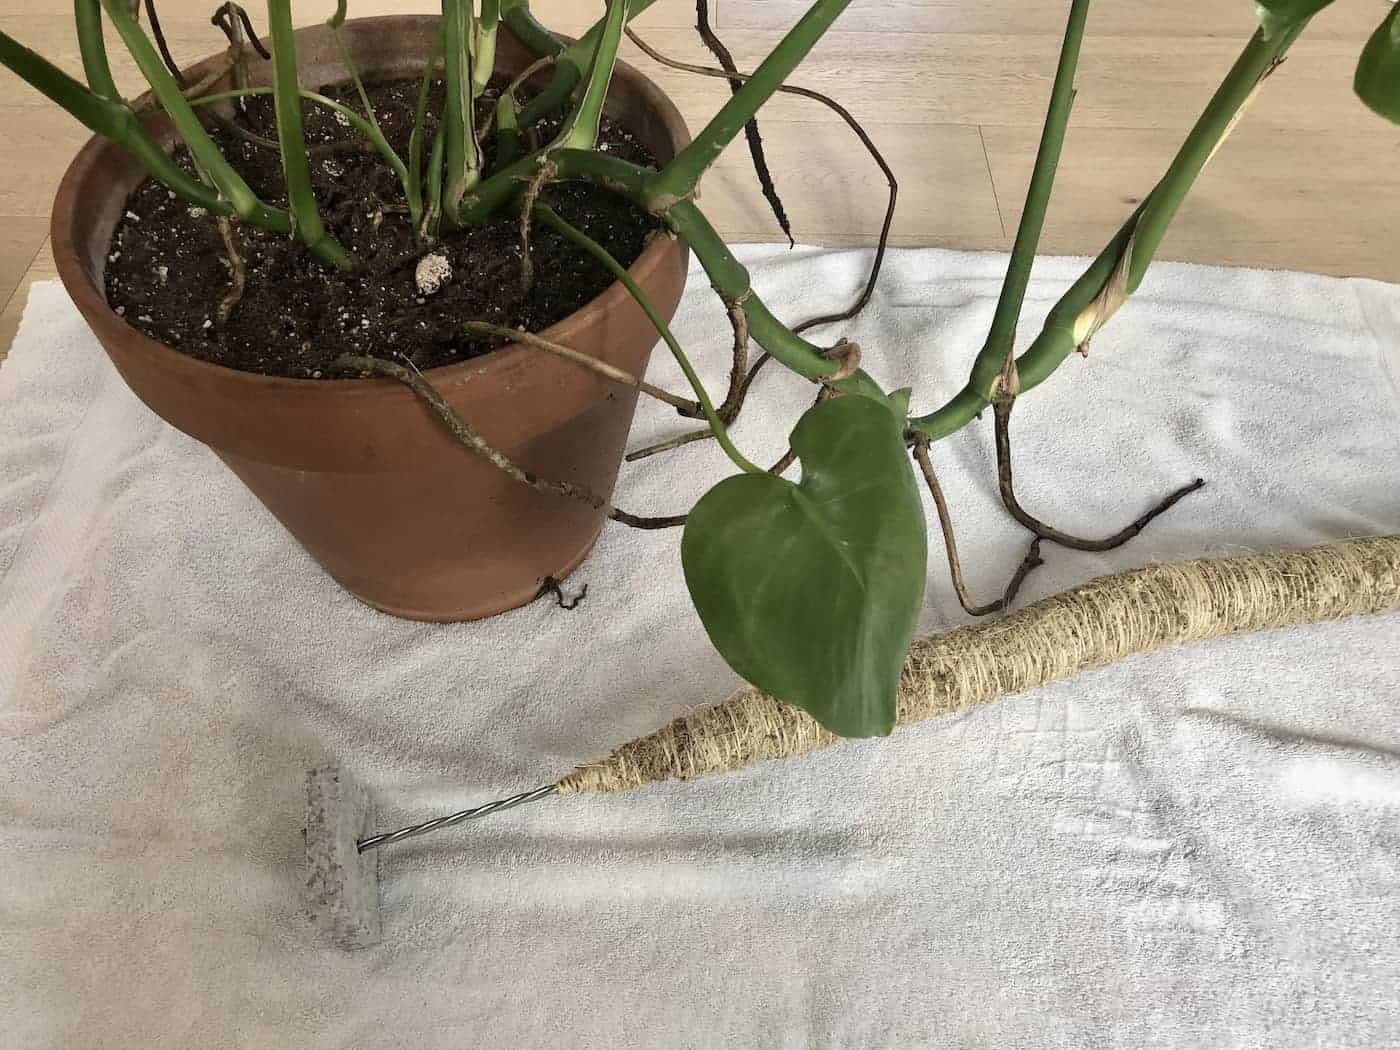
Moss pole Monsteras are simply regular Monstera plants that have been potted to include a moss pole in their planter. The Monstera vines can then climb the moss pole vertically rather than sprawling out the sides of the planter. Most moss poles for Monsteras are in the range of 36″-42″ tall and made of either sphagnum moss or coco coir. Larger monstera vines can be attached with twine or plant tape before the aerial roots start to attach themselves to the pole.
Read on to learn all about Moss Pole Monstera plants!
Moss pole Monstera basics
Moss Pole Monstera plants are becoming more common as houseplant owners look for ways to accommodate the natural growth habits of their favorite houseplants. Some plants, like Monstera, are natural climbers in their native habitats. These epiphytic vining plants are always looking for something to grow up!
Adding a moss pole to a Monstera is a great way to channel some of that growth upwards without working against the natural form and habit of the plant. A moss pole can be as great for small-space houseplant growers as it can be for the Monstera itself!
The easiest way to make a Moss Pole Monstera is to add the moss pole to an empty planter and repot the Monstera plant around the base of the moss pole. Monsteras can grow quite large, so having the base as deep and sturdy as possible helps to keep the moss pole from being overly wobbly.
You can use many different species of plants in the Monstera genus to make a Moss Pole Monstera. Great options for potting up with a moss pole include Monstera deliciosa and Monstera adansonii.
Best moss poles for Monstera plants
The best moss poles for Monstera plants are typically tall sturdy poles. The bendable moss pole pictured above is a great option. This pole is available in conventional live Sphagnum Moss or as a Coco Coir Pole. The Mossify poles are nice because they are flexible, allowing them to be bent into an organic shape that can accommodate the thick vines of larger Monstera plants.
Read more about the best moss poles.
Adding a moss pole to a Monstera
Moss poles can be added to any kind of Monstera plant. While some moss poles have a pointy base allowing for it to be poked down into the existing root ball, the best way to install a moss pole in a Monstera plant is during repotting. This allows for the moss pole to extend all the way to the bottom of the planter pot (making it less wobbly for larger plants).
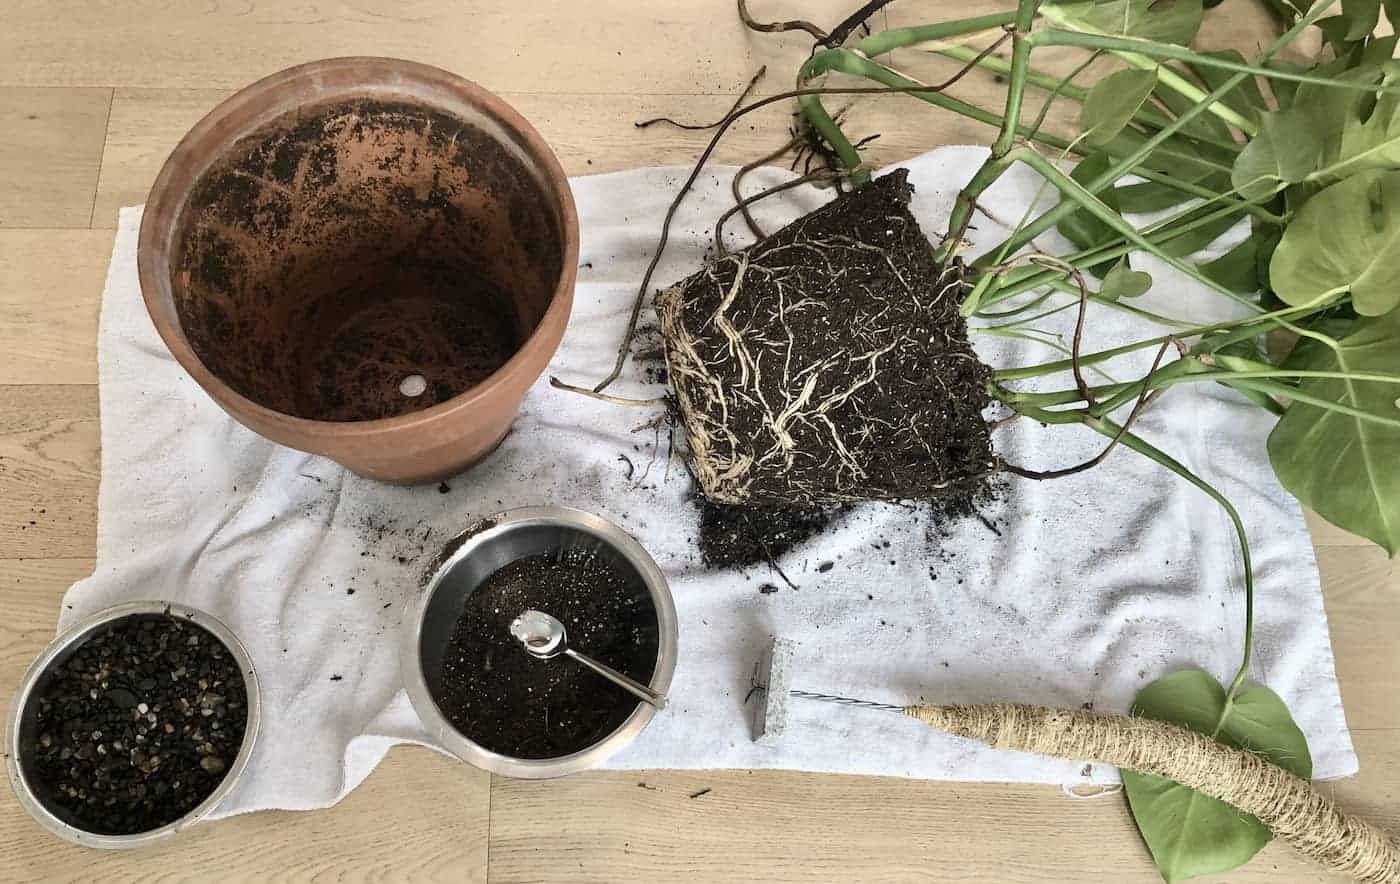
Supplies for adding a moss pole
- Monstera Plant
- Moss Pole
- Planter Pot (
- Rocks (I used pea gravel)
- Potting Mix
- Sprout Screen or coffee filter
- Twine, Plant Pins, or Plant Tape
A second pair of hands during installation is also a HUGE help!
Steps for potting the moss pole Monstera
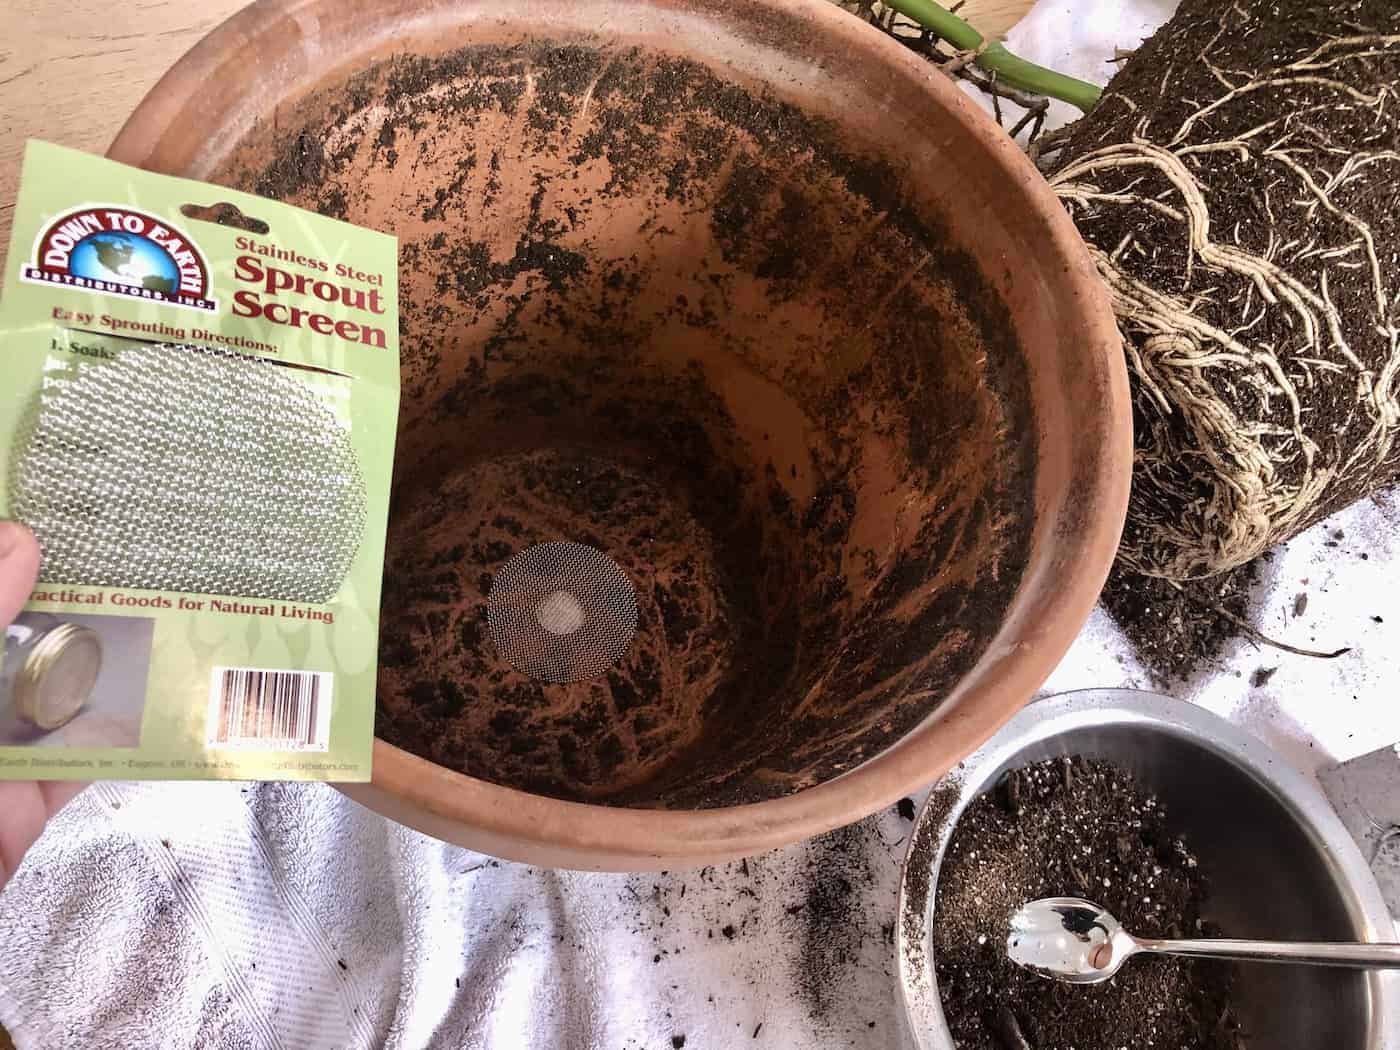
- Remove the Monstera plant’s root ball from the existing planter pot. The Monstera can either be potted up into a larger planter or repotted into the existing planter if the planter is quite large. Make sure to use a pot with a drainage hole (or holes).
- If the pot has quite a large drainage hole, consider using a piece of landscape fabric, coffee filter, or sprout screen to prevent rocks, soil, or roots from escaping out of the bottom of the pot.
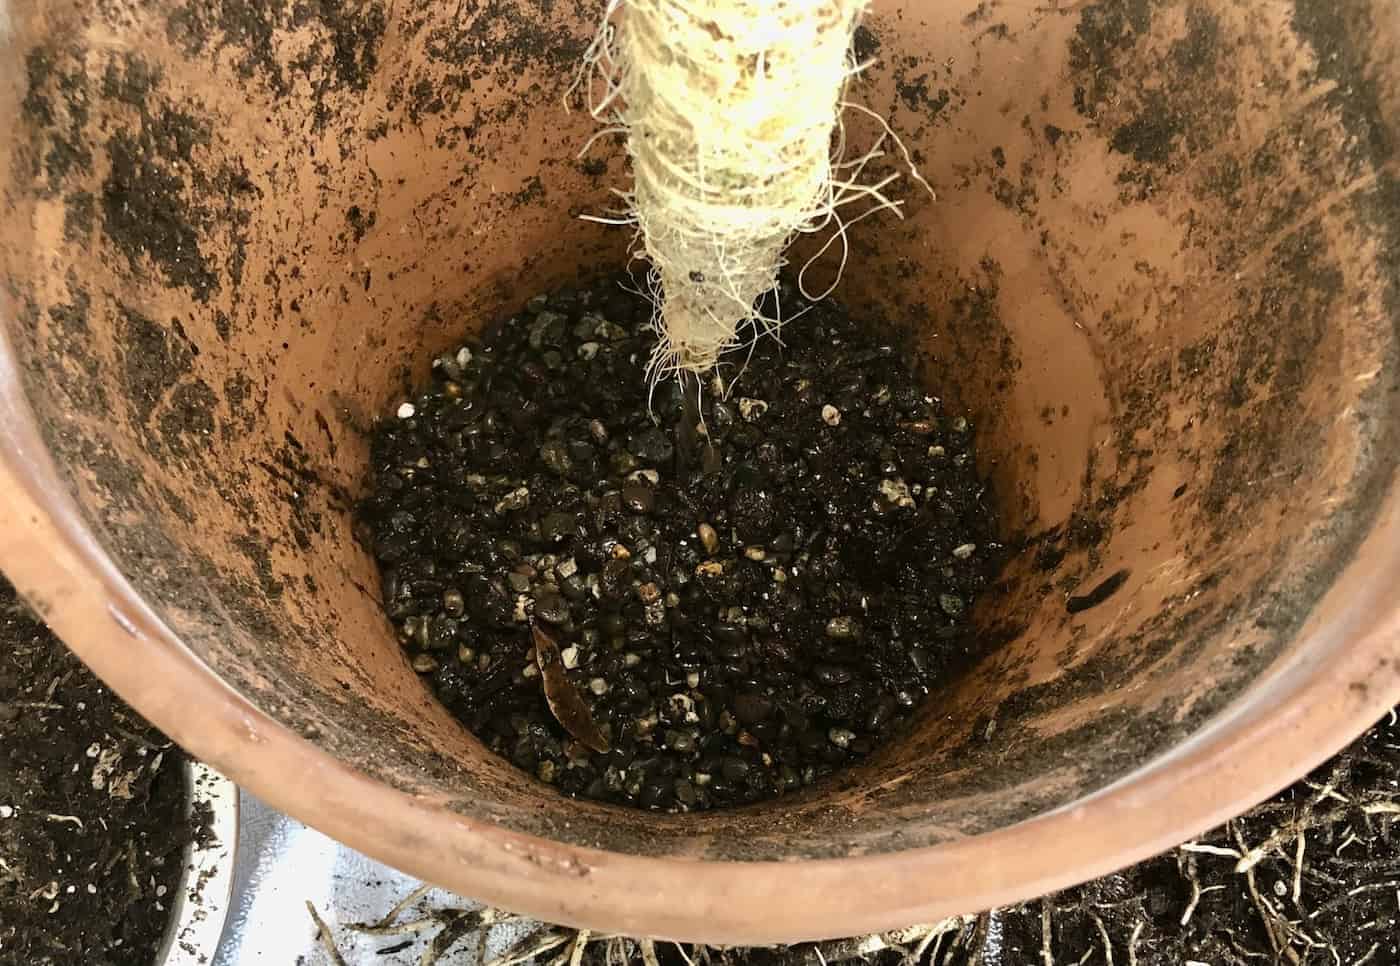
- Place the moss pole into the empty planter so the base of the moss pole rests on the bottom of the pot.
- Fill the base of the pot with rocks to surround the bottom of the moss pole.
- Add some potting mix and compress gently around the base of the moss pole.
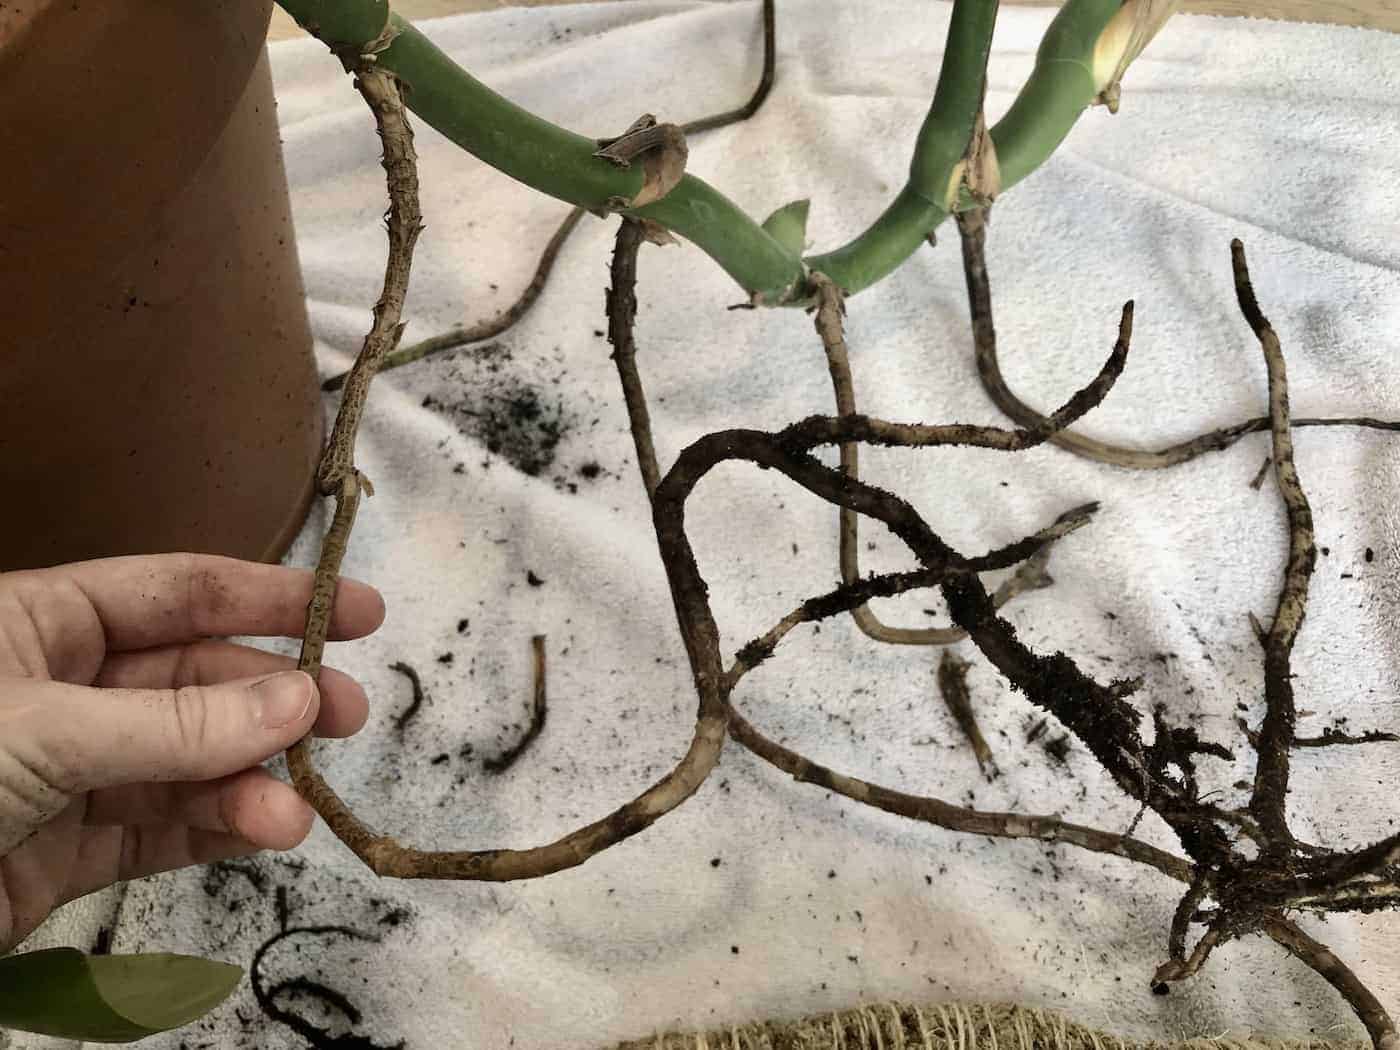
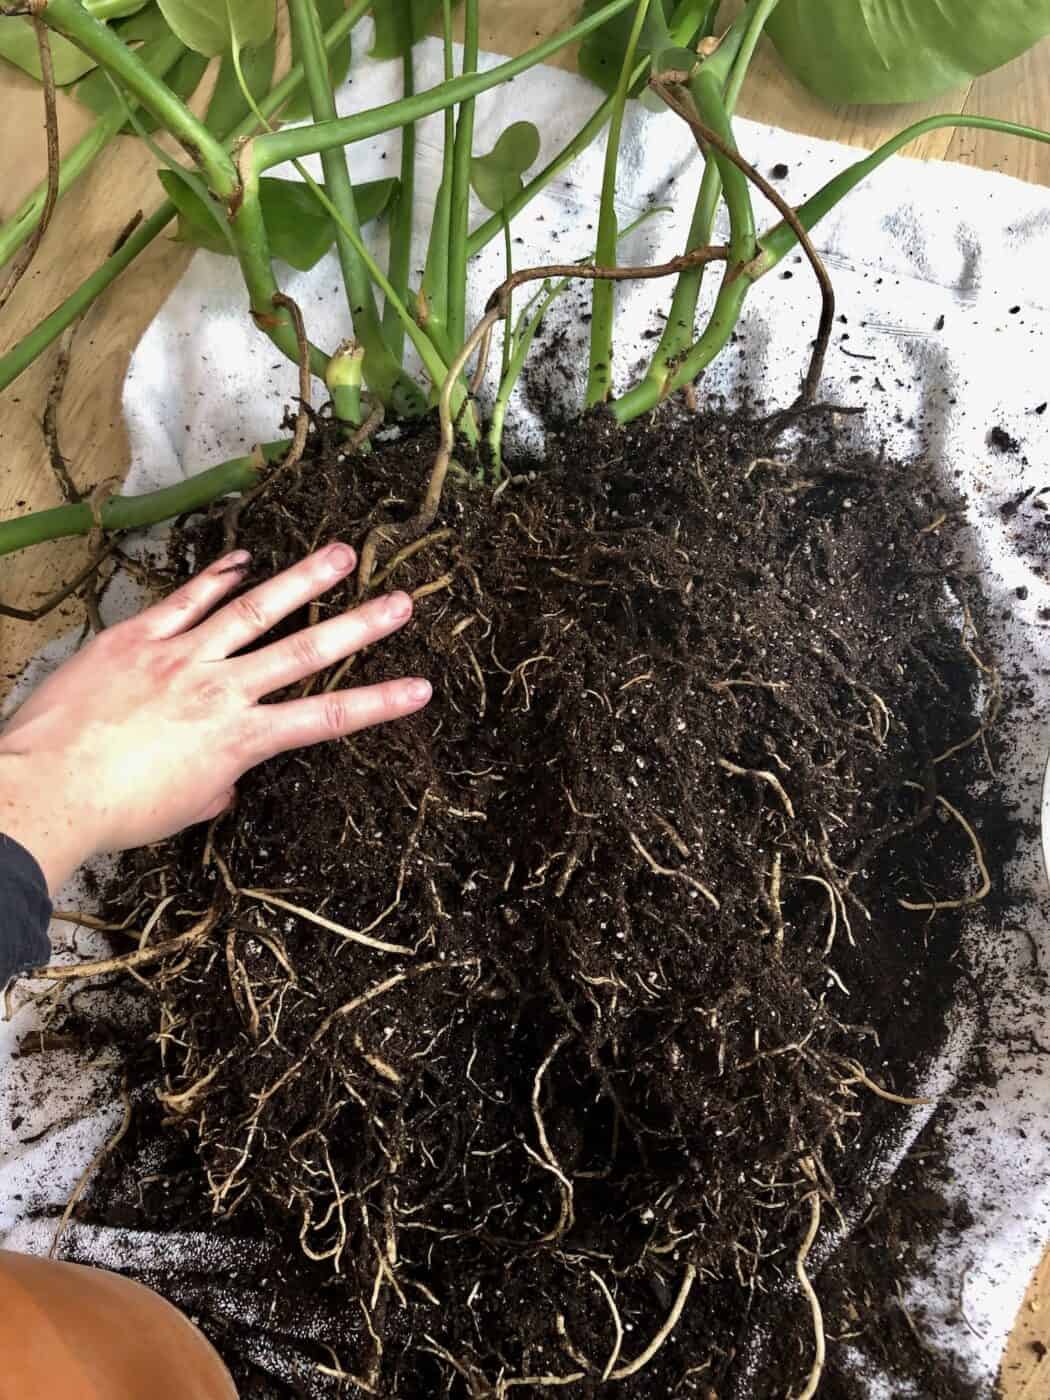
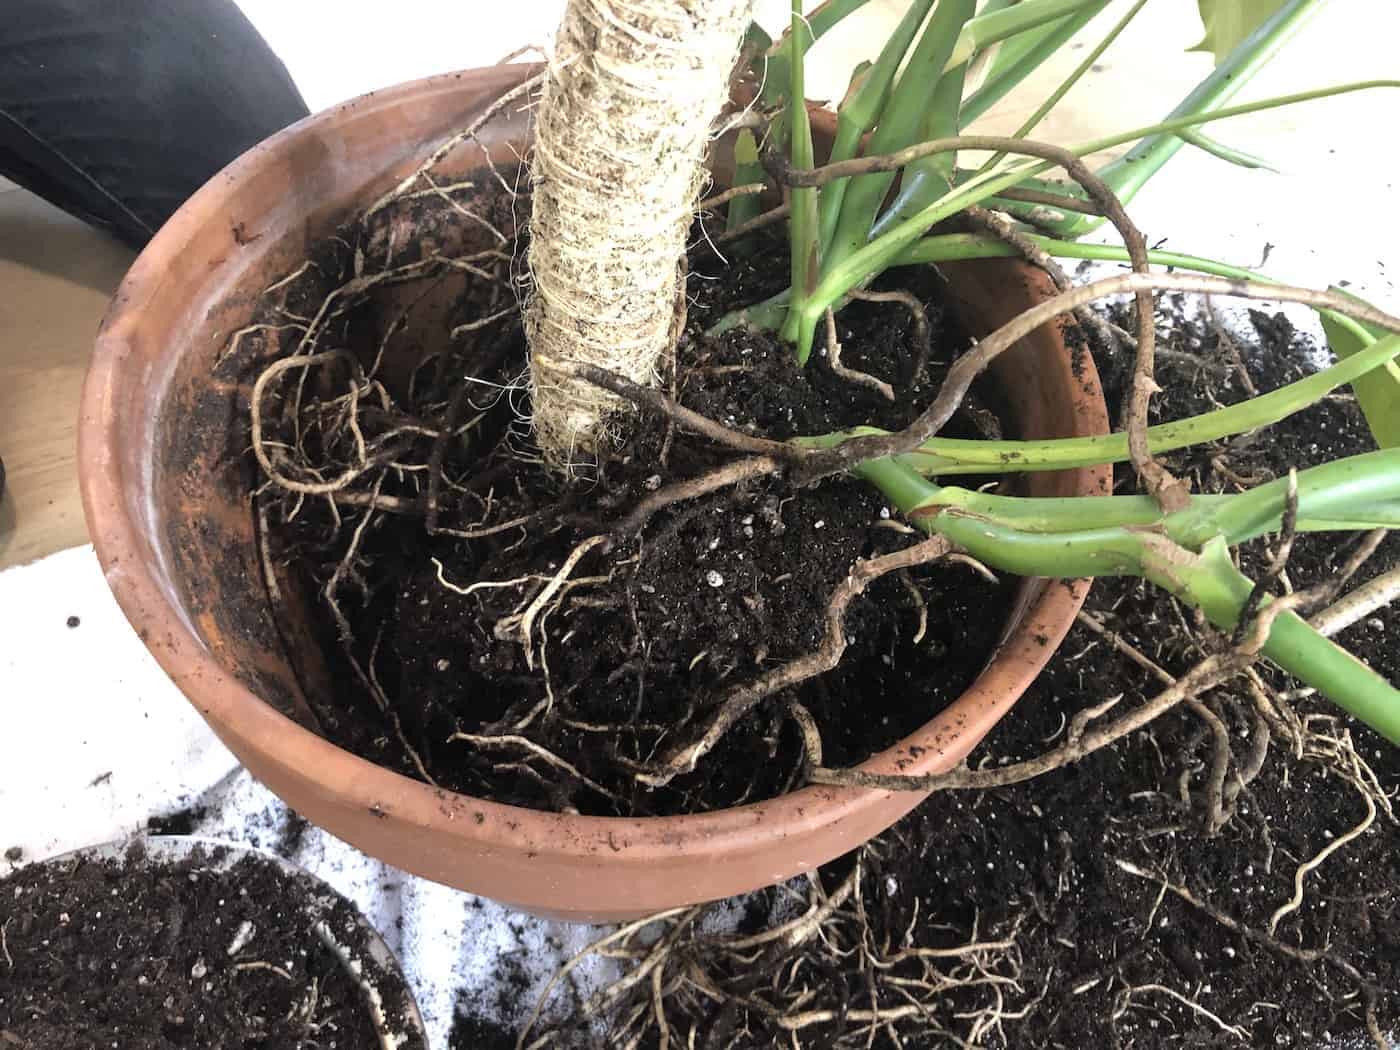
- Examine the root ball of the plant. Monstera is quick growers and tend to develop a sturdy root ball that may have to be broken up to fit around the base of the moss pole. Look around the stem base of the plant to find where the pole may fit best, and then pull apart the rootball in a vertical line to the bottom of the root ball (like opening a book).
- Wrap the Monstera’s split root ball base around the moss pole as it stands inside the pot. This is much easier with a second person to hold the moss pole in place during root ball placement.
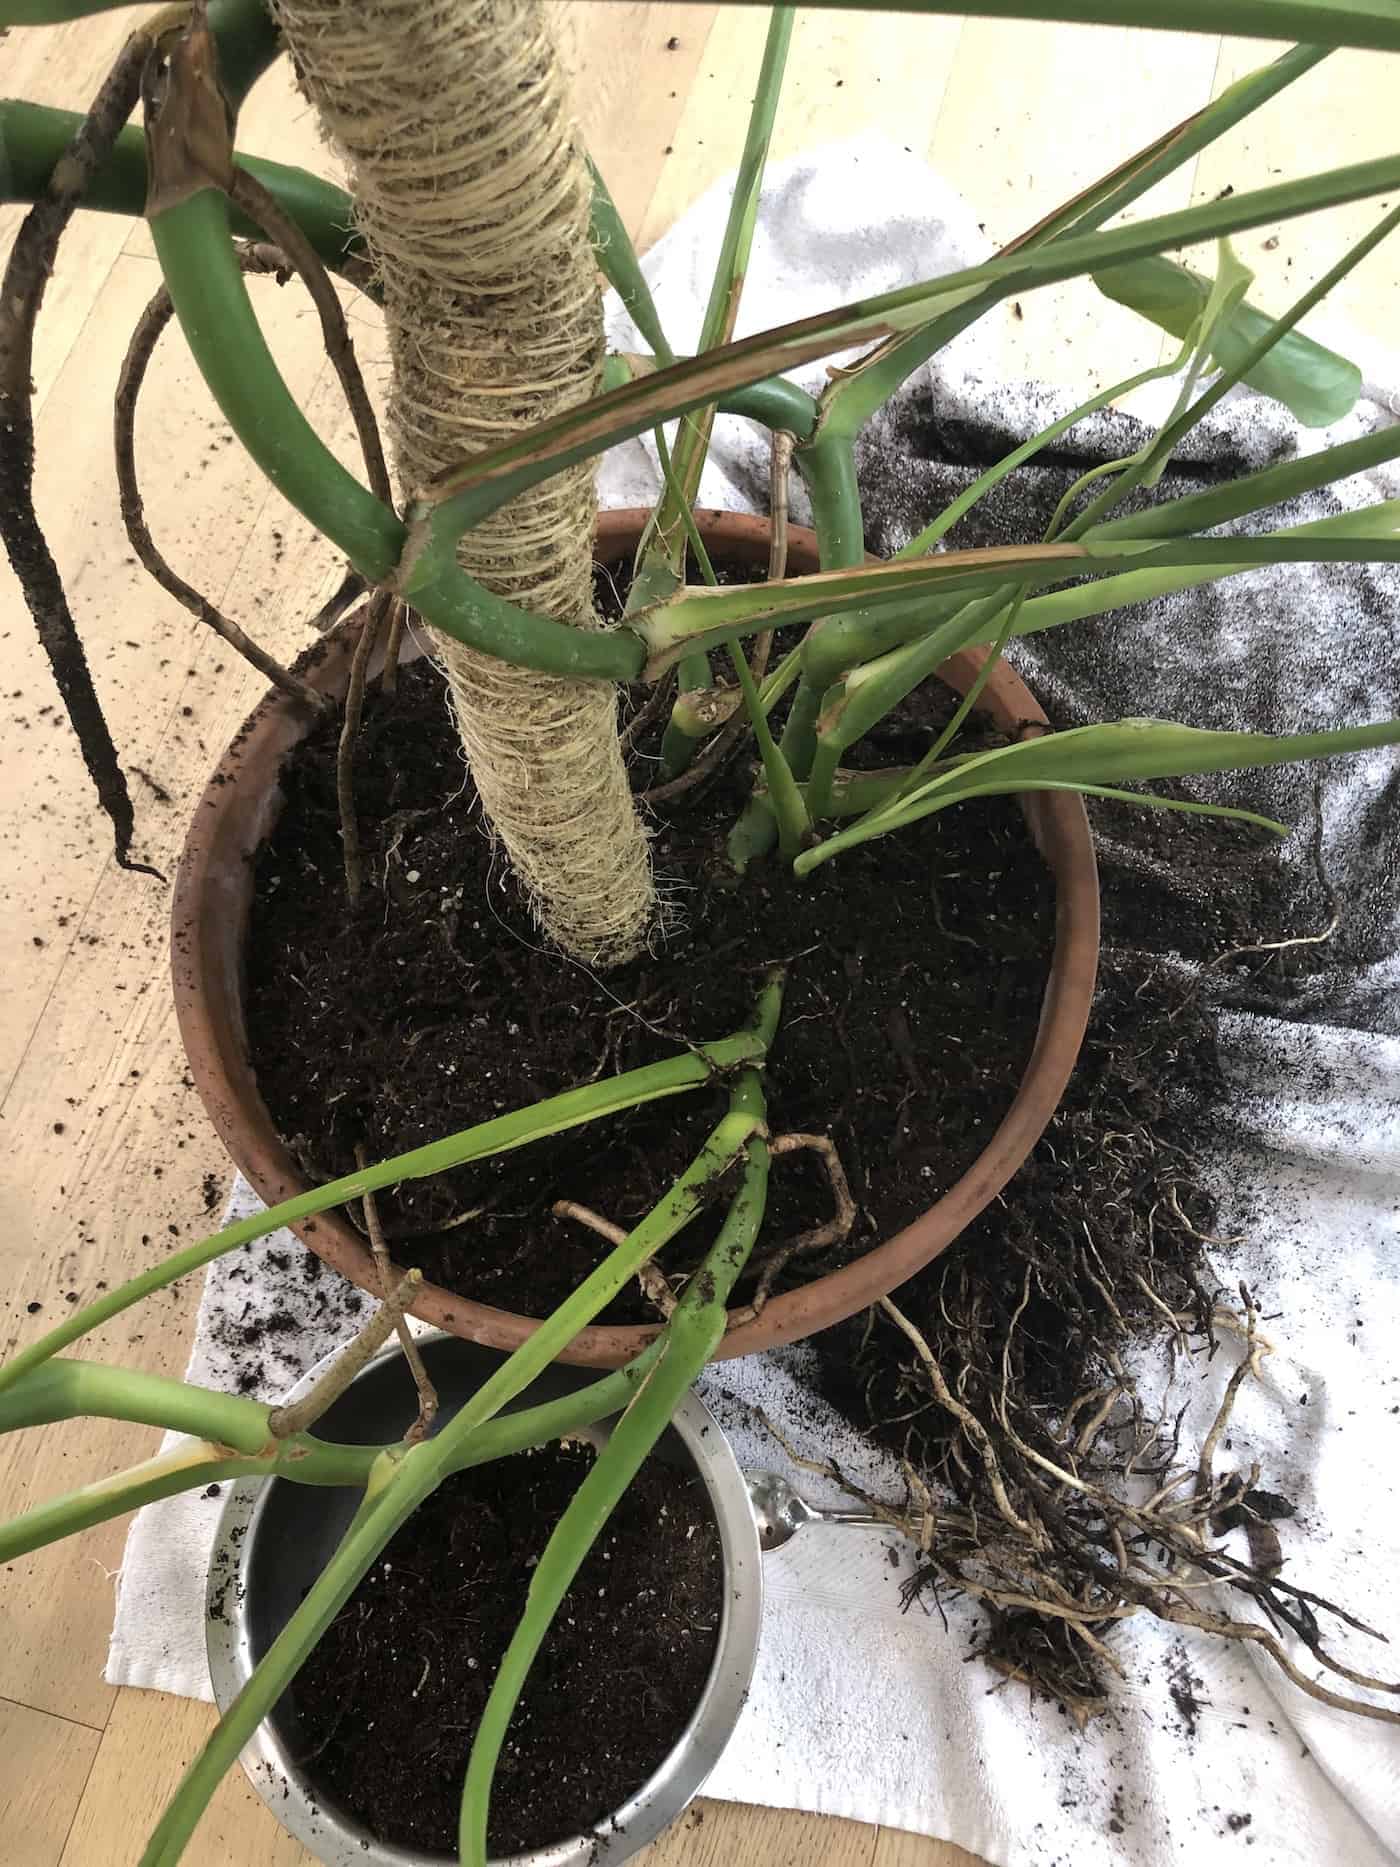
- Backfill the planter with potting mix. Tuck any nearby aerial roots down into the soil. Be sure to leave a half inch to an inch of space to facilitate watering the plant.
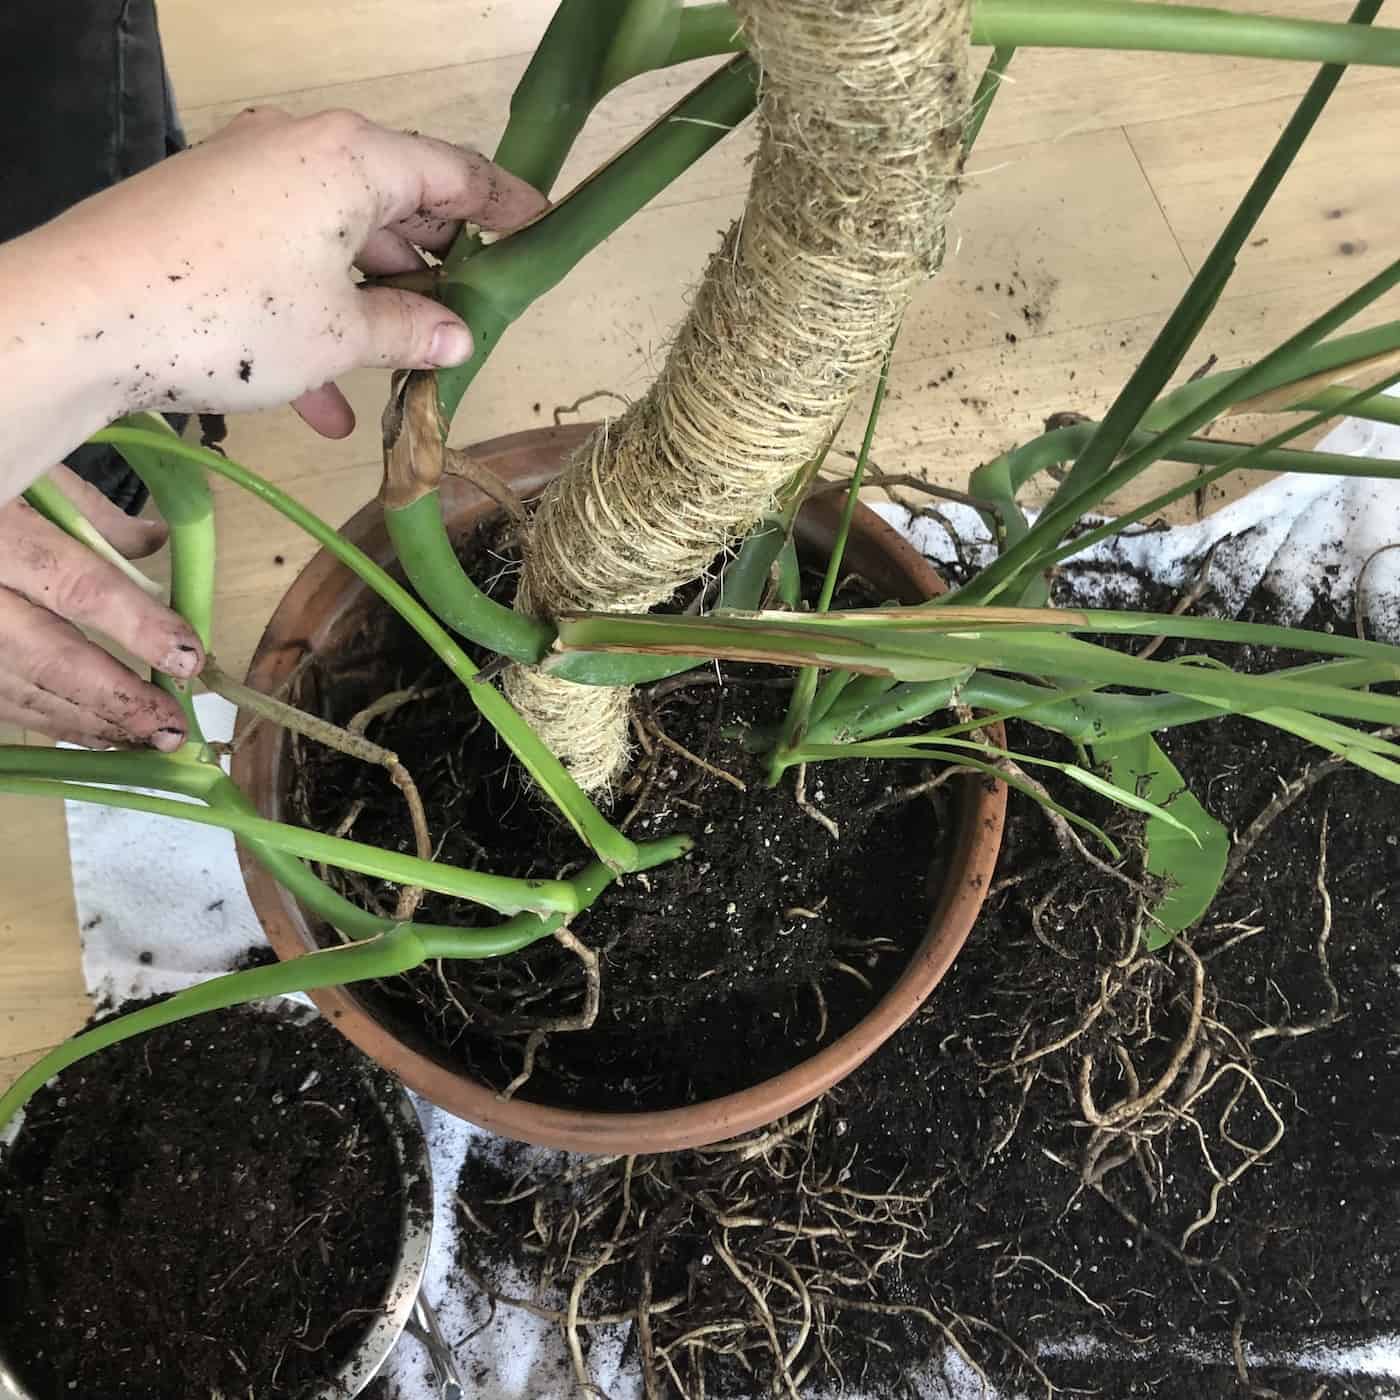
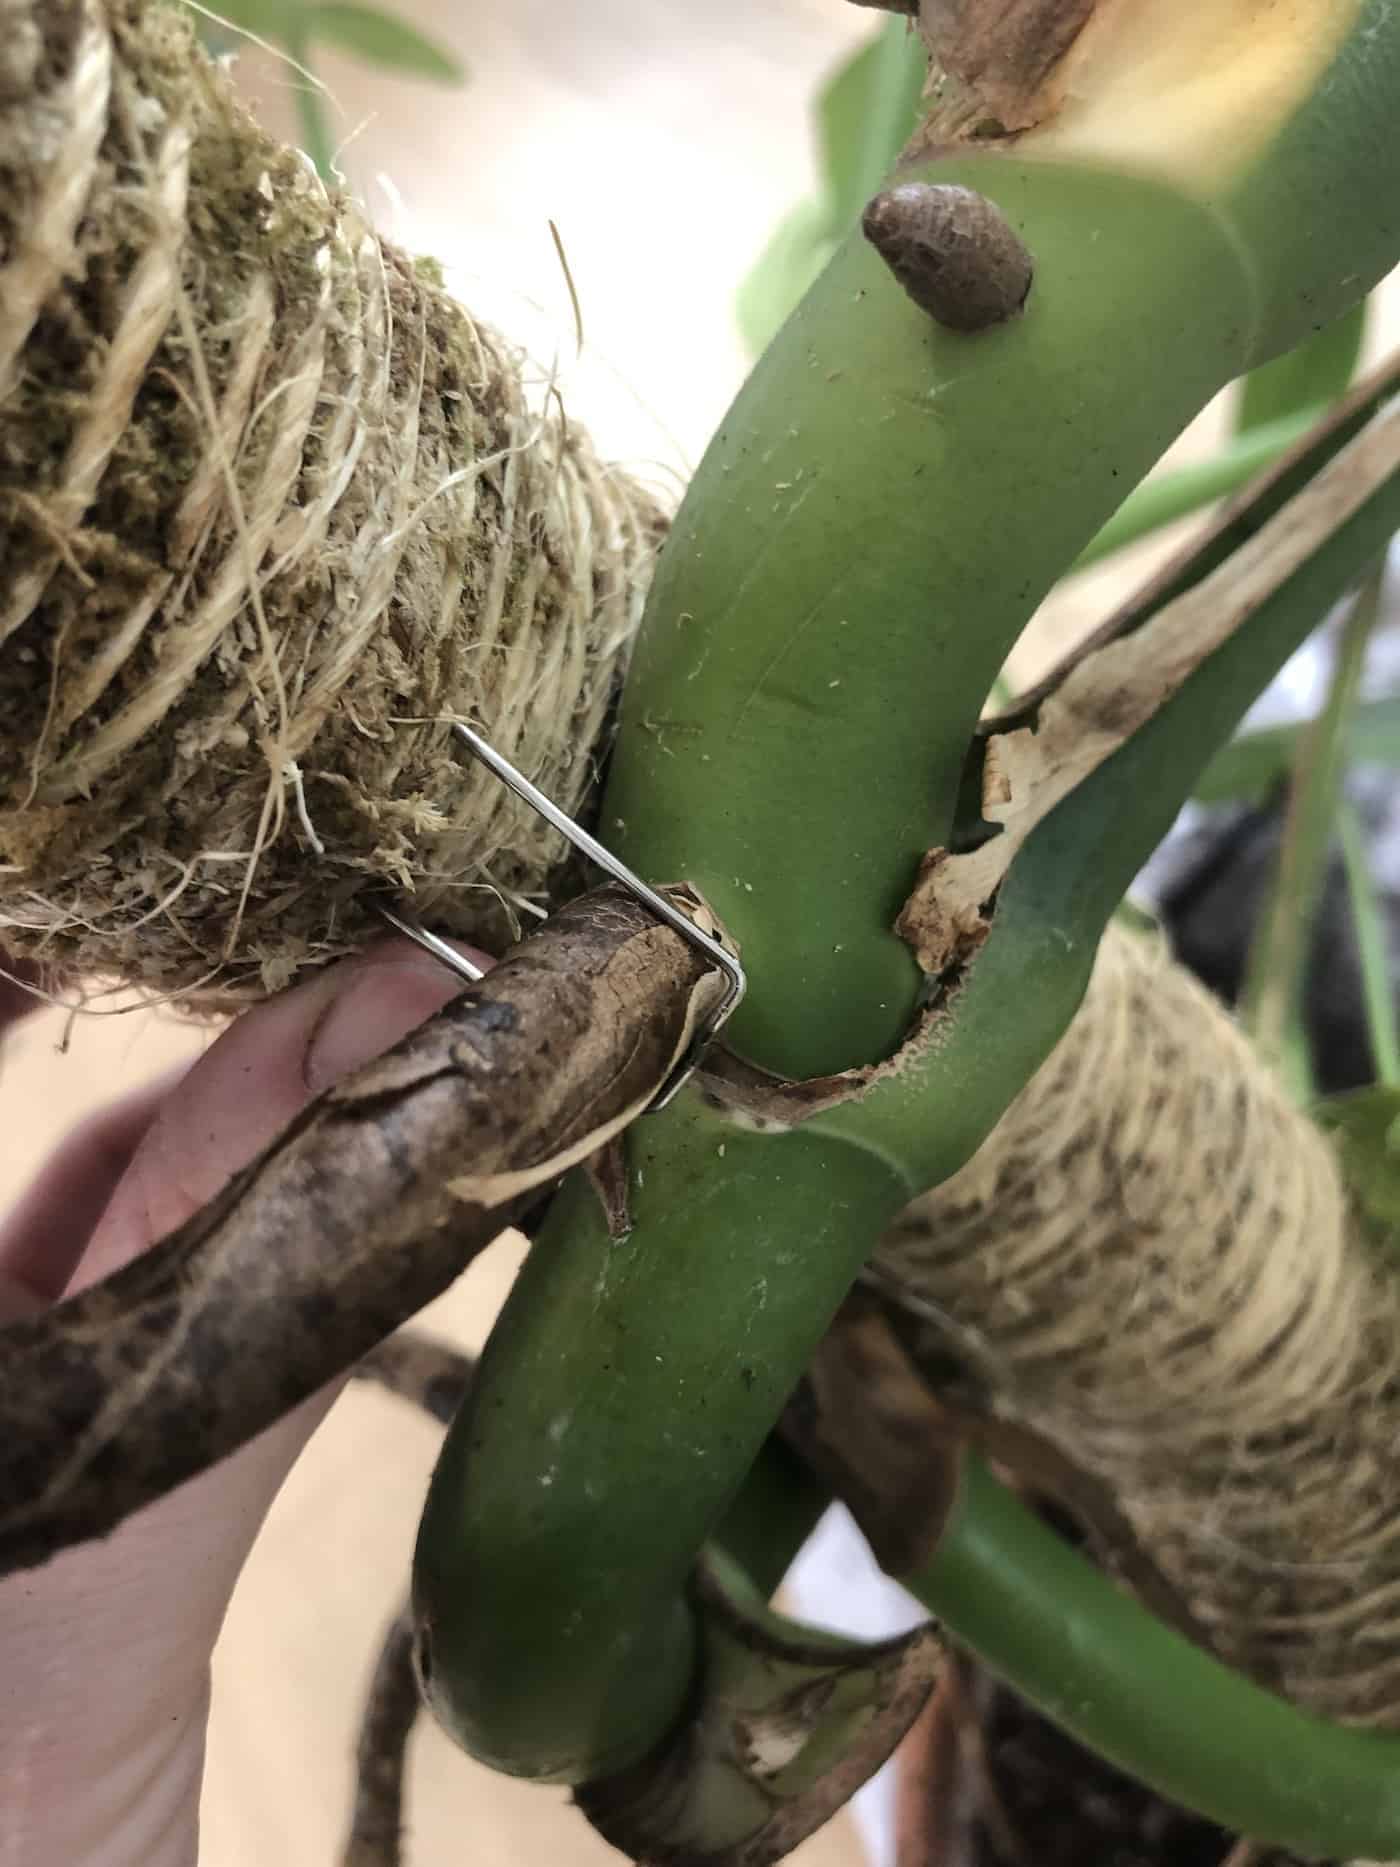
- Gently maneuver the Monstera vines around the moss pole. Attach each vine at several points using twine, pins, or velcro-like plant tape.
- Soak the whole Moss Pole Monstera thoroughly (including the moss pole). Let the excess water drain before placing the planter pot onto its saucer.

Caring for Monstera plants with moss poles
Moss Pole Monstera plants are typically easier to care for in the long run than sprawling Monstera, but this is only true if you do a little bit of regular upkeep.
Continue to secure plant vines to the moss pole so they can climb upwards. Use plant tape to attach the vines gently to the pole, without damaging the vines themselves. While aerial roots are generally quite adept at finding parts of the pole to root into, you can also lay them up against the pole and pin around them to keep them in place while they root in.
Keep the moss pole slightly moist to encourage aerial roots to secure themselves to it. Keeping a moss pole moist is easiest with an automatic plant mister, but can also be done with a regular spray bottle or in the sink/shower with tap water. Misting also helps to increase air humidity for the Monstera plant (however momentarily).