Paperwhites are not only beautiful but also incredibly easy to grow, both indoors and outdoors. Here’s everything you need to know about growing paperwhites, from selecting the right variety to caring for your lovely blooms.
How to grow paperwhites
Plant paperwhite bulbs in a shallow dish with stones or potting mix, ensuring that the base of the bulbs is in contact with water without being fully submerged to prevent rot. Provide a bright, cool location for the paperwhites, as this encourages sturdy growth and prevents the stems from becoming too leggy. Once the flowers bloom, which typically occurs four to six weeks after planting, you may need to support the stems with stakes to keep them upright, as their fragrant blossoms can become top-heavy.

Getting started with paperwhites
Paperwhites are a type of narcissi that thrive in room temperature and humidity conditions. You can grow paperwhites in water or soil, offering versatile options to kickstart their growth journey.
There are several delightful paperwhite varieties available, each with its unique characteristics. When purchasing paperwhite bulbs, look for larger, blemish-free bulbs that are firm to ensure the highest quality.
Selecting the right variety
When choosing paperwhite varieties, you’ll be delighted to find options like ‘Ziva,’ ‘Inbal,’ ‘Ariel,’ and ‘Avalanche.’ The different varieties showcase characteristics such as bright white flowers, exquisite fragrances, rapid growth, and sturdier flower stalks.
Make sure to consider the lovely features of each variety when making your decision. For example, the delightful short flower stems and gentle mild fragrance of Nir paperwhites make them an attractive choice. The Ziva variety is known for its bright white flowers, exquisite fragrance, and rapid growth. While some varieties are better suited for water-based planting, others, such as ‘Avalanche’, are more commonly planted outdoors throughout the south.

Planting paperwhites indoors
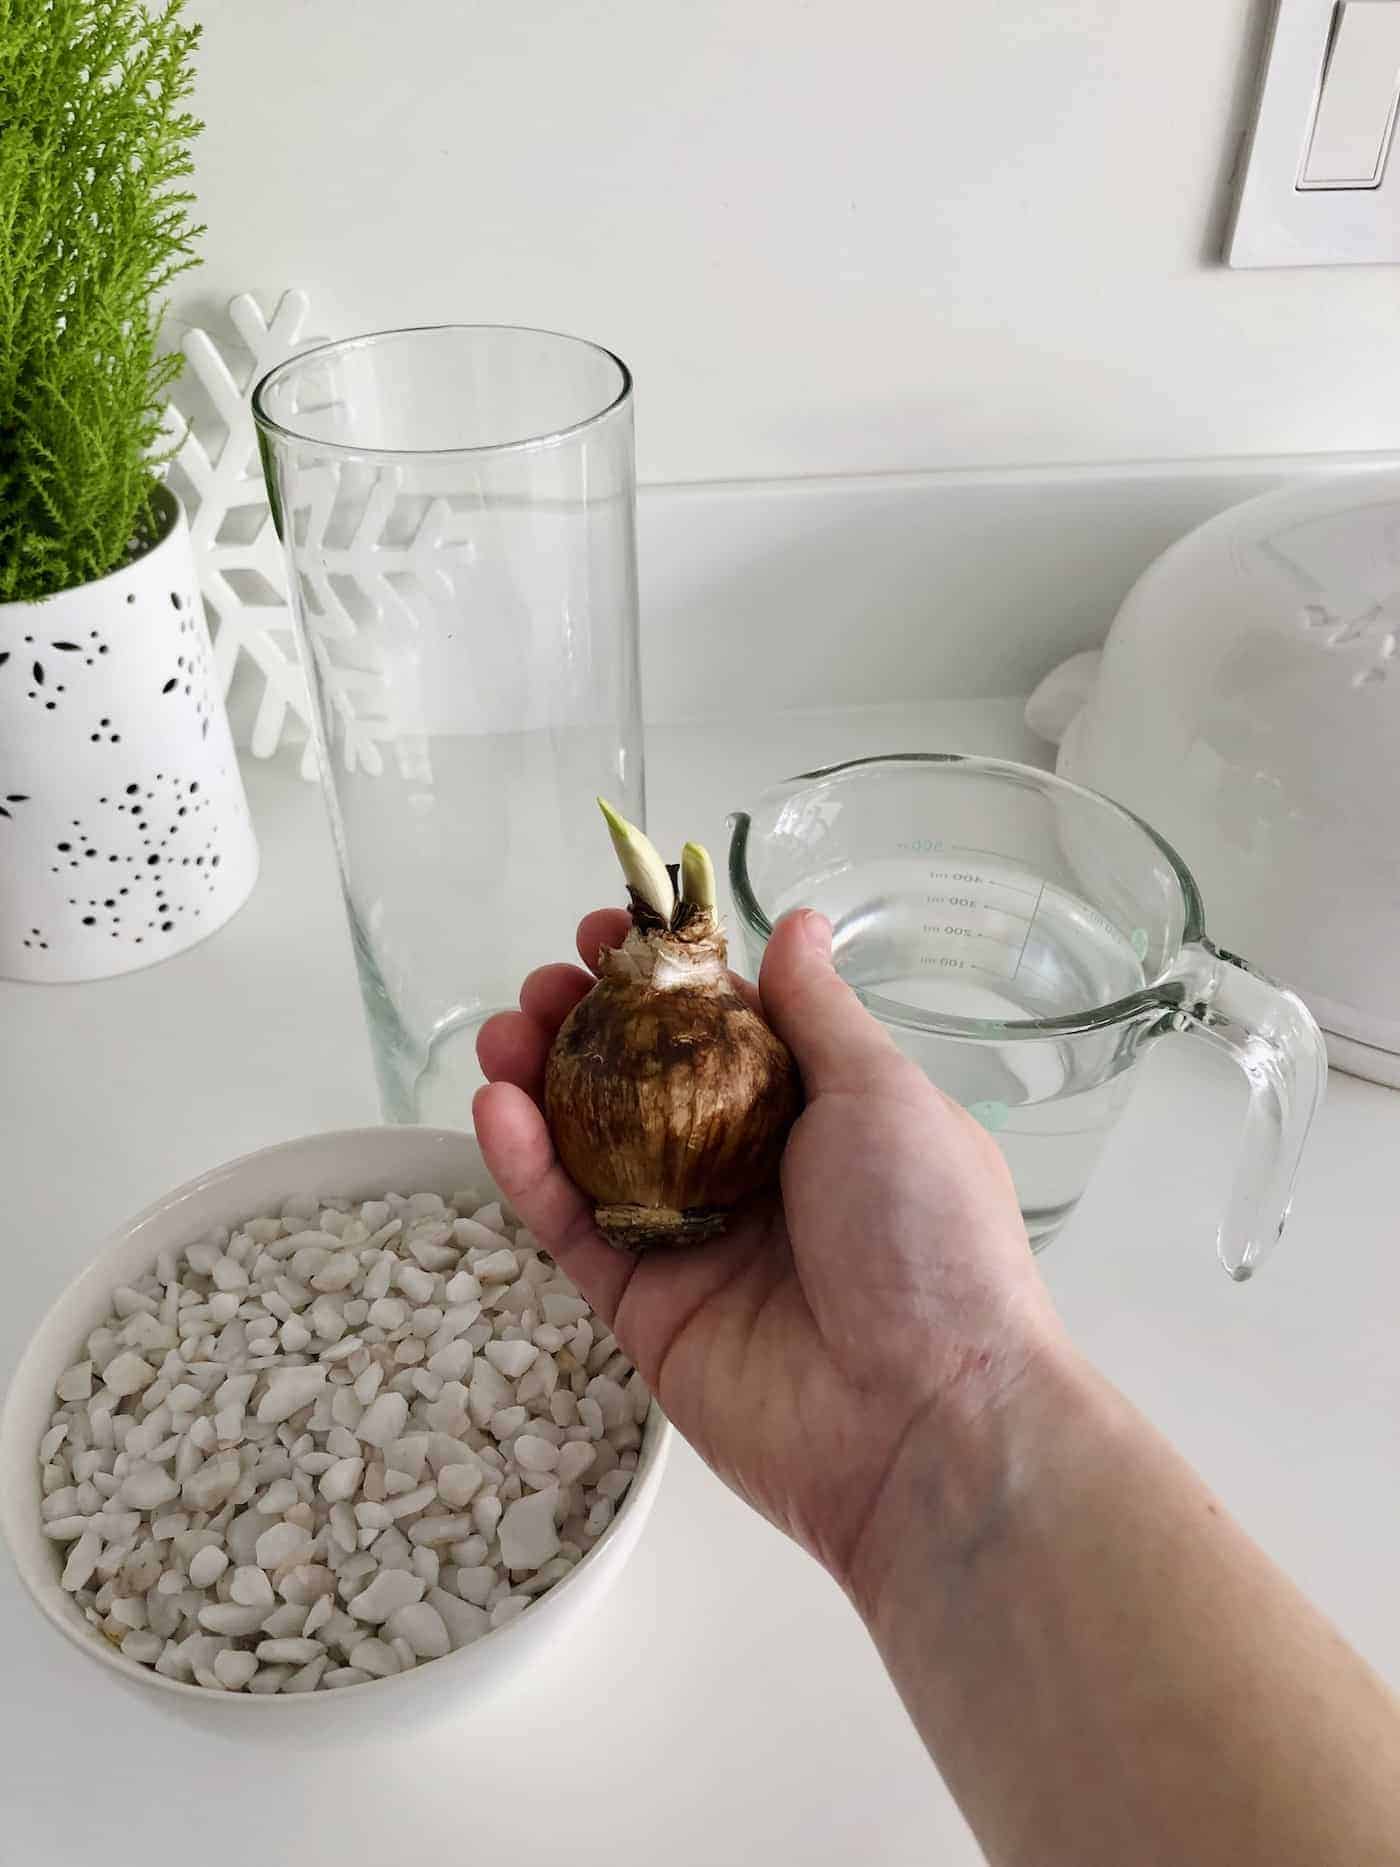
Planting paperwhites indoors is an excellent way to enjoy their delightful blooms even during the colder months. You can grow them in various containers, such as decorative saucers, bowls, and tall glass vases, which will make your paperwhites look stunning. Paperwhites can be grown without soil, most successfully. All you need is a pile of rocks or small stones, and you can add a little water and replenish it only when necessary.
When planting indoors, you can choose between soil or water-based planting methods. While both methods have their advantages, providing your paperwhites with the appropriate light and temperature conditions is key for healthy growth. Let’s explore the different planting options and requirements for indoor paperwhites.
Container selection
Selecting the right container for your indoor paperwhites can be a fun and creative process. Some beautiful container options include decorative saucers, bowls, and tall glass vases, which will showcase your paperwhites wonderfully. When planting multiple paperwhite bulbs together, consider using a wider container to accommodate their growth. Five to eight bulbs can create a stunning display.
You can also use bulb-forcing vases available at local garden shops or online for a unique and eye-catching presentation.
Soil or water-based planting
Paperwhites can be grown successfully in either soil or with the water and pebbles method. For soil-based planting, follow these steps:
- Choose a shallow pot or bowl and add a couple of inches of soil or bulb compost.
- Plant the paperwhite bulbs with the pointed ends upwards. Pack them closely together.
- Add more soil so that only the tips are visible.
- Water the soil sparingly, just enough to keep it moist.
- Place the pot in a spot that gets plenty of sunlight.
Your paperwhites will bloom in about 6 weeks.
For water-based planting, follow these steps:
- Use a container without drainage holes.
- Fill it halfway with pebbles.
- Set the bulbs on top of the pebbles.
- Add water to a level no higher than the base of the bulbs.
This method allows you to see the development of the roots and provides a unique visual appeal.
Both soil and water-based planting methods can lead to beautiful indoor paperwhite displays when you plant paperwhites and grow indoors.
Light and temperature requirements
To ensure healthy growth and blooming, paperwhites require:
- Bright but indirect sunlight
- Planting in a cool location, with temperatures between 55-65 degrees Fahrenheit, for a few weeks
- Moving them into a warmer, well-lit location for optimal growth, as they require a temperature of around 65 F to flourish.
Providing appropriate bright light, temperature, and humidity conditions will enable you to enjoy the fragrant and beautiful blooms of your indoor paperwhites, also known as temperature and humidity paperwhites, as they bloom indoors.
Planting paperwhites outdoors
If you live in a warm climate or would like to enjoy paperwhites in your outdoor garden, you can plant them outdoors during late fall to early winter. Paperwhites planted outdoors can bring joy with their early spring blooms, adding a touch of elegance to your garden.
Successful planting outdoors calls for careful consideration of timing, location, soil preparation, and planting techniques, as this is when plants begin to thrive. Follow the spacing on the package, which is usually further apart than bulbs planted in containers.
Timing and location
The ideal time to plant paperwhite bulbs outdoors in warm climates is anytime in the fall or early winter. Paperwhites thrive in sunny spots with some protection from the mid-day sun and can also be grown indoors near a sunny window or on a cool windowsill with indirect sunlight. It is best to avoid a southern window with direct sunlight to ensure the best growth.
Paperwhites planted outdoors grow best in USDA Hardiness Zones 8 to 10. The bulbs may die over winter in cooler zones where the ground may freeze.
Soil preparation
Preparing the soil for outdoor paperwhite planting is crucial for success. Paperwhites thrive in well-drained soil. To prepare the soil, fill a pot or dish halfway with soil or gravel for drainage, and set the bulbs gently in the soil or gravel, allowing the tips to peek above the surface.
Keep the soil slightly moist during active growth periods for a flourishing garden. If your soil doesn’t have good drainage, you can create a small elevation or use gravel for better drainage, which will help your paperwhites flourish.
Planting depth and spacing
To ensure the proper growth of your outdoor paperwhites, planting depth and spacing are essential. Plant paperwhite bulbs about 6 inches deep in outdoor ground, with the base around 3 times as deep as the bulb height for optimal results.
Paperwhite bulbs can be planted 4 to 6 inches apart for optimal growth outdoors. Planting them in groups of 10 or more will create an incredible impact and a stunning outdoor display.
Caring for your paperwhites
Caring for your paperwhites is an essential part of ensuring their healthy growth and vibrant blooms. Whether planted indoors or outdoors, proper watering, fertilizing, staking, and troubleshooting common problems are necessary.
Watering and fertilizing
Watering and fertilizing your paperwhites is crucial for their growth and flowering. Here are some tips to keep in mind:
- For paperwhites planted in soil, water thoroughly when the potting mix is dry 1” below the surface, but not more than once a week.
- Water is essential for bulb growth, so if you decide to grow it in a container with stones or pebbles, ensure the water level remains just below the bulb base.
- It’s important not to overwater the bulb as this can cause root rot. Regularly checking the water level and adjusting as needed will help your paperwhites thrive.
Fertilizing your paperwhites isn’t necessary when growing bulbs for one season, as the bulbs provide all the nutrients the plant needs for optimal growth. However, if you want to give your paperwhites an extra boost, you can supply bloom food or diluted fertilizer when the plant is actively growing to promote beautiful blooms.
Staking and support
One of the charming features of paperwhites is their tendency to flop over. To help them stand tall and proud, you can provide proper support using:
- Slim stakes
- Twine
- Metal rings
- Bamboo stakes
- Plant supports
- Sticks
- Pretty branches
When the green stem is 1-2 inches tall, usually after 1-2 weeks of planting, it’s the perfect time to start staking your paperwhites. By providing support, you’ll ensure your paperwhites look their best throughout their blooming period.
Troubleshooting common problems
Paperwhites are generally pest-resistant, but they can still encounter some issues. The larvae of the narcissus bulb fly may infest bulbs grown outdoors, but proper care and insecticides tailored for bulb flies can prevent infestations.
Additionally, paperwhites can be prone to basal rot caused by a fungus found in soil. To avoid this, keep the potting soil consistently moist but not overly wet. By staying vigilant and addressing any issues promptly, you can keep your paperwhites healthy and beautiful.
Propagating and reblooming paperwhites
Paperwhites can be propagated and encouraged to rebloom in subsequent seasons, allowing you to enjoy their delightful blooms year after year. Dividing and replanting bulbs is an essential part of this process.
Nurturing your paperwhites and offering them appropriate care will help them bloom profusely, gracing your home with their fragrant beauty for years to come.
Dividing and replanting bulbs
To divide and replant overcrowded paperwhite bulbs, follow these steps:
- Gently remove the small bulbs from the base of the plant.
- The bigger the small offset bulbs are, the quicker they will bloom.
- Discard any bulbs that look damaged or unhealthy.
Divide the bulbs into individual parts before replanting. Space them 4-6 inches apart in soil with good drainage to help promote healthy growth. Ensure that the plant bulbs are planted at the same depth. Planting them in groups of five or more will give you the best results. Divided paperwhite bulbs typically take 4-6 weeks to establish and bloom, so you can look forward to enjoying their beauty soon.
Encouraging reblooming
To encourage paperwhites to rebloom the following year, follow these steps:
- Supply fertilizer when the plant is actively growing.
- Keep the pot in a warm, sunny spot away from drafts.
- Water the plant when the top inch of soil is dry.
- Deadhead the spent flowers.
- Let the leaves stay on the plant until they die back naturally.
- Don’t let the bulbs freeze over winter.
With the right care and attention, your paperwhites can produce beautiful flowers again. Well-established outdoor paperwhites may bloom the following year and in subsequent years, while those bulbs that have been forced indoors may take two to three years to recover after their initial indoor blooming.
Decorating with paperwhites
Paperwhites make a stunning addition to your home décor during the holiday season and beyond. Their fragrant flowers and elegant appearance can enhance any space and create a warm, inviting atmosphere.
Try adding red holly berry branches, poinsettia flowers, or moss at the top of the stone or pebble base for a festive touch. Or, place paperwhites in a glass vase on a wooden table or windowsill for a stunning display. Incorporating paperwhites into your home décor allows you to relish their beauty and fragrance throughout the season and beyond.