Wondering how to clean Click and Grow gardens? I was too when the first round of basil was done in mine. I’ve tried a few different ways to clean it and this is what I’ve found works best.
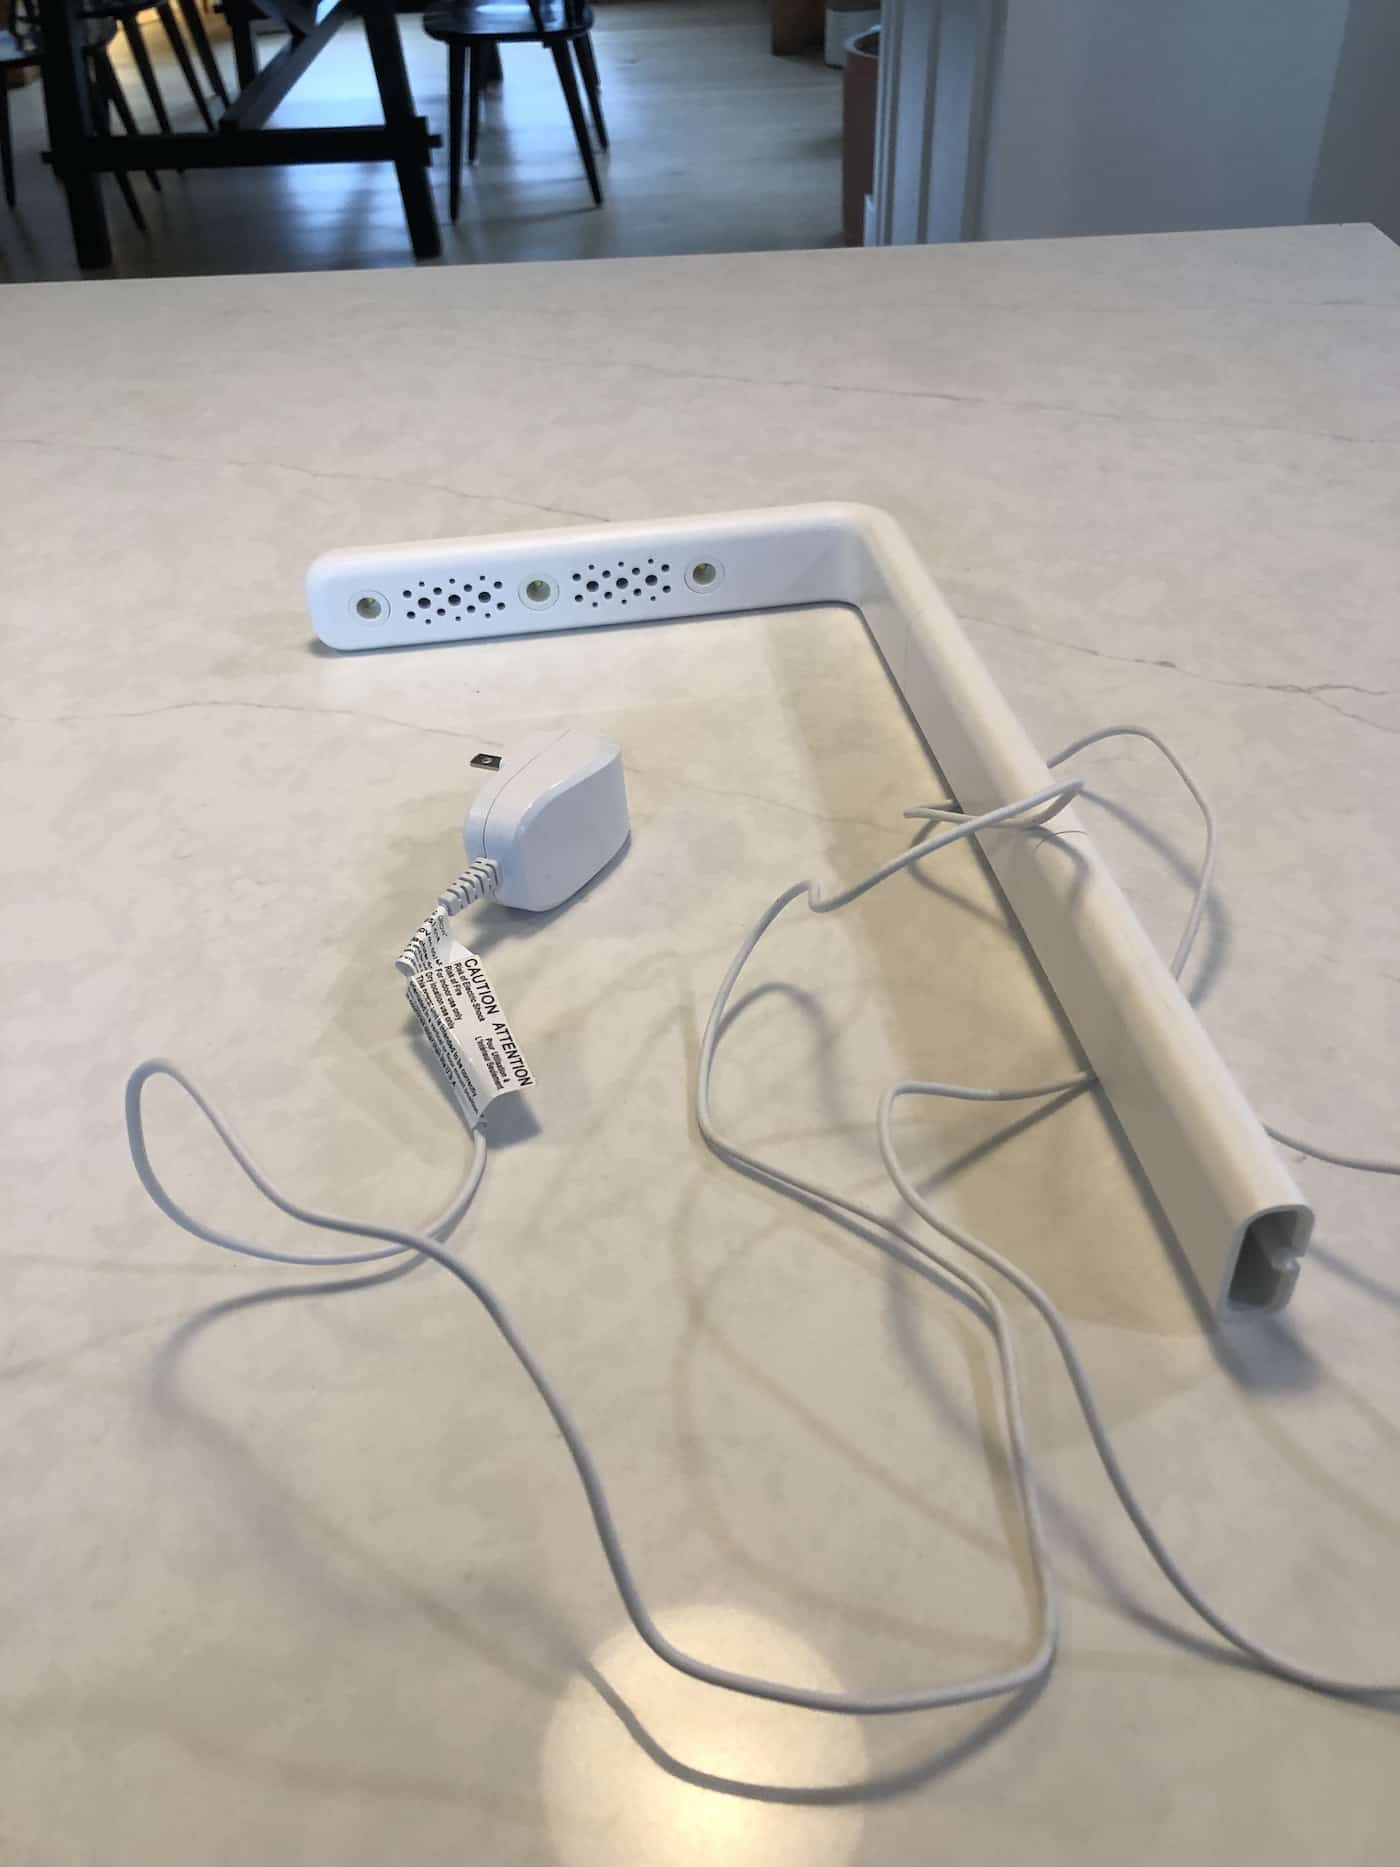
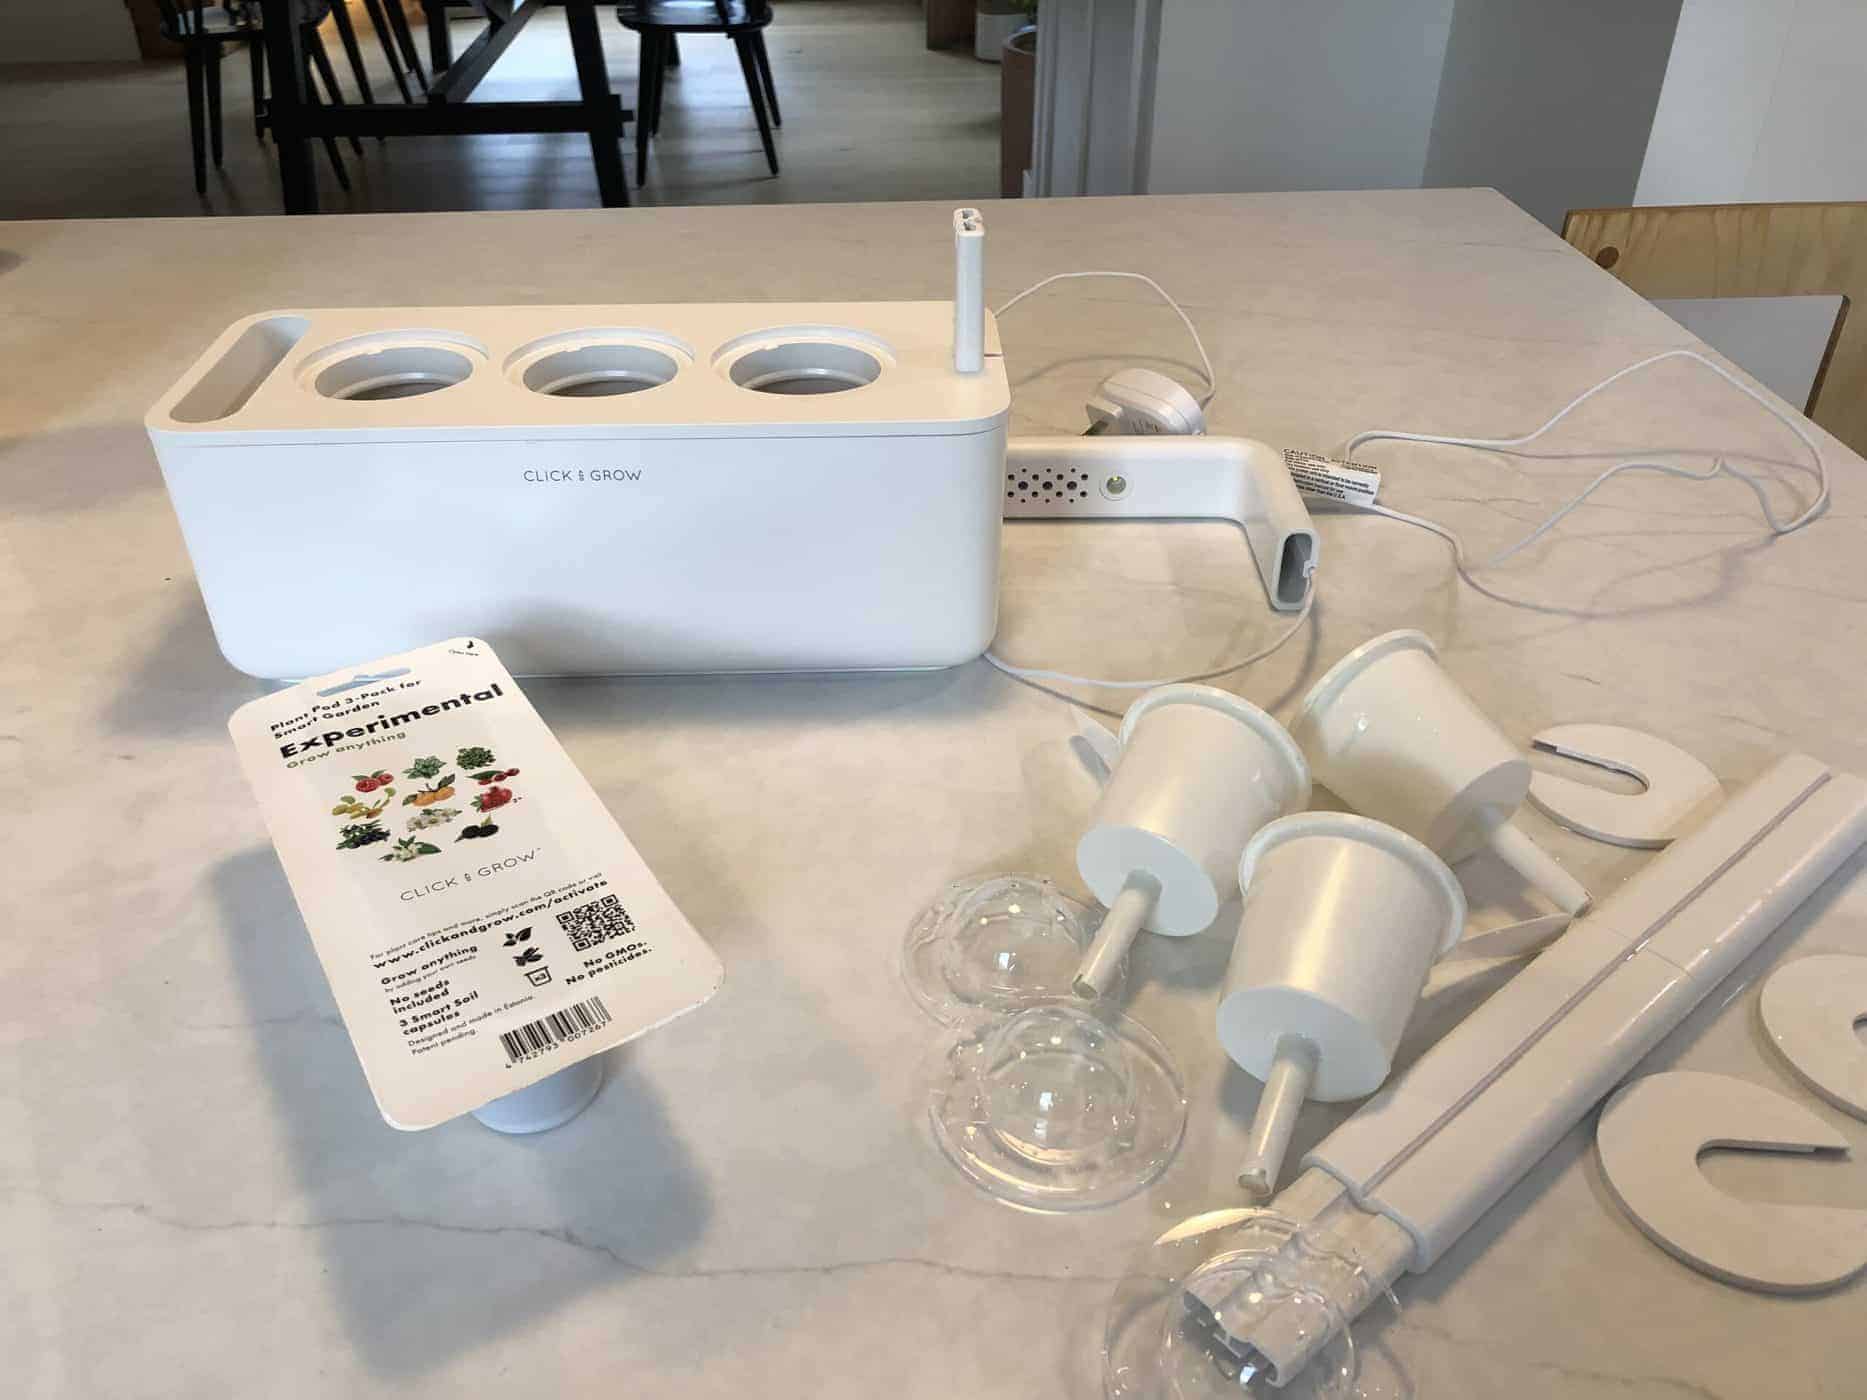
To clean a Click and Grow, first remove the light extension arms, including the lamp and the power cord. Wipe the lamp clean and set it aside. Remove the capsules and covers and soak in soapy water. Pull out the float and drain out any water. Separate the top grow deck off of the bottom water tank portion of the reservoir. Place the water tank, grow deck, and float into the dishwasher for cleaning. Scrub capsules and accessories clean in the sink.
Read on to learn all about the details of how to clean Click and Grow smart gardens.
How to clean Click and Grow smart gardens?
Click and Grow smart gardens are best cleaned after they have been separated into parts. It is much easier to clean the inside of the water tank once the reservoir has been disassembled. This includes removing any existing bits of roots or plant debris, as well as any pests or plant diseases that may be present.
Disassembly is also a good time to check for issues and order any required replacement parts. New plant pods can be started once the equipment has been properly cleaned.
The supplies I used to clean the Click and Grow were:
- Lysol Disinfecting Wipes
- Dish Soap
- Sink
- Lysol Kitchen Spray
- Scrubby Brush
- Plastic Putty Scraper
- Drying Mat
- Dishwasher
Here is an overview of how I tend to clean each part of my Click n Grow.
Grow light
The grow light is generally quite easy to clean. It does not come into contact with water and mostly only gets a bit dusty over time.
Pour out any remaining water from the water tank. Remove the light extension arms, grow light piece, and electrical cord from the main tank body of the garden. I like to take these parts over to the kitchen island and wipe the main parts clean with Lysol disinfecting wipes. Do not put the electrical parts anywhere near water and stay away from the electrical plug itself.
Click & Grow plant capsules
Pop the plant capsules out of the Click and Grow (if they are still in there). Plants can be transplanted outdoors, into pots, or composted if finished.
I like to spray the capsules and seed pod accessories (like the covers) with Lysol kitchen spray. Then later I place them in a bowl of warm water in the sink to soak.
Once the pieces have soaked, I rinse them off and give them a good scrub. I usually follow up with a soap scrub and a thorough rinse before placing the pieces on a clean drying mat to dry out.
Main water tank reservoir body
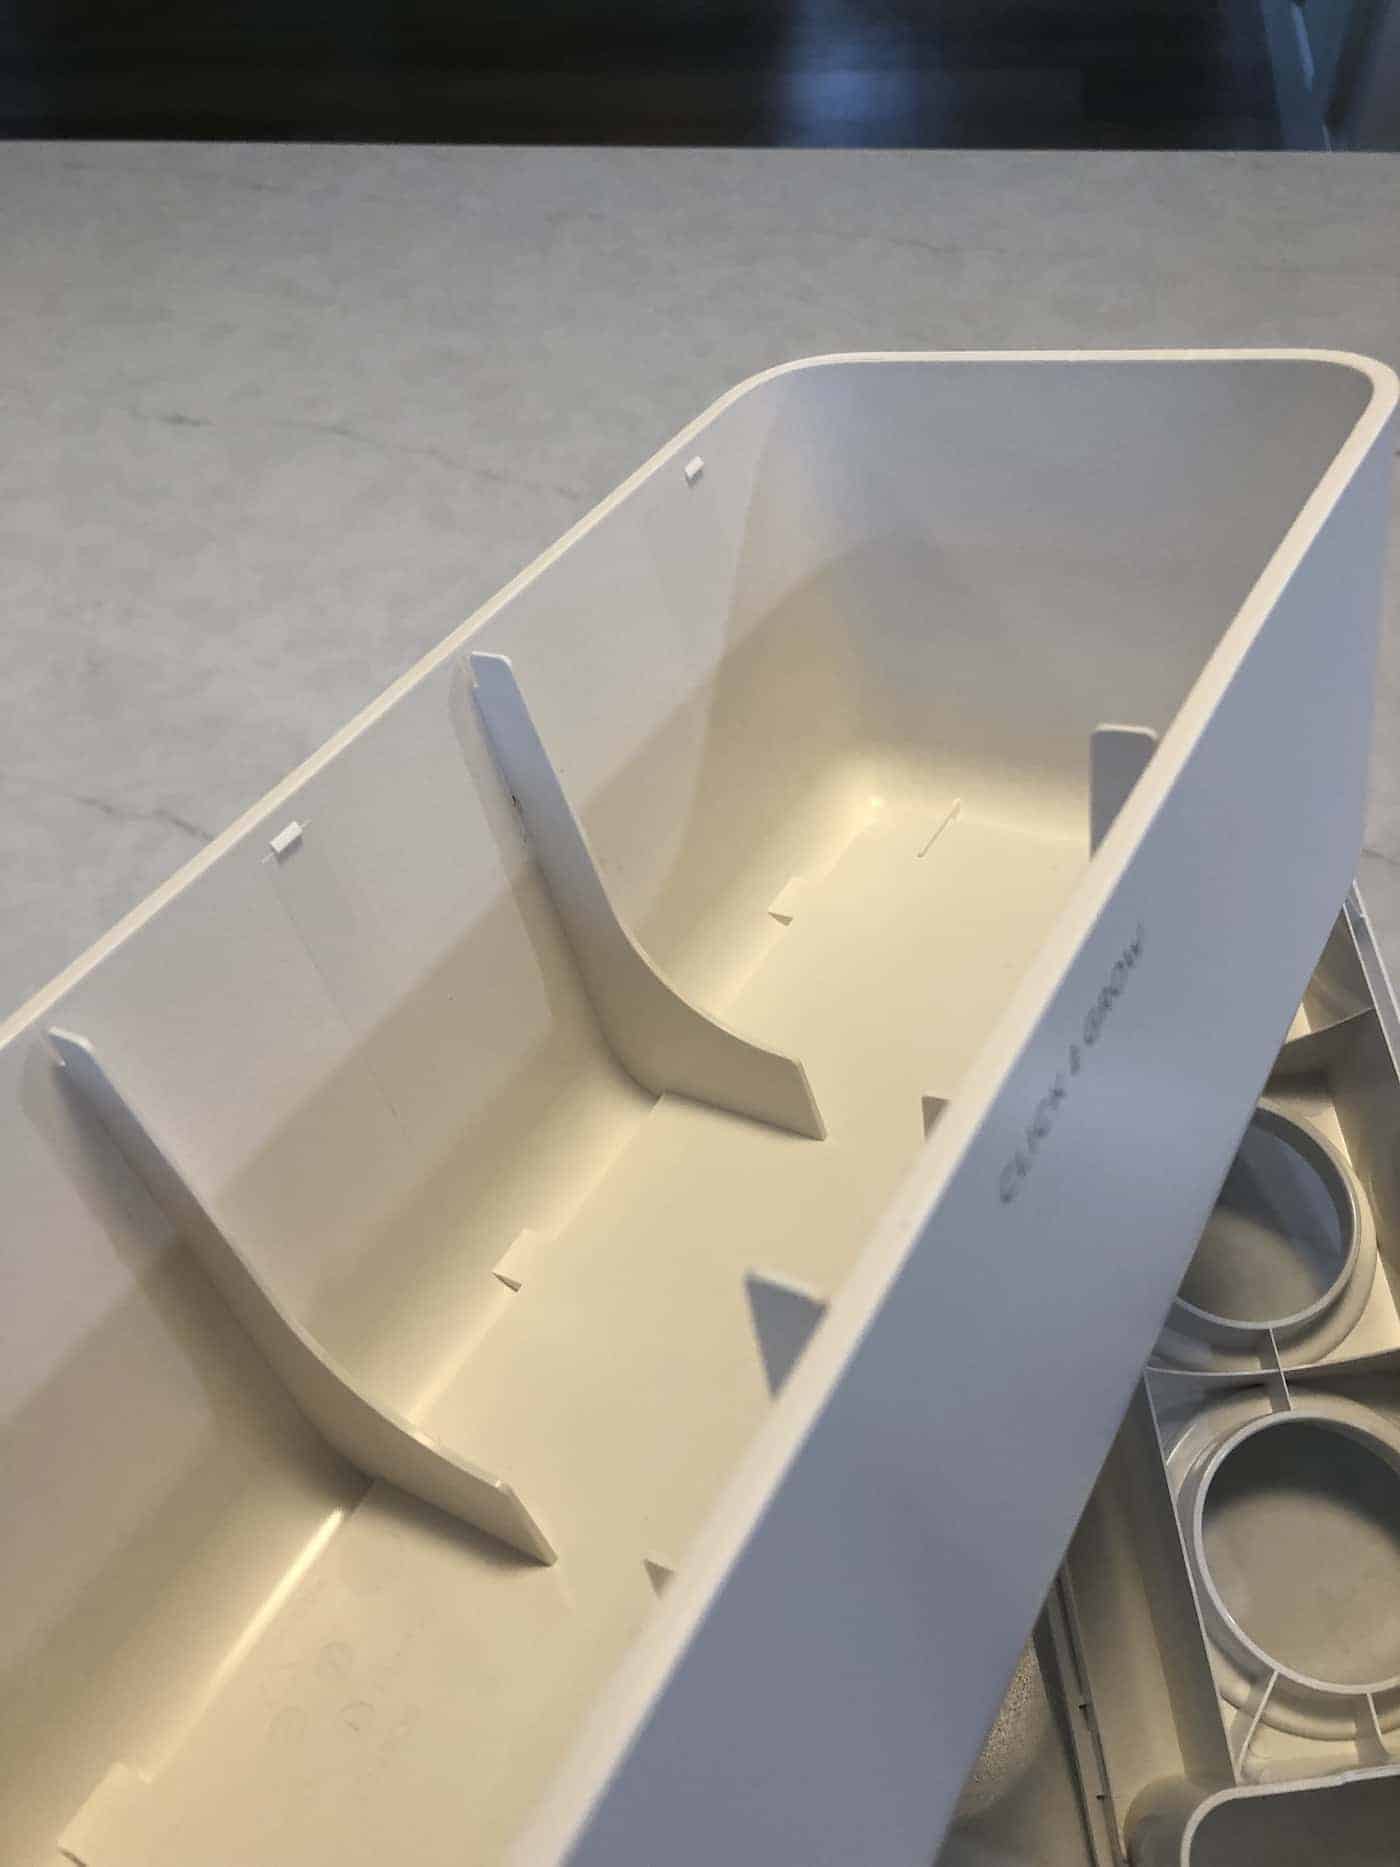
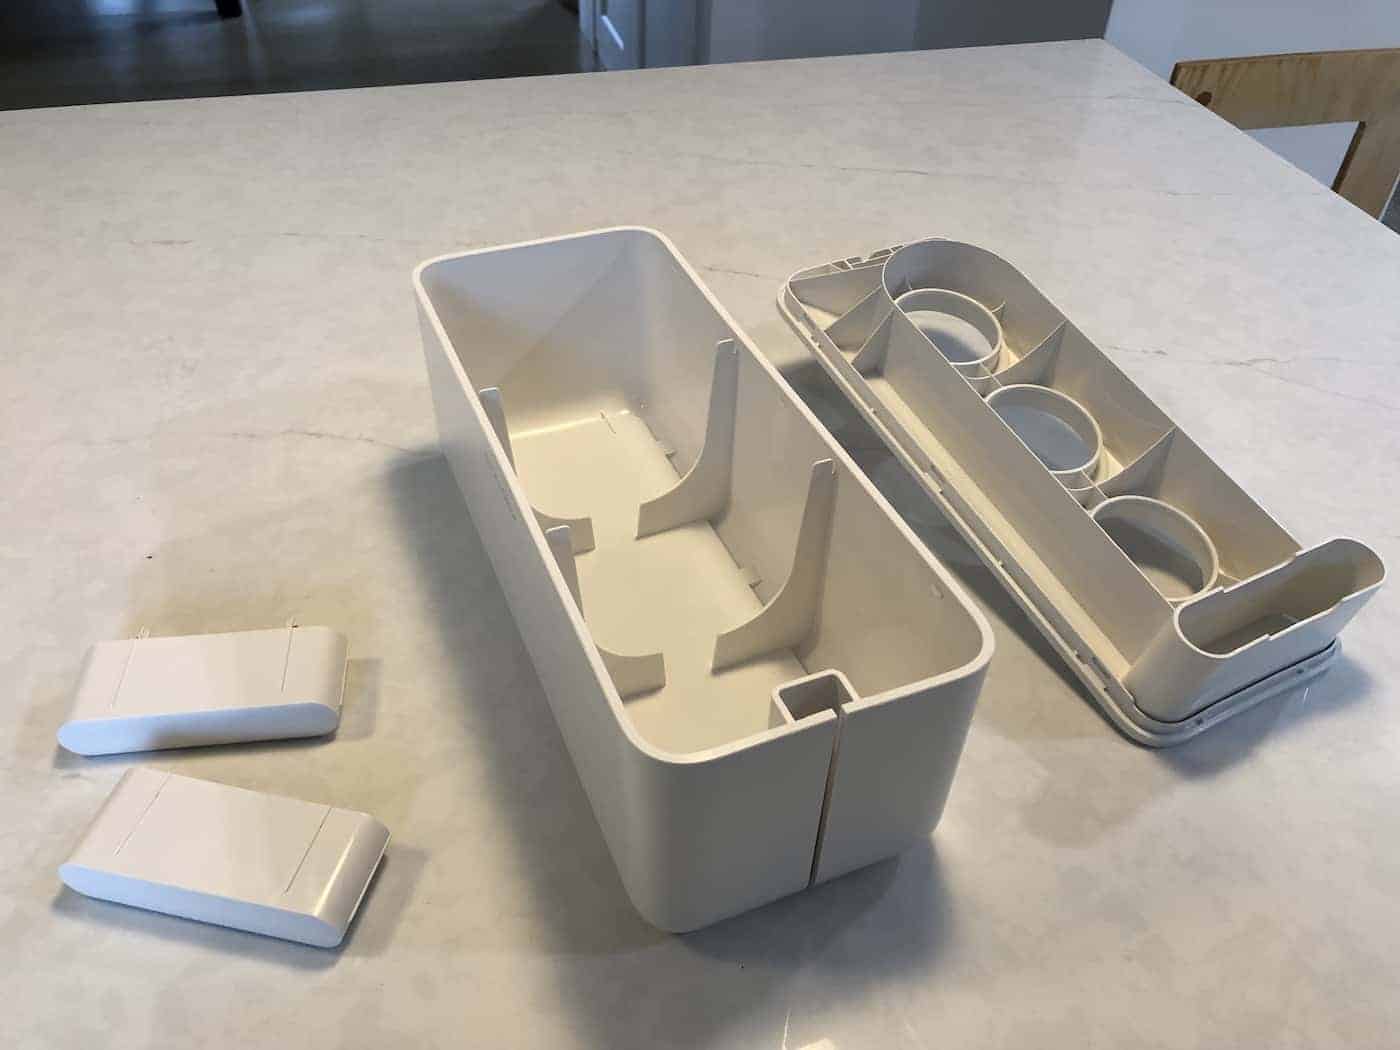
The main water tank reservoir body is easiest to clean once it’s been fully disassembled. There are quite a few ribs and ledges inside the body of the tank that are difficult to clean by trying to reach into the holes.
Start by taking out the float. If it feels at all heavy, there may be water inside. The float separates with a click into two pieces that can then be poured out and washed.
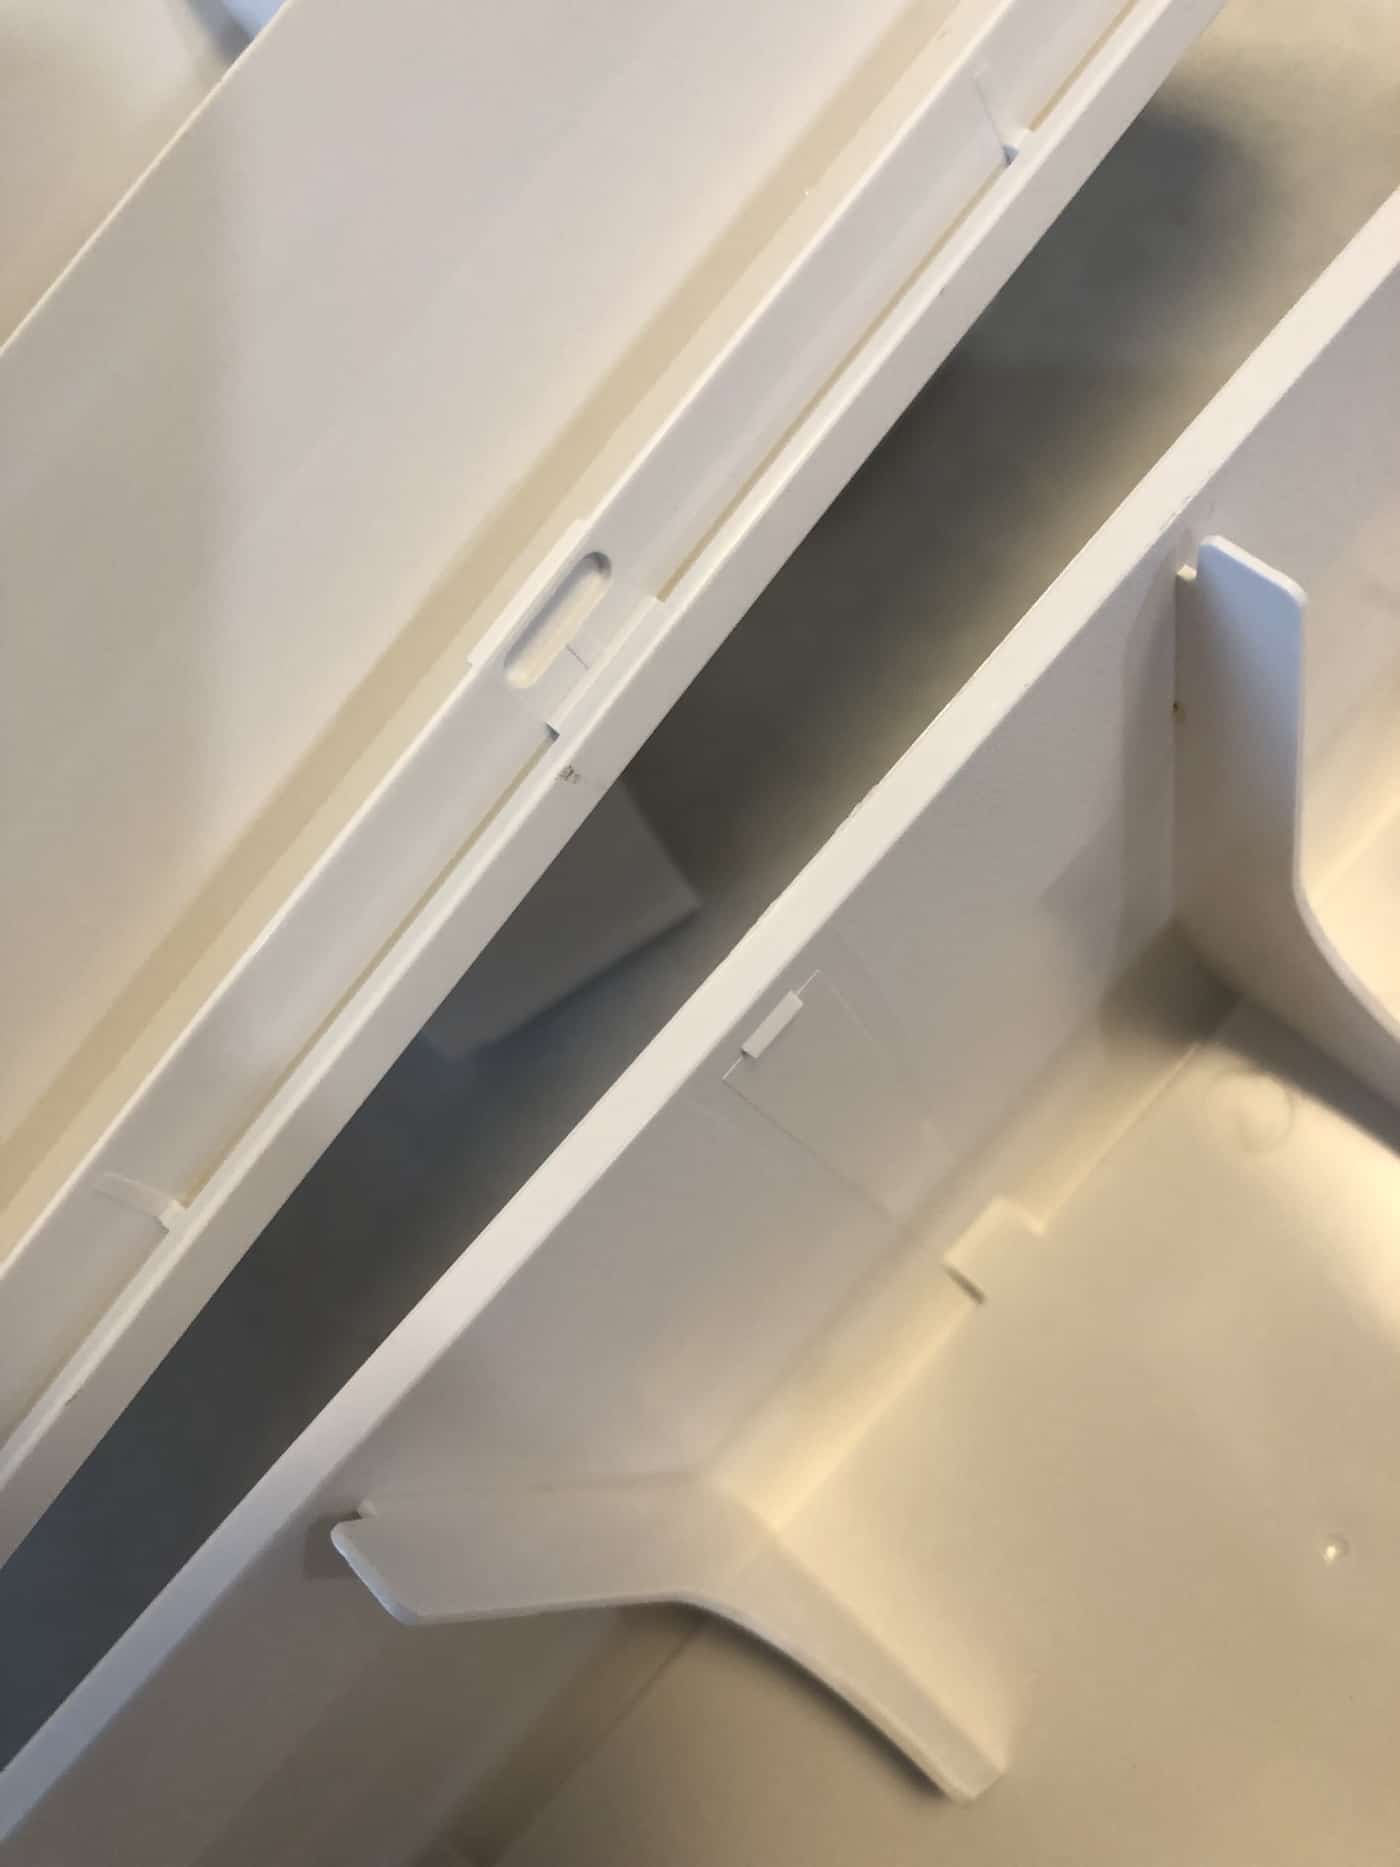
The main body water tank is a little bit harder to separate (especially the first time). You can sometimes pull the top right off by pulling between the float hole and the first plant pod hole (see photos here). I use a plastic putty scraper knife that isn’t sharp at all but is thin enough to fit into the narrow crack between the top deck and the bottom tank part of the reservoir. Don’t use any sharp tools as that could be dangerous and may also damage the plastic body of the smart garden.
There are six little plastic tabs inside the water tank that hold the top deck onto the tank bottom. Use the plastic putty scraper to click each little tab off its plastic clasp. See the photos below for the exact location of the six clasps that hold the top grow deck onto the bottom water tank.
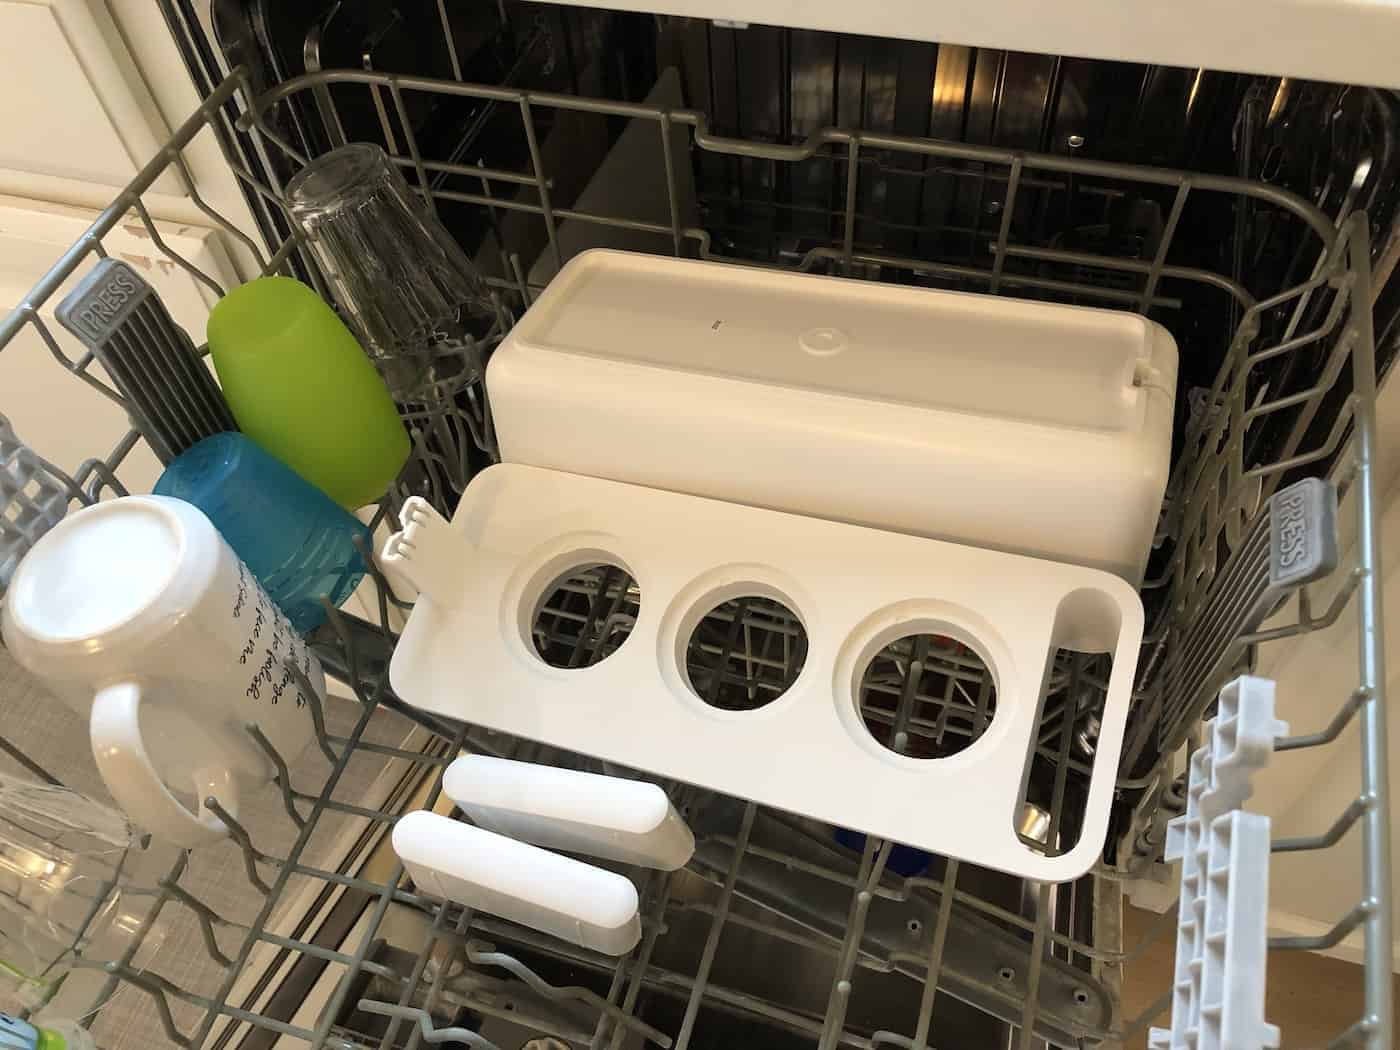
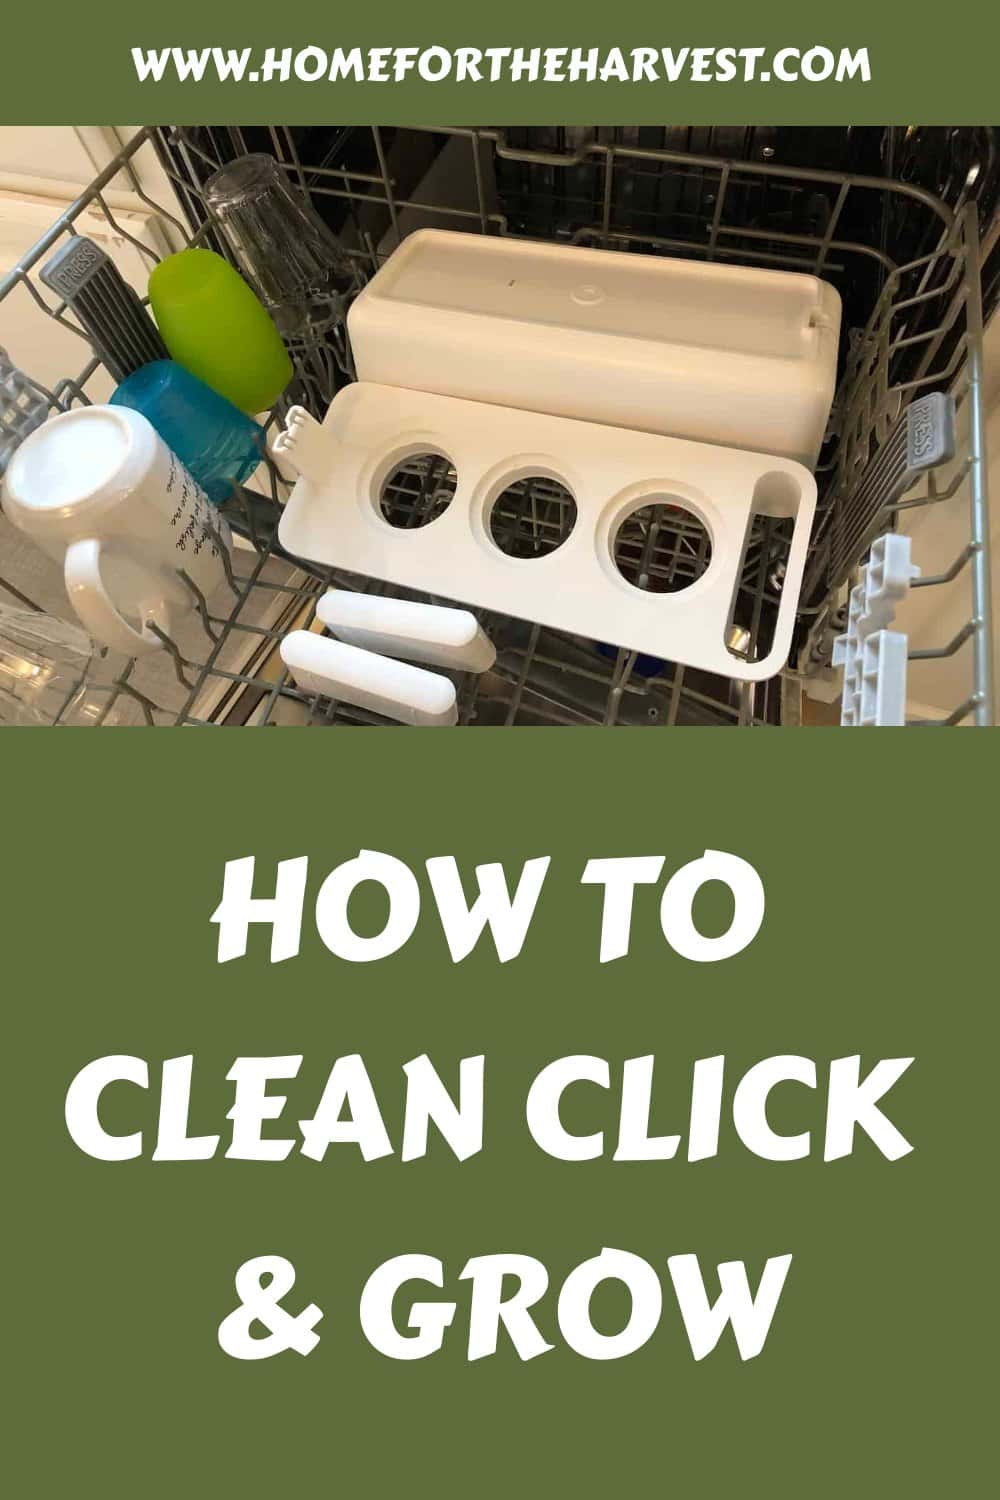
Once the parts of the water tank are separated, they can be washed by hand or put through the dishwasher. I put mine through the dishwasher on the top rack using the “sanitize” setting. The manufacturer recommends using dishwasher temperatures below 140°F (60°C). Check out the video tutorial on this page for extra info on using a dishwasher to clean your Click and Grow parts.