As the festive season rolls around, we all start to feel the pull of cherished traditions and the excitement of creating new ones. This year, I wanted to add a twist to our holiday gatherings, something beyond the beloved cookie exchanges and ornament crafting.
Why not host a wreath-making party? They are honestly so lovely. Imagine a cozy afternoon filled with laughter, creativity, and the scent of fresh evergreens as friends and family come together to craft their own holiday wreaths.
From selecting the perfect greenery to adding personal touches at our flower bar, this gathering is set to redefine our holiday festivities. Join me as I take you through the steps of hosting a holiday wreath-making party that promises to be as joyful and heartwarming as it is creatively fulfilling.

Preparing your space
Transforming your space into a festive wreath-making workshop requires a touch of creativity and thoughtful organization. Start by choosing a room with enough table space for your guests to work comfortably. Drape the tables with festive tablecloths, and perhaps add a centerpiece of candles or a miniature Christmas tree for that extra holiday sparkle.
To set up the wreath-making stations, evenly space out the essential tools and materials on each table. Ensure each station has ample greenery, decorative accents, and a set of tools like pruning shears and floral wire. Organize the materials in an accessible manner, perhaps in charming baskets or rustic wooden crates for a festive look.
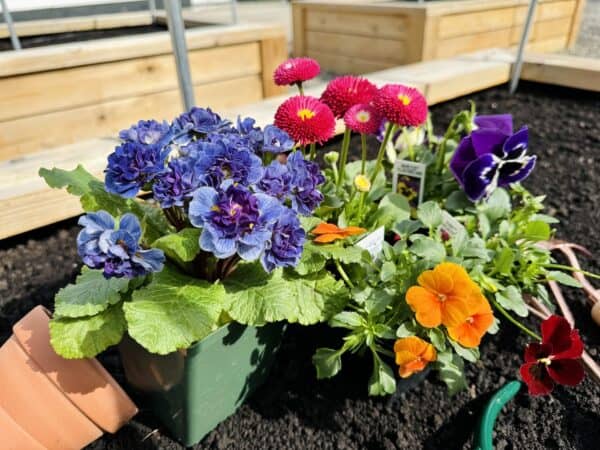
The flower bar can be a separate, standout feature—set it up on a side table, beautifully displaying the array of flowers and special accents for guests to choose from. Ambient lighting and soft holiday music in the background will not only set the mood but also make the crafting experience more enjoyable and relaxing for everyone.
Supplies you’ll need
Hosting a wreath-making party is a delightful way to celebrate the holiday season. Here’s a list of supplies you’ll need to ensure your party is a success:
- Wreath forms: Offer a variety of sizes and types, such as wire, grapevine, or foam forms.
- Greenery: Procure a mix of evergreens like pine, fir, cedar, and spruce. Ensure you have enough for all guests.
- Floral wire and wire cutters: Essential for attaching greenery and decorations to the wreath forms.
- Pruning shears: To trim and shape the greenery.
- Gloves: To protect hands while handling prickly branches.
- Ribbon and bows: In various colors and textures for making bows or adding decorative accents.
- Decorative accents: Such as pine cones, dried fruit slices, cinnamon sticks, bells, and baubles.
- Flower bar: Set up a station with flowers and unique accents like berries, eucalyptus, holly, and mistletoe for customization.
- Glue guns with extra sticks: For securing decorations that can’t be tied on with wire.
- Tables and coverings: Provide ample workspace for each guest and protect surfaces with tablecloths.
- Instructional sheets or a live demo: Prepare a brief tutorial or handout on basic wreath-making techniques.
- Snacks and beverages: Offer holiday-themed treats and drinks to add to the festive atmosphere.
- Music and decorations: Create a festive ambiance with holiday music and decorations.
- Take-home boxes or bags: For guests to safely transport their creations home.
- Name tags or place markers: If guests don’t know each other, name tags can help break the ice.
- Seating: Ensure there’s comfortable seating for guests while they work on their wreaths.
- Photo area: Set up a spot where guests can take pictures of their finished wreaths.
- Waste bins: For disposing of trimmings and unused materials.
By preparing these supplies, you can create a warm, welcoming environment for a memorable wreath-making party.

Wreath-making tutorial
Here is a step-by-step wreath-making tutorial to use:
Step 1: Gather materials
- Wreath form (wire, grapevine, or foam)
- Greenery (such as pine, fir, cedar, and spruce)
- Floral wire
- Pruning shears
- Decorative elements (like ribbons, pine cones, berries, ornaments)
- Gloves (optional, but recommended)
Step 2: Prepare greenery
- Using your pruning shears, cut the greenery into manageable pieces, approximately 6-10 inches long.
- Sort them by type and size for easy access.
Step 3: Attach greenery to the form
- If using a wire form, start by attaching a bundle of greenery to the form with floral wire. Wrap the wire around the stems and the form a few times to secure it.
- For foam or grapevine forms, you might need to use hot glue or floral pins.
- Continue adding greenery, layering the bundles so that each new one covers the stems of the previous bundle.
- Work your way around the wreath form until it’s fully covered.
Step 4: Add decorative elements
- Once your wreath is green and full, it’s time to add personality!
- Attach your decorative elements like ribbons, pine cones, or ornaments using floral wire or hot glue.
- You can create a focal point with a large bow or cluster of decorations, or distribute them evenly for balance.
Step 5: Create a hanger
- For wire and grapevine wreaths, you can fashion a hanger using floral wire at the back.
- For foam forms, you might need to attach a ribbon or a ready-made hanger.
Step 6: Final touches
- Step back and look at your wreath. Adjust any elements as needed, trimming excess greenery or repositioning decorations for a pleasing, balanced look.
- Remember, each wreath is unique – embrace the imperfections!
Step 7: Display your wreath
- Hang your wreath on a door, wall, or window to showcase your handiwork. If it’s a gift, wrap it carefully for a special presentation.
Before you go…
As the last piece of ribbon curls gracefully on your wreath, step back and admire the masterpiece that is a testament to your creativity and holiday spirit. Wreath-making isn’t just about crafting something beautiful for your home; it’s about the memories made, the laughs shared, and the traditions forged. Whether you’re a seasoned pro or a first-time wreath-maker, each creation is a unique expression of holiday joy.
If you’re seeking further inspiration or looking to dive into a world of festive wreath ideas, I invite you to explore my holiday wreath Pinterest board. It’s a carefully curated collection brimming with styles, themes, and ideas, perfect for sparking your imagination for next year’s party or simply to enjoy the beauty of the season. From minimalist designs to extravagantly adorned creations, there’s something for every taste and style. So grab a cup of hot cocoa, cozy up, and let’s make some wreaths!