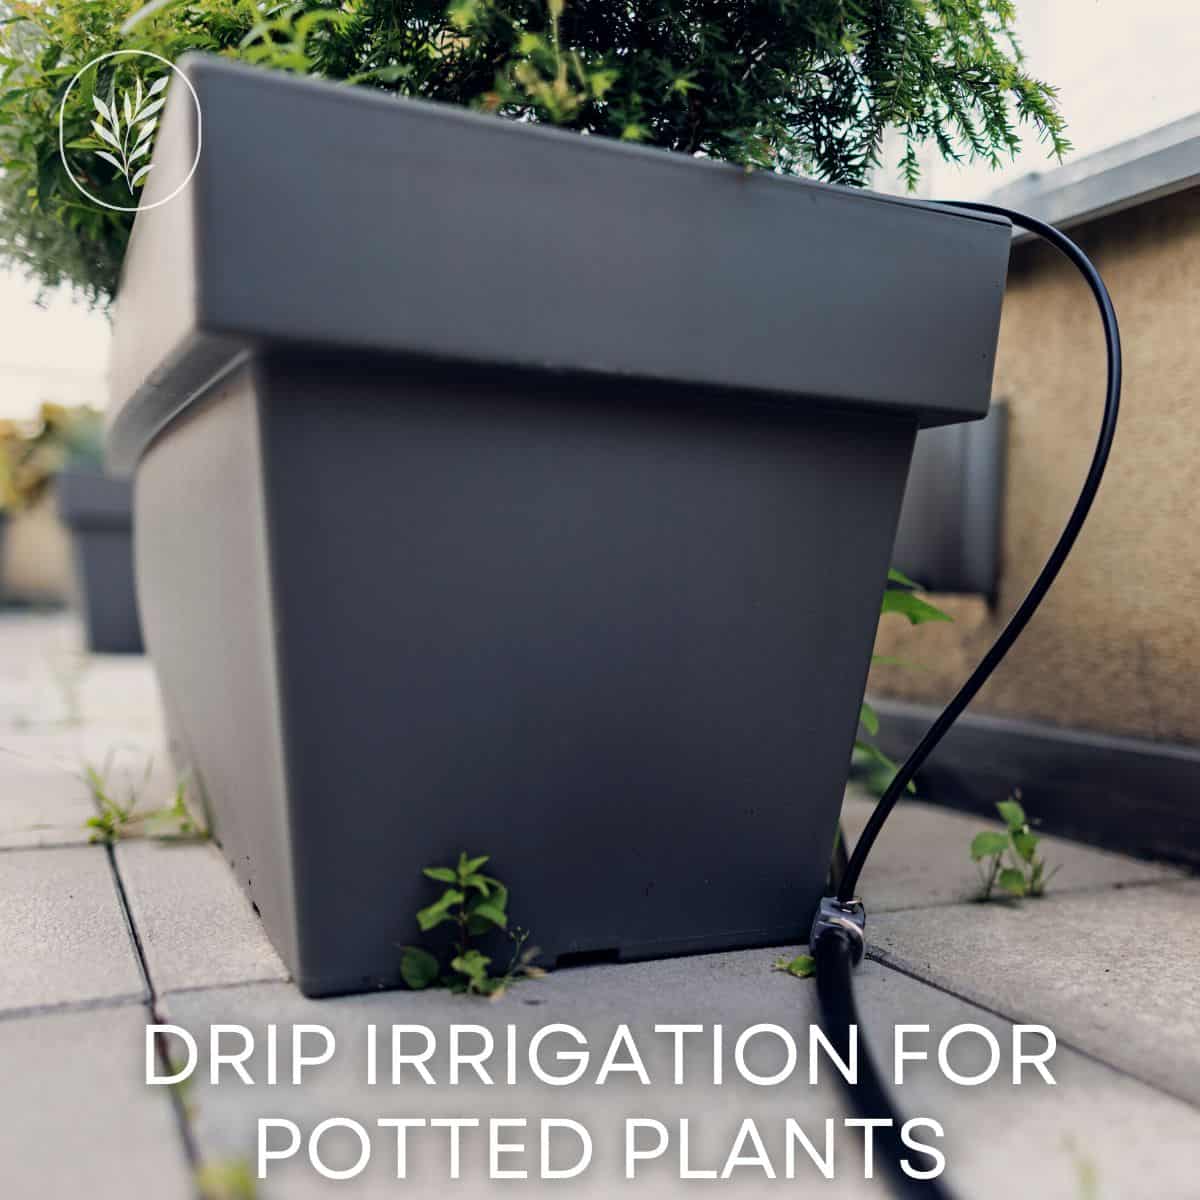
Thinking about drip irrigation for potted plants? While it takes some time to set up, it’s a huge timesaver when you consider the season overall.
Drip irrigation for potted plants generally consists of a distribution line that runs the area’s perimeter and is fitted with offshoot lines that travel to the base of each plant. Systems typically use 1/4″ soaker dripline, micro tubing, or individual emitters configured to the individual planters using various fittings, couplers, and plugs. The system may also start with an automated timer followed by a filter for debris and a pressure regulator.
Installing a drip irrigation system for container plants is an efficient way to ensure your vegetation gets the correct amount of water while conserving resources. Now let’s look at drip irrigation for potted plants, including essential components, customization, watering techniques, and maintenance tips for your system.
Disclosure: The drip irrigation kit pictured in this article was provided by DripWorks, a leading US producer of drip irrigation supplies. Use my Dripworks promo code HOMEHARVEST for 5% off your order.
Benefits of drip irrigation for potted plants
Using drip irrigation offers numerous benefits that make container gardening on your patio, deck, or balcony a breeze. From saving time to promoting healthier plant growth, this efficient watering solution is perfect for busy homeowners and gardening enthusiasts alike.
For example, the Deck Garden Irrigation Kit is a complete drip irrigation system designed for containers, planters, and window boxes. This small kit can water up to 45 pots, making it perfect for patio gardens.

Time-saving convenience
Gone are the days of manually watering each pot in your container garden. With our drip lines, you can sit back and relax while the system takes care of delivering precise amounts of water directly to your plants’ roots. This saves you valuable time and ensures consistent hydration for your plants.
Water conservation
Drip irrigation systems like ours help conserve water by minimizing evaporation and runoff. By providing targeted watering at the root zone, you’ll use less water overall compared to traditional methods such as overhead sprinklers or hand-watering with a hose. In fact, drip irrigation can save up to 50% more water than conventional techniques (source). This makes it an eco-friendly choice for environmentally conscious gardeners.
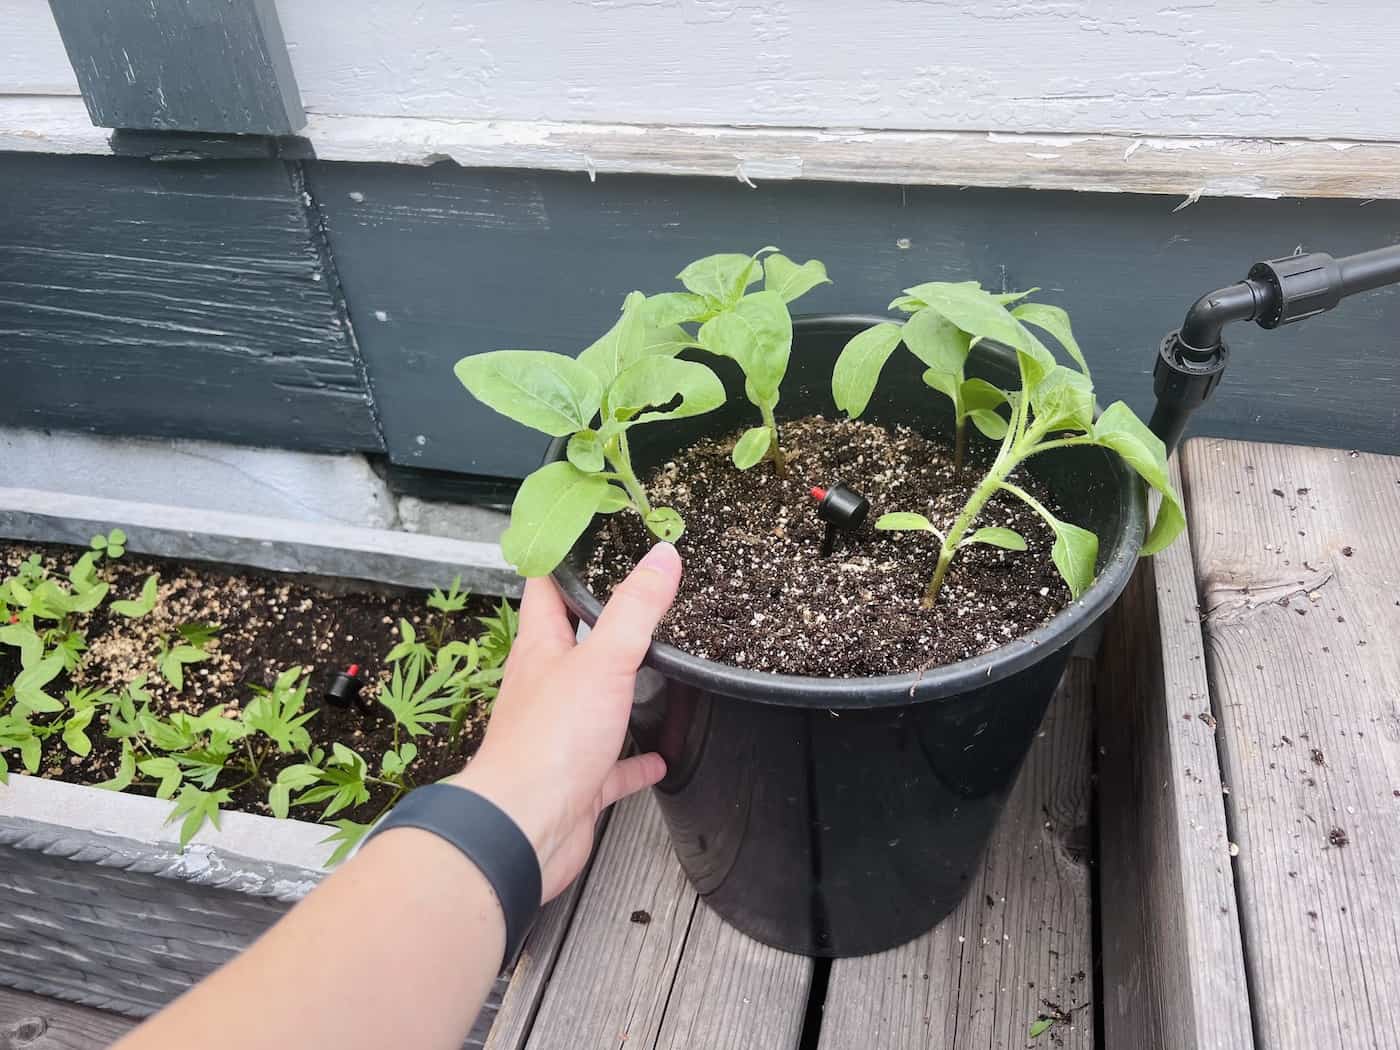
Healthier plant growth
Here are some reasons that drip irrigation can lead to healthy plant growth:
- Better nutrient absorption: Drip irrigation delivers water slowly and consistently right where it’s needed most – at the roots. This allows plants to absorb nutrients more efficiently from their growing medium.
- Fewer diseases: Overhead watering often leaves foliage wet which can lead to fungal diseases like powdery mildew or leaf spot. Drip systems help prevent these issues by keeping foliage dry.
- Reduced stress: Inconsistent or over-watering can cause plant stress, leading to stunted growth and even death. A Deck Garden Irrigation Kit ensures your plants receive the right amount of water at regular intervals, promoting healthier growth overall.
Incorporating drip irrigation into your container gardening routine is an excellent way to save time, conserve water, and promote healthier plant growth.
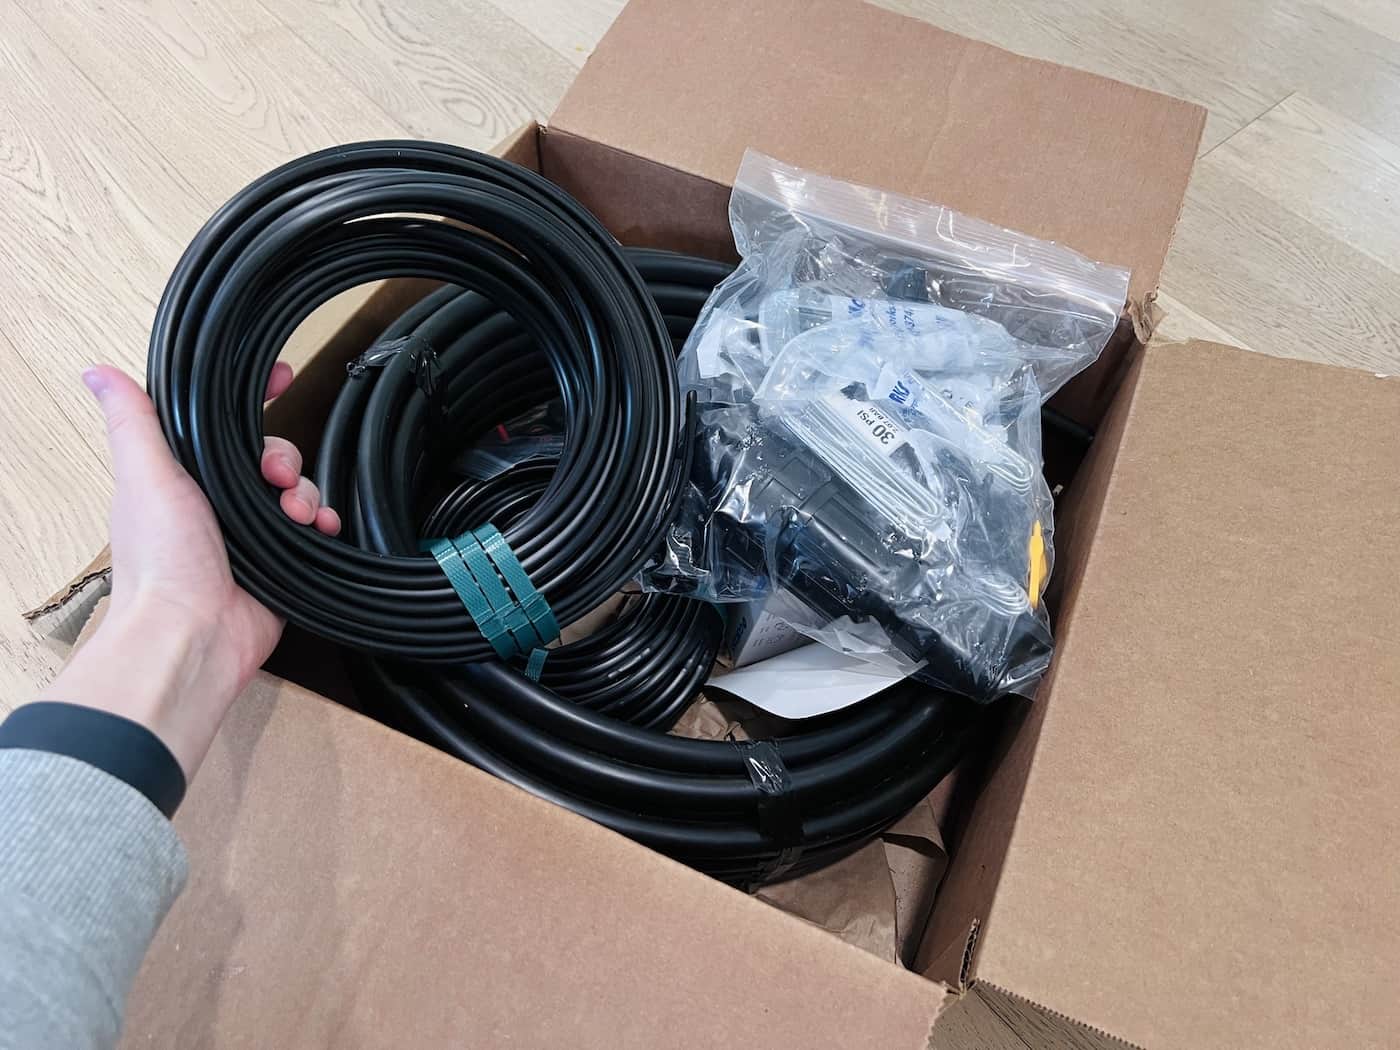
Essential components for drip irrigation
To set up a drip irrigation system for potted plants, you will need essential components that ensure efficient watering and easy maintenance. Let’s explore some of these key parts.
Mainline Tubing
Mainline tubing is the backbone of your deck garden irrigation system, providing water flow from the faucet to each individual pot or planter. This is a solid line to which emitter lines are fastened.
Mainline tubing is usually a roll of polyethylene pipe that can be trimmed to fit your individual design. This poly tubing, usually 1/2-inch in diameter, runs the perimeter of the area, typically from the faucet around the edge of the whole garden area.
Micro-tubing Connectors
To connect the mainline tubing to each plant, you’ll need micro-tubing connectors. These connectors allow you to create a customized watering network tailored to your unique container arrangement. They’re simple to install – just insert them into the mainline tubing and attach driplines leading directly towards each pot.

Dripline tubing and/or emitters
Dripline tubing is poly tubing that comes complete with installed drip emitters, usually at a 6″ or 12″ spacing. You can run this tubing across the soil surface of larger planters. For smaller planters, use an individual emitter connected to the mainline with a small run of solid microtubing.
In addition to these essential components, you may also require dripline connectors to attach micro-tubing hoses directly onto mainline tubes. With all these parts in place, you’ll have everything needed for an efficient and effective drip irrigation system.

Pressure regulator
A pressure regulator is necessary to control the incoming water pressure, ensuring it doesn’t damage your drip emitters or cause leaks.
Filter
To prevent clogging from debris in the water supply, use a filter that can be easily cleaned and maintained.
Backflow preventer
A backflow preventer stops contaminated water from flowing back into your clean-water source, protecting your household water supply.

Customizing your drip irrigation system
For the DIY-minded, customizing a drip irrigation system for potted plants can prove to be an invigorating and satisfying endeavor. By creating your own emitter rings or adding bubblers and micro-sprinklers, you’ll have more control over the watering process and ensure that each plant receives the right amount of water.
Creating emitter rings
Emitter rings are circular tubing with small holes that evenly distribute water around the base of a plant. To create your own emitter rings, cut a piece of 1/4-inch poly emitter tubing to fit around the circumference of your pot, typically not too close to the edge. Attach this ring to your mainline tubing with another connector.
Adding bubblers or micro-sprinklers
Bubblers and micro-sprinklers provide additional options for delivering water directly to your plant’s roots in different ways than traditional emitters do. Bubblers release slow streams of water at low pressure, while micro-sprinklers emit fine sprays covering larger areas within pots or garden beds. Punch holes into the main lines where these devices will be installed before attaching them securely with connectors.
Securing the system with garden staples
- Use U-shaped garden staples to anchor the tubing within soil beds or potting mix to keep everything in place throughout your garden space.
- These stakes help prevent tubing from shifting, ensuring that water is delivered consistently and accurately to each plant.
- Place a stake every few feet along your mainline tubing and at any turns or connections between sections of micro-tubing.
Incorporating these customizations into your drip irrigation system will make it more efficient and give you greater control over the watering process. By tailoring your setup to suit the unique needs of your potted plants, you’ll be able to provide them with optimal growing conditions for a thriving garden.
Careful arrangement of your drip irrigation system is essential for attaining the most effective results, so be sure to dedicate adequate time to plan out every stage. Putting together the irrigation setup can be complex, yet with the right planning and execution, it will become much simpler.
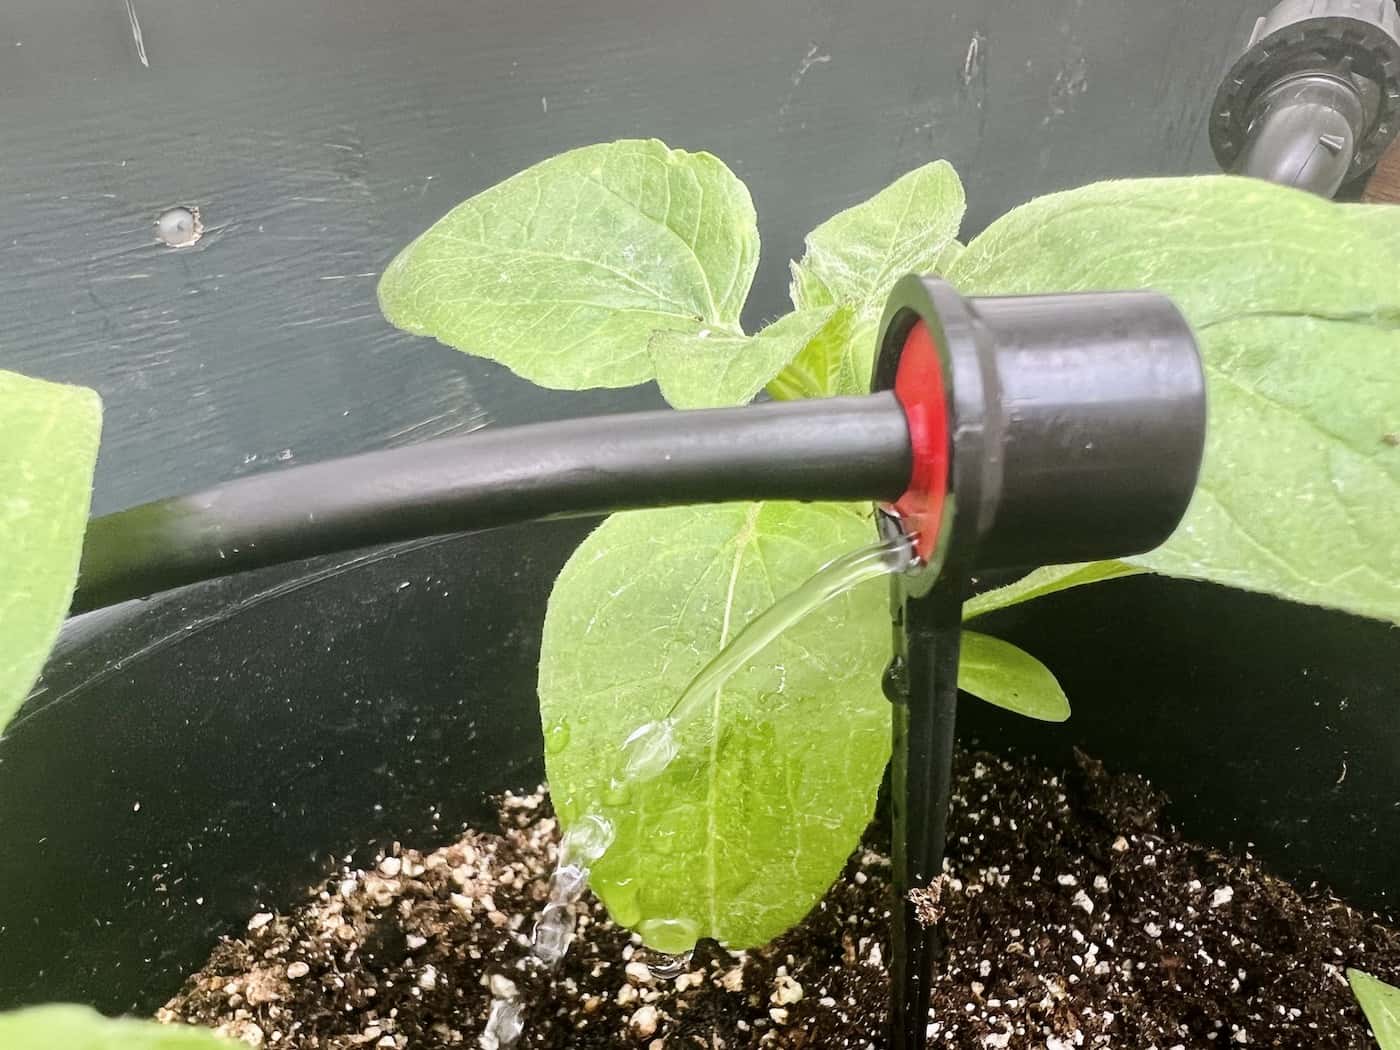
Tailoring emitter placement & spacing
To ensure that each plant receives the right amount of water, it’s essential to place emitters strategically around your deck garden. Consider factors such as sunlight exposure and water requirements when deciding where to position the emitters. Additionally, adjust the spacing between emitters based on plant type and size – some plants may need more frequent watering than others.
- Sunlight Exposure: Plants in sunnier spots may require more water than those in shaded areas; therefore, consider placing additional emitters near these plants.
- Water Requirements: Different types of plants have varying water needs; make sure you understand each species’ requirements before determining emitter placement and spacing.
Customization for garden size and shape
No two gardens are alike. Whether you’re working with a small balcony space or an expansive patio area, customizing your irrigation system is key to ensuring all your plants receive adequate hydration. Here are some ideas for tailoring your setup based on different garden sizes/layouts:
- Mixed Container Sizes: If you have various container sizes within one area (e.g., window boxes alongside large pots), use different emitter types or flow rates to accommodate the differing water needs.
- Vertical Gardens: For vertical gardens, consider using drip emitters with adjustable flow rates and positioning them at various heights to ensure even watering throughout your green wall.
- Tiered Planters: In tiered planter setups, make sure each level receives adequate water by placing emitters on every tier and adjusting their spacing as needed.
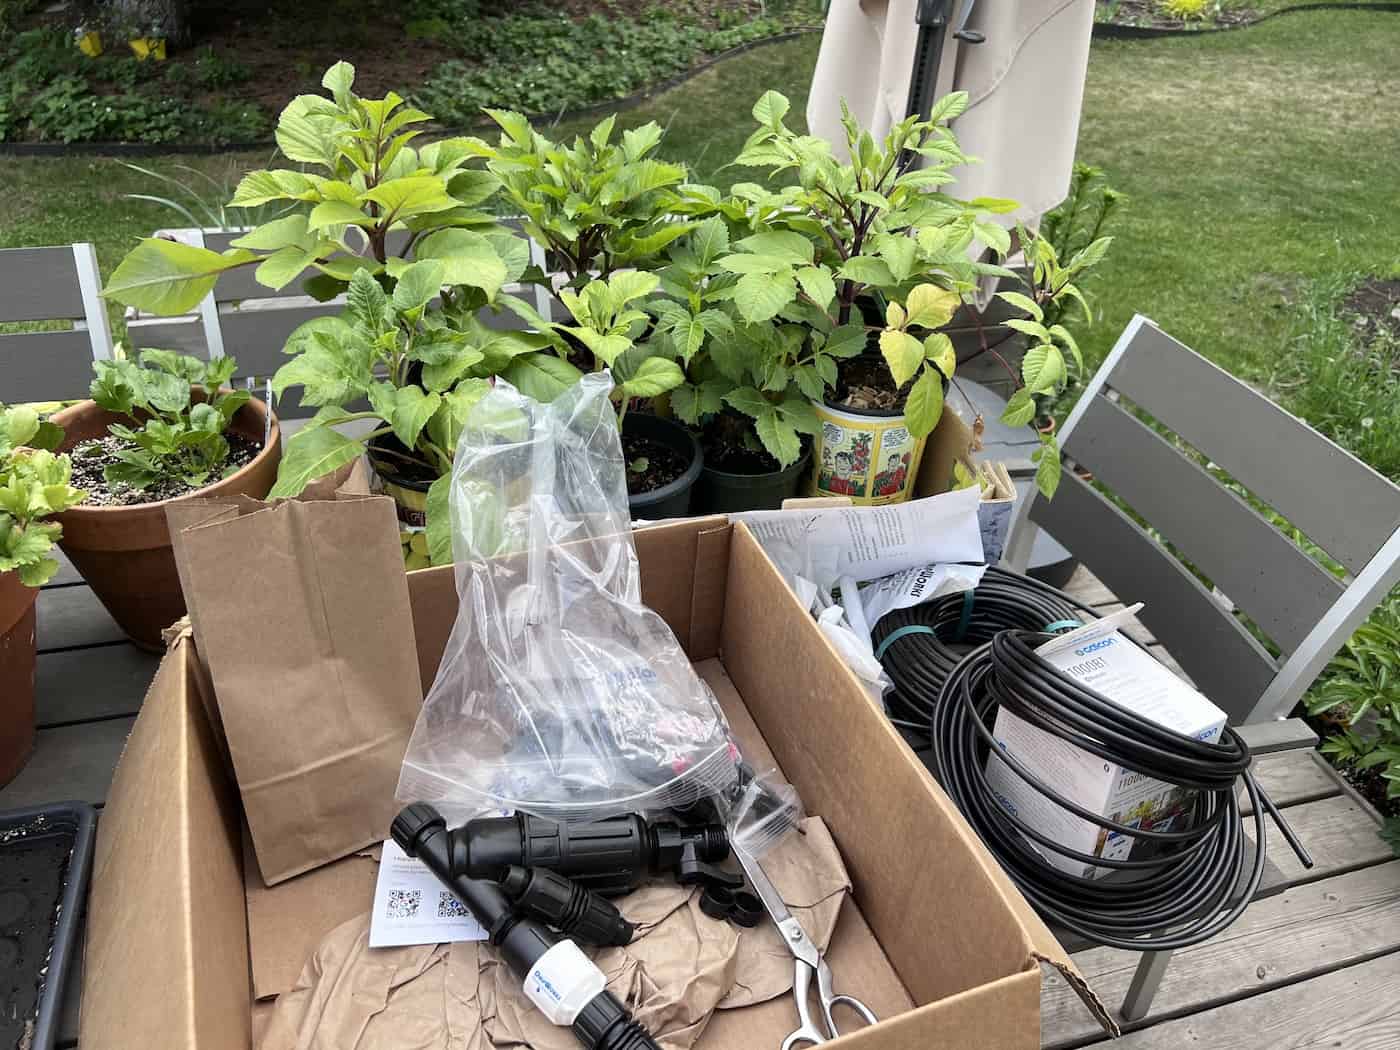
Assembling your drip irrigation system
Once you have gathered all the necessary materials, assembling your drip irrigation system for potted plants should only take about an afternoon’s worth of work. Follow these simple steps to ensure a successful installation:
Attaching splitter and timer
To begin, attach a two-way connector onto your outdoor faucet. Connect a two-way adapter to the exterior spigot, so you can access one port for your drip irrigation setup and still have another free for other watering activities. Next, secure a timer attachment to the two-way connector. A timer is essential in maintaining a consistent watering schedule for your potted plants.
Securing regulator valve
The next step is securing the regulator valve, which helps control water pressure within the system. Attach it directly after the timer attachment on your two-way connector setup.
Adding mainline hose fitting
Then add a mainline hose fitting that connects to both 1/2-inch poly tubing and 1/4-inch micro-tubing hoses as needed throughout your garden space.
Designing the layout plan
- Determine where each potted plant will be placed in relation to the main line hose.
- Cut appropriate lengths of 1/4-inch micro-tubing based on individual plant locations.
- Punch holes into the 1/2-inch poly tubing using a 1/4-inch hole punch tool at the desired intervals for each potted plant.
- Attach 1/4-inch micro-tubing to the punched holes in the main line hose, ensuring a secure connection.
- Install drip emitters or emitter rings onto the ends of each 1/4-inch micro-tubing section, placing them directly above or near your potted plants’ root zones.
You can assemble an efficient drip irrigation system for your potted plants using the guidelines provided. Having completed the setup of a drip irrigation system, let’s now take a look at some strategies for correctly irrigating your container plants.

Proper watering techniques for potted plants
One of the most important aspects of using a drip irrigation system for potted plants is ensuring that they receive just the right amount of water. Overwatering can lead to root rot and other issues, while underwatering may cause your plants to become stressed or even die. This part will explore some advice for appropriately irrigating your potted plants with a drip irrigation system.
Avoiding overwatering
To prevent overwatering, only use your drip irrigation system with planter pots that have adequate drainage. Each pot should have holes at the bottom and you should confirm that excess water drains easily out of the pot. Make sure you adjust your emitter flow rates accordingly so that they provide adequate hydration without saturating the soil too much (mud is not a good sign).
Establishing a regular drip schedule
A consistent watering schedule is essential in maintaining healthy potted plants. Start by setting up an automatic timer on your drip irrigation system, which will help ensure that your pots are receiving water at regular intervals throughout the day.
Remember that different plant species have varying water requirements. Tailor your watering schedule according to their specific needs. Watering requirements also vary with weather conditions and the exposure of your garden.
For instance, a hot sunny patio garden that uses small pots might need daily or even twice daily irrigation in the heat of summer. On the other hand, a shady container garden with larger pots in a mild climate might be ok with weekly or twice weekly irrigation. Try not to let the soil in your pots dry out entirely between waterings as this can stress the plants and make it more difficult to re-hydrate the potting mix when you do water.
In terms of how long to keep the system on each time, check to see how long it takes for the system to fully saturate the soil in each of the pots. Wait until you can see moisture dripping out of the drainage holes of your pots and draining freely away from the roots. Make note of how long this takes on several different occasions and set your timers to water for this amount of time.
Removing saucers from underneath containers
Saucers placed under pots can collect excess water and create standing pools around plant roots, potentially leading to root rot and other diseases. If you’re using saucers as part of your container setup, make sure you empty them regularly or consider removing them altogether when implementing a drip irrigation system. Alternatively, you can use pot risers to elevate your containers off the deck or patio surface and allow excess water to drain away freely.

Adjustments for weather conditions and different plants
As a dedicated gardener, it’s essential to adapt your watering techniques based on changing weather conditions and the specific needs of your potted plants. By doing so, you’ll be able to maintain a healthy environment for them to thrive in. Let’s explore some adjustments you can make during hot weather, how to cater to individual plant needs, and the benefits of using quality potting soil with mulch.
Increasing frequency during hot weather
Drip irrigation systems are highly adaptable when it comes to adjusting water frequency. During hotter periods, consider increasing the watering frequency up to two times per day. However, always monitor your plants’ condition and local weather patterns before making any changes.
Adjusting watering based on plant needs
No two plants are alike; each has its own unique requirements when it comes to hydration. To ensure optimal growth for all your potted beauties, familiarize yourself with their specific watering needs, then adjust the drip system accordingly. This may involve varying emitter placement or flow rates between different pots within your garden space.
Using quality potting soil and mulch
A high-quality potting mix is crucial in retaining moisture within the pots while also providing adequate drainage. Look for mixes that contain ingredients like peat moss or coconut coir, which help with water retention. Construct your own soil blend for plants that need special attention.
Topping off your pots with a layer of mulch not only adds an aesthetic touch but also helps in conserving moisture. Organic mulches such as shredded bark, cocoa bean hulls, or straw are excellent choices for potted plants. Learn more about the benefits and types of mulch for landscape trees.
Incorporating these adjustments into your drip irrigation routine will ensure that you’re providing just the right amount of water to each plant while adapting to changing weather conditions – ultimately resulting in a flourishing garden.
Monitoring soil moisture levels
Keeping an eye on the soil moisture levels in your potted plants is crucial for their overall health and growth. Regularly checking these levels ensures that your plants receive adequate hydration without overwatering them, which can lead to root rot and other issues. In this section, we’ll explore the significance of providing your potted plants with appropriate hydration and examine some instruments that can help you keep track of soil moisture.
Tools for checking soil moisture levels
Several simple tools can help you accurately gauge the moisture content in your plant’s potting mix. One such tool is an old screwdriver or a wooden dowel. To determine if your plant needs water, insert a screwdriver or wooden dowel into the soil near its base; if it comes out dry, then watering is in order. If wet soil clings onto it, hold off on watering until later.
You may also consider investing in a moisture meter, which provides more accurate readings by measuring electrical conductivity between two probes inserted into the potting mix. These devices typically have easy-to-read scales indicating whether your plant needs water or not.

Maintaining your drip irrigation system
Preserving the ideal state of your drip irrigation system is paramount for the well-being and flourishing of your potted plants. With some regular maintenance, you can ensure that everything continues to work smoothly throughout the growing season. In this section, we’ll discuss how to clean essential components, schedule routine maintenance checks, and adjust as needed.
- Evaluate emitter output: Turn on your patio plant watering system occasionally without attaching timer so you can observe how each emitter functions during operation; look out for reduced flow rates indicating potential blockages inside nozzles due to sediment buildup over time.
- Clean blocked emitters: Use a small brush (drip irrigation cleaning tools are available) or a toothpick to gently remove any debris lodged inside emitter openings, then test again for proper flow.
- Replace damaged emitters: If an emitter is beyond repair or continues malfunctioning after attempted cleaning, replace it with a new one from your Deck Garden Irrigation Kit supplies or purchase additional emitters.
Cleaning essential components
Over time, debris can accumulate inside various parts of your drip irrigation system. To keep things running efficiently, it’s important to periodically remove and clean certain components like the backflow preventer, pressure reducer, and filter. Carefully take apart the components, give them a good rinse to clear away any debris or sedimentation, then put it all back together firmly before starting up again.
Scheduling routine maintenance checks
Setting recurring calendar reminders is a great idea to stay on top of your system’s performance and catch potential issues early on. This will help you remember when it’s time to check overall functionality – from inspecting tubing connections for leaks or damage to monitoring soil moisture levels using an old screwdriver or another probing tool (as discussed earlier). By staying proactive about maintenance tasks like these, you’ll be able to extend life expectancy and maximize efficiency and effectiveness for new potted plant setups.
Making adjustments as needed
Your garden landscape may change over time due to weather conditions, growth patterns, or individual specimens themselves, so don’t hesitate to adapt accordingly by adjusting watering schedules, adding or removing emitters as necessary, or even experimenting with different types of mulch to retain more moisture in pots during hotter months of the year. Always keep in mind that specific needs and preferences of each unique plant variety call for varying levels of care and attention to detail throughout their life cycle.
By following these simple maintenance tips, you can keep your drip irrigation system running smoothly and ensure that your potted plants continue to thrive.
Easy expansion options
- Add more emitters: If you’re adding more containers to your deck garden, purchase additional emitters, which are available in various flow rates depending on plant needs. Attach these new emitters and micro-tubing connectors for seamless integration into your existing system.
- Increase mainline tubing length: To reach newly added containers further away from the water source, use a compatible connector like a barbed coupler or tee fitting.
- Add splitters for multiple lines: If expanding horizontally across different levels (e.g., shelves), use splitter adapters such as T-fittings or Y-fittings to create multiple lines from a single mainline tubing. This allows you to water different sections of your garden simultaneously.
- Upgrade pressure regulator: As the number of emitters increases, it’s essential to maintain proper water pressure throughout the system. Upgrading your existing pressure regulator can help ensure consistent flow rates for all containers.
Incorporating these expansion options into your deck garden irrigation system will allow you to effortlessly accommodate new plants and containers as they’re added over time, ensuring that every plant receives adequate hydration for healthy growth.
Ideal for patios, decks, and balconies
No matter where you live or what type of outdoor space you have available, this versatile irrigation kit is designed to work seamlessly with various container gardening setups. Whether you’re working with a spacious deck or a cozy balcony area, container gardening has never been easier.
- Patio: Transform your patio into a lush oasis by using the Deck Garden Irrigation Kit on potted plants arranged throughout the space.
- Deck: Keep all those beautiful flowers blooming on your deck by ensuring they receive consistent hydration from our easy-to-install drip system.
- Balcony: Create an urban jungle even in limited spaces like balconies by utilizing our compact yet effective irrigation solution tailored specifically for container gardens.
With drop irrigation, you can now enjoy a thriving and vibrant outdoor space without spending countless hours on manual watering tasks. Embrace the convenience
FAQs about drip irrigation for potted plants
Does drip irrigation work for potted plants?
Yes, drip irrigation is an effective and efficient method for watering potted plants. It delivers water directly to the plant’s root zone, reducing evaporation and conserving water. This system can be easily customized to suit the needs of individual plants in your garden. Professional greenhouses and nurseries use these systems to maintain their large inventories of plants.
How often do you drip irrigate potted plants?
Drip irrigation frequency depends on factors such as plant type, pot size, soil composition, and weather conditions. Generally speaking, most potted plants require watering every 2-4 days during hot summer months and less frequently during cooler or wetter periods. They may need daily irrigation (or more) if the pots are small and the direct sunlight is very hot. Regularly monitoring your plants’ moisture levels will help determine the optimal watering schedule.
What is a downside of drip irrigation?
A significant downside to drip irrigation is that it requires regular maintenance to ensure optimal performance. This includes checking for clogs, leaks, and damaged components. Additionally, the initial setup cost may be higher than traditional watering methods. However, the long-term benefits of water conservation and improved plant health often outweigh these drawbacks.
Before you go…
In the end, employing drip irrigation for potted plants is an efficient and useful technique to keep your vegetation healthy and flourishing. By using essential components like poly tubing, a hole punch tool, hose splitter, pressure regulator, U-shaped garden stakes, and emitters or micro-sprinklers, you can install a system that will save time and water while promoting plant growth.
Remember to adjust watering schedules based on weather conditions and maintain the system by periodically removing backflow preventers, pressure reducers, and filters and protecting exposed ends of submain tubing from debris. Adaptable setups are also available so that adjustments can be made easily as gardens evolve over time.


