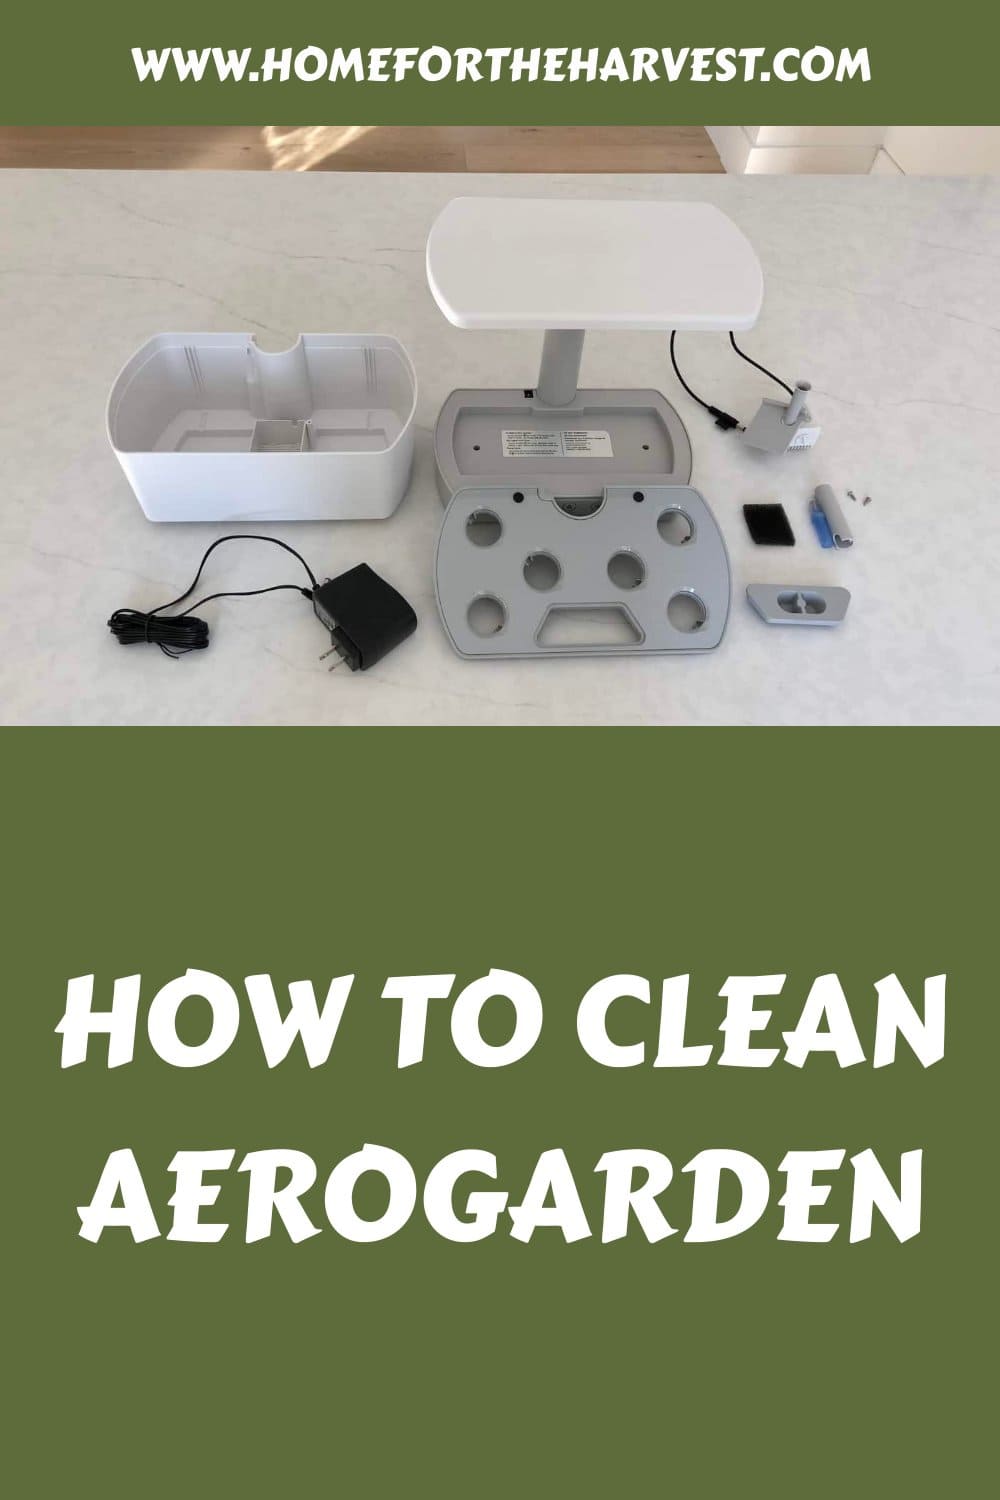
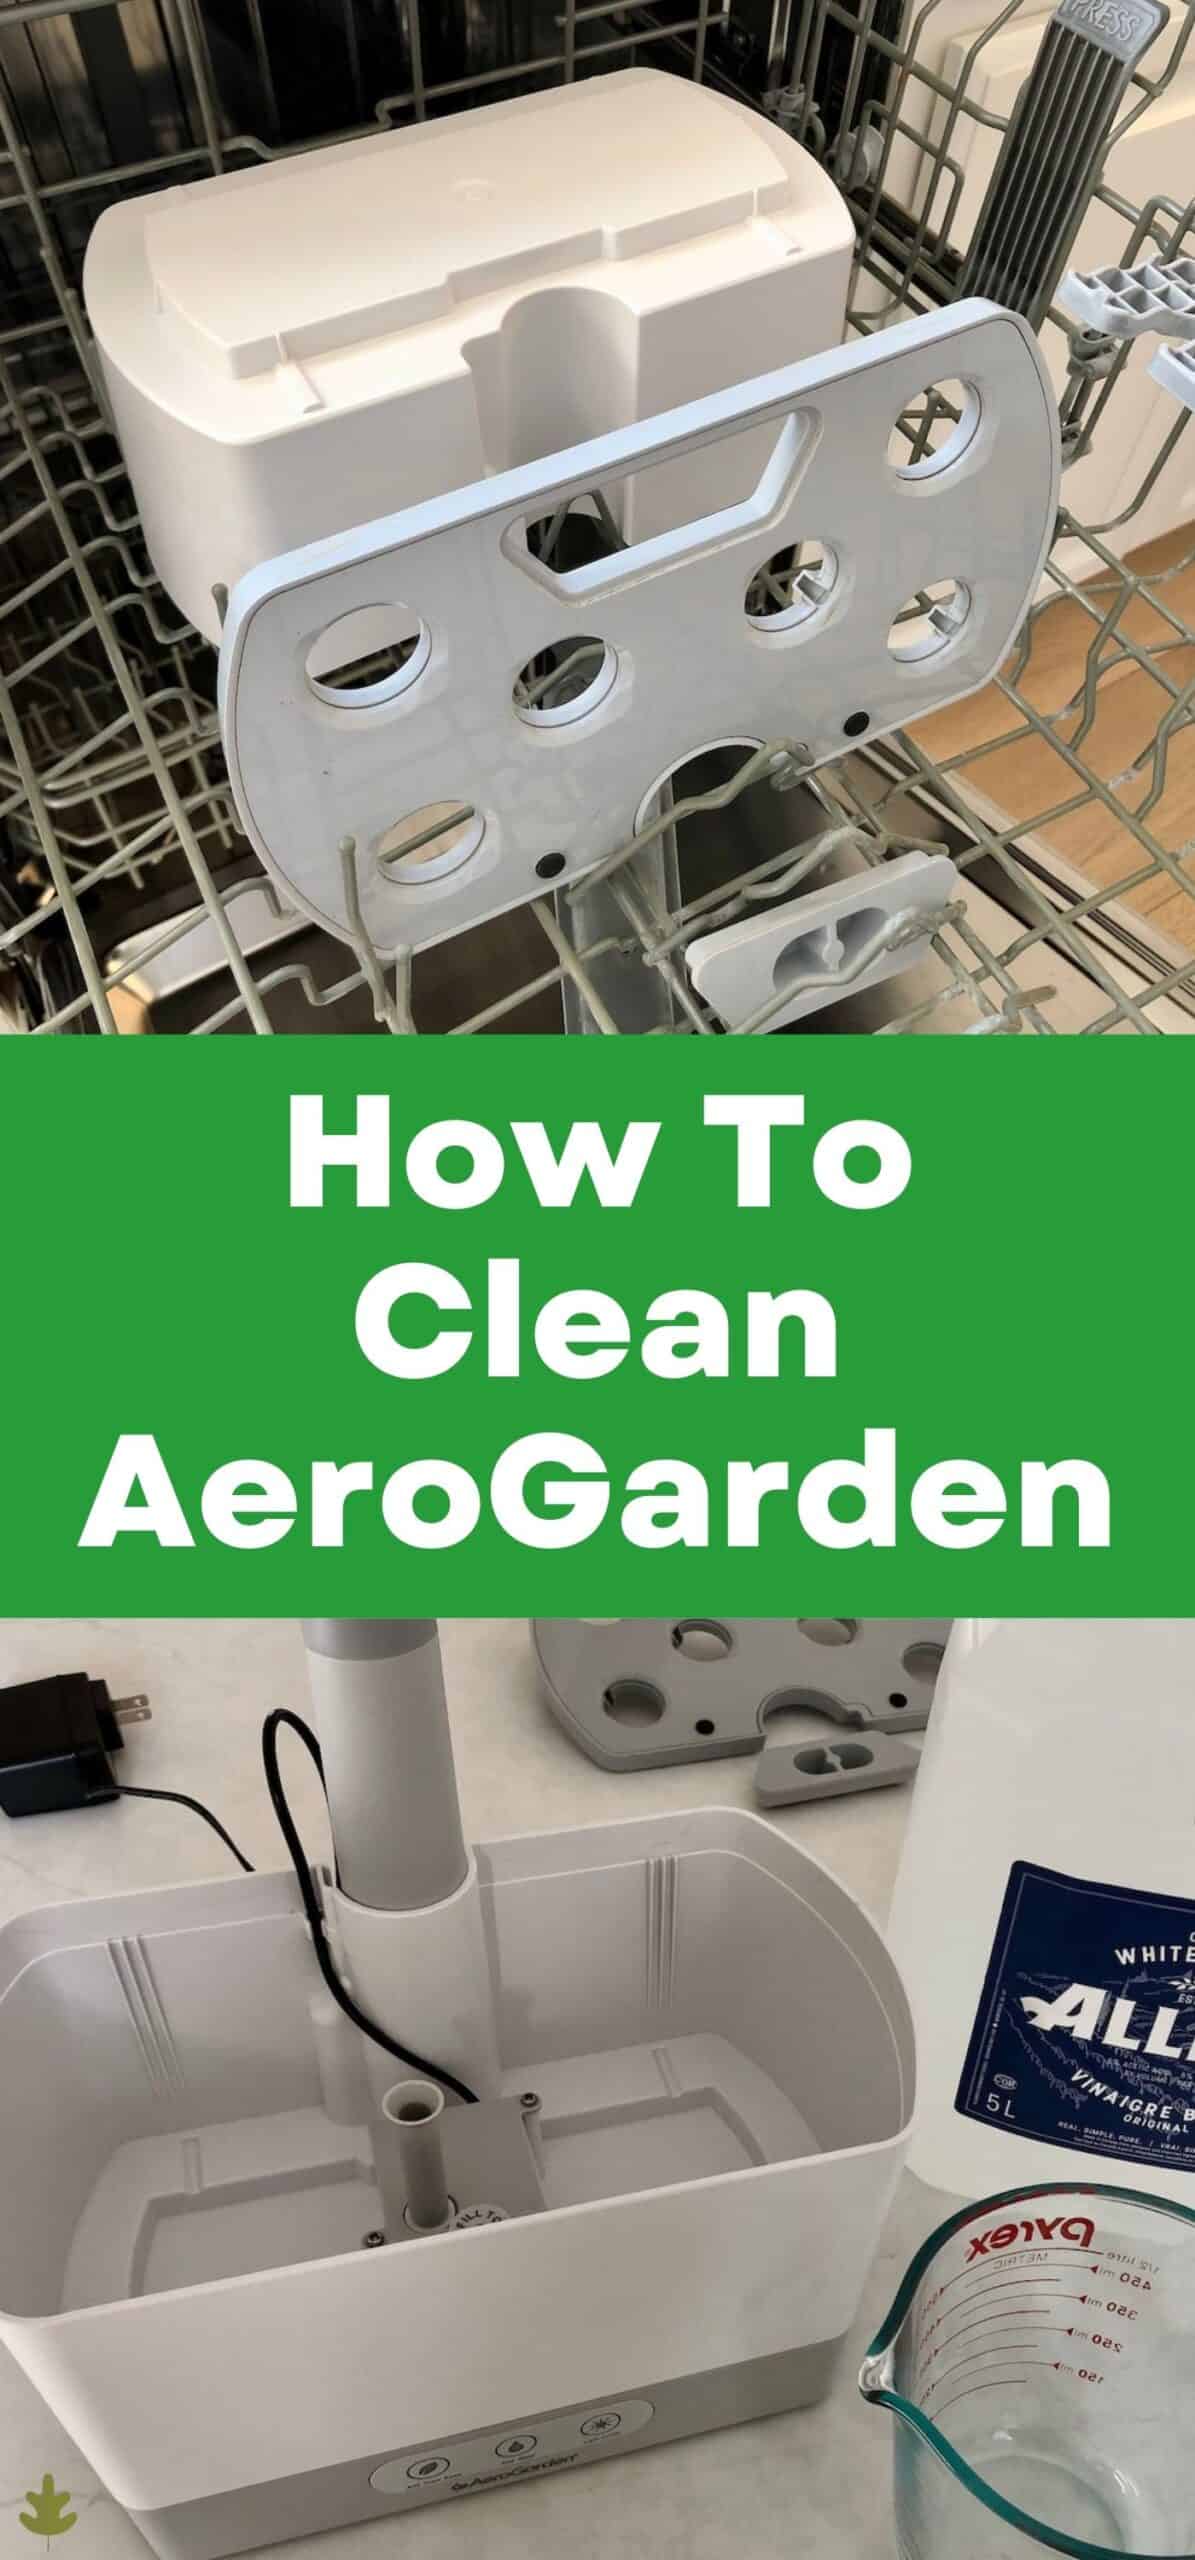
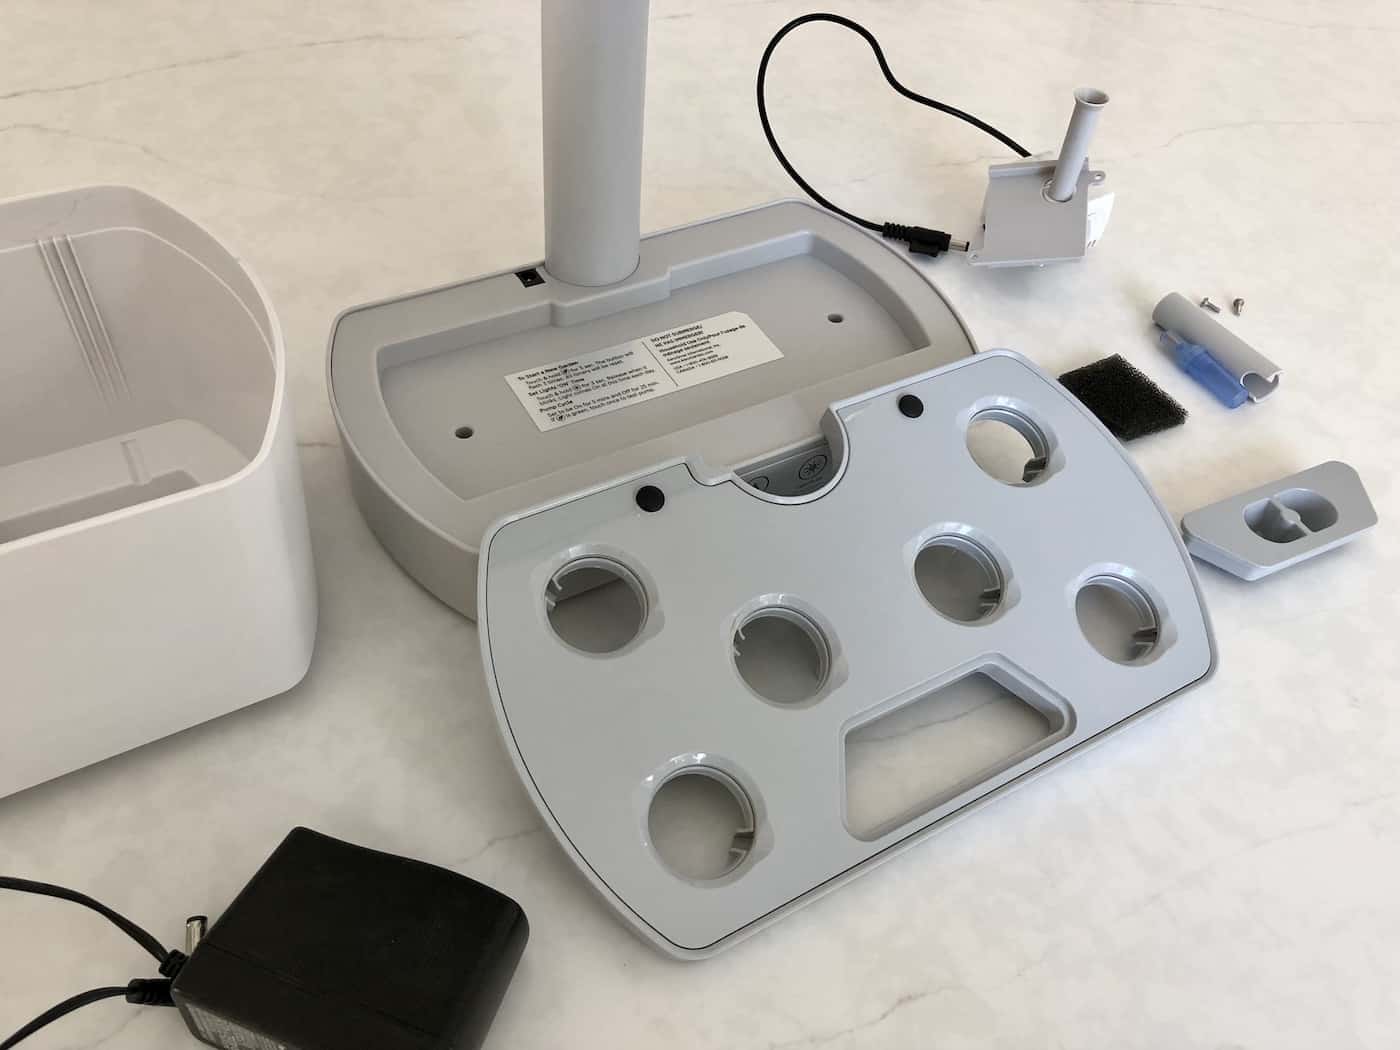
To clean an AeroGarden, start by disassembling the unit. Place the plastic non-electric parts in the dishwasher (top rack, cold-warm cycle only). Wash the pump filter sponge under warm running water to remove root debris. The remaining parts can be wiped clean.
Reassemble the unit and circulate a cleaning solution of vinegar, dilute bleach solution, or the manufacturer’s cleaner. Give the unit one last rinse, and it’s ready for its next planting. AeroGardens should be cleaned and sanitized between every planting, which usually occurs once every 3-4 months.
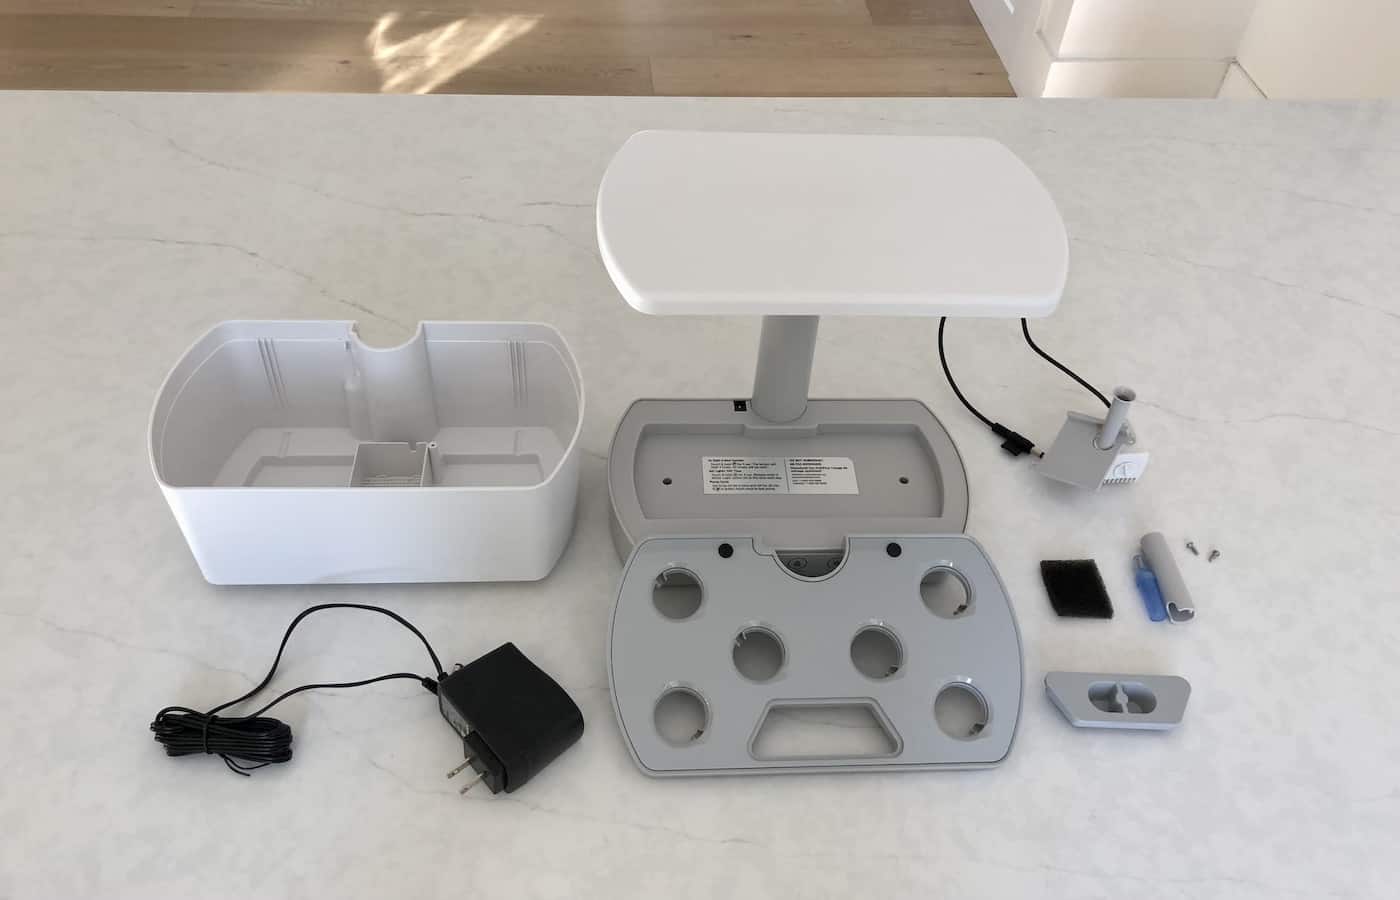
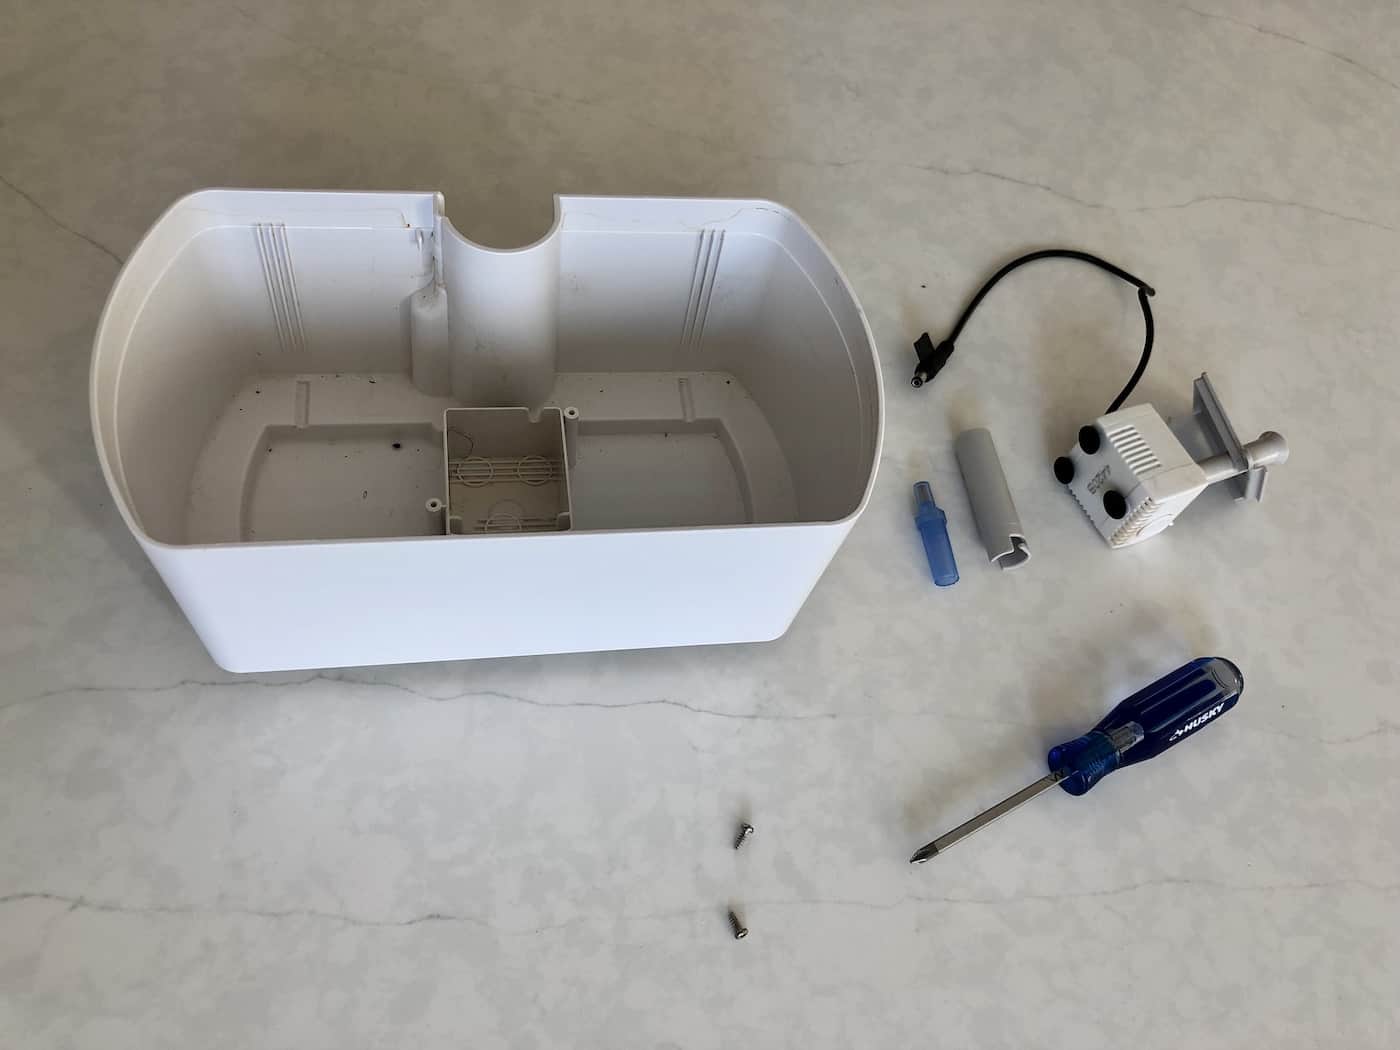
1. Dissasemble the AeroGarden
The first step in cleaning an AeroGarden is to disassemble the unit. Start by unplugging the unit and pulling out the plant pods. Each plant can either be transplanted into a planter or an outdoor garden bed, or the plants can be discarded into the compost.
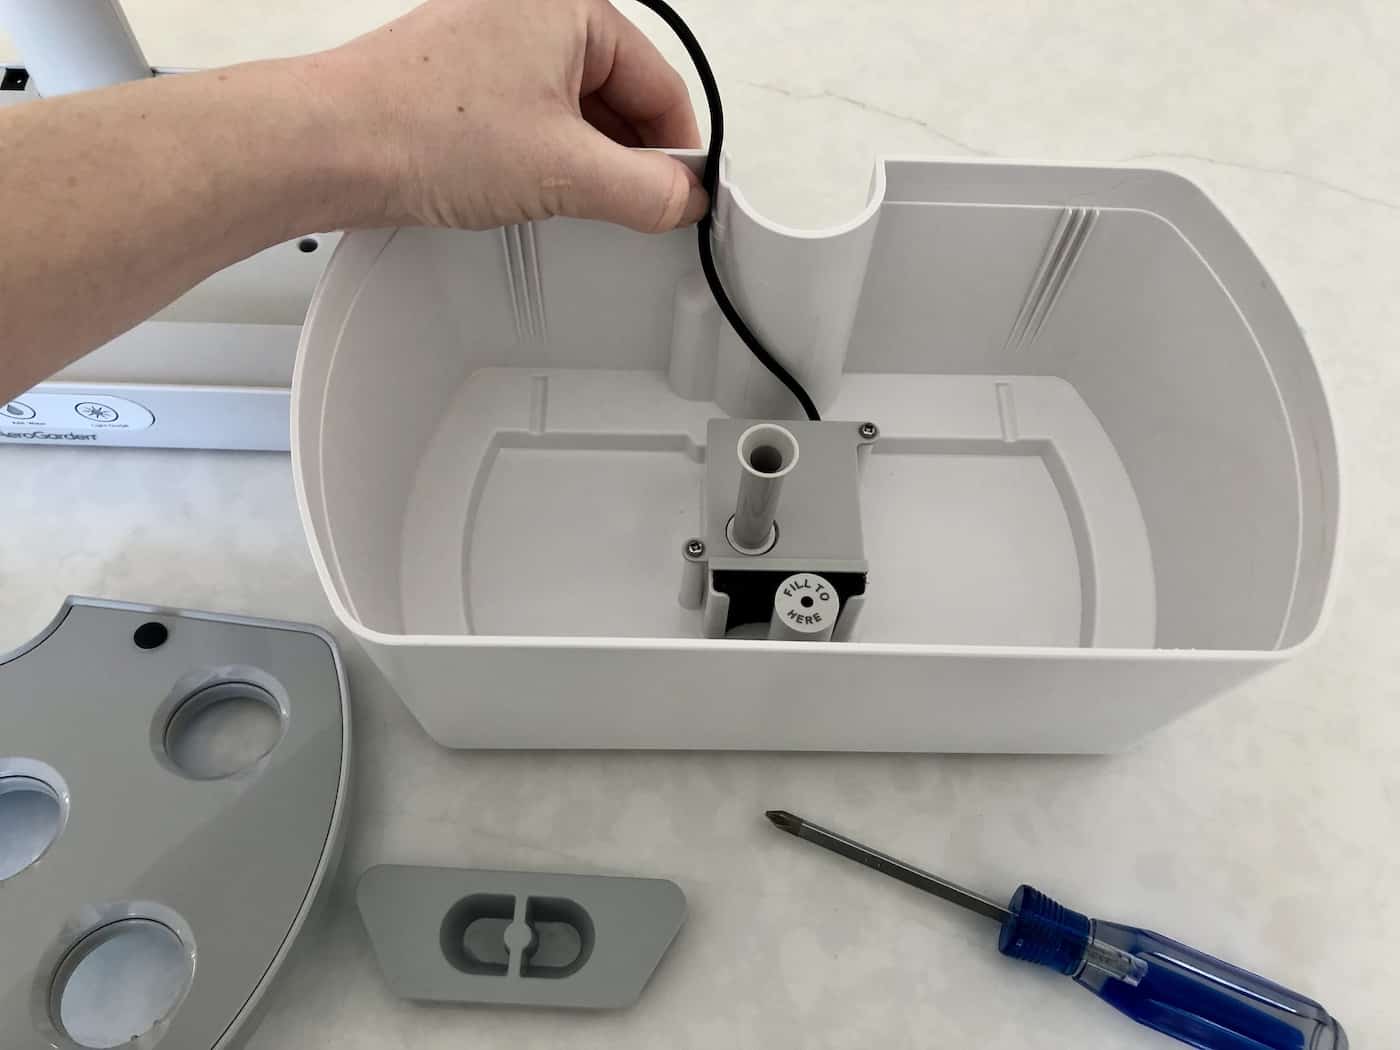
Pop the top deck off of the AeroGarden. Unplug the pump connection cord and pour the water out of the water tank bowl. There are often little bits of roots in the water, but hopefully minimal mold and algae. I like to give the bowl a quick wipe in the sink.
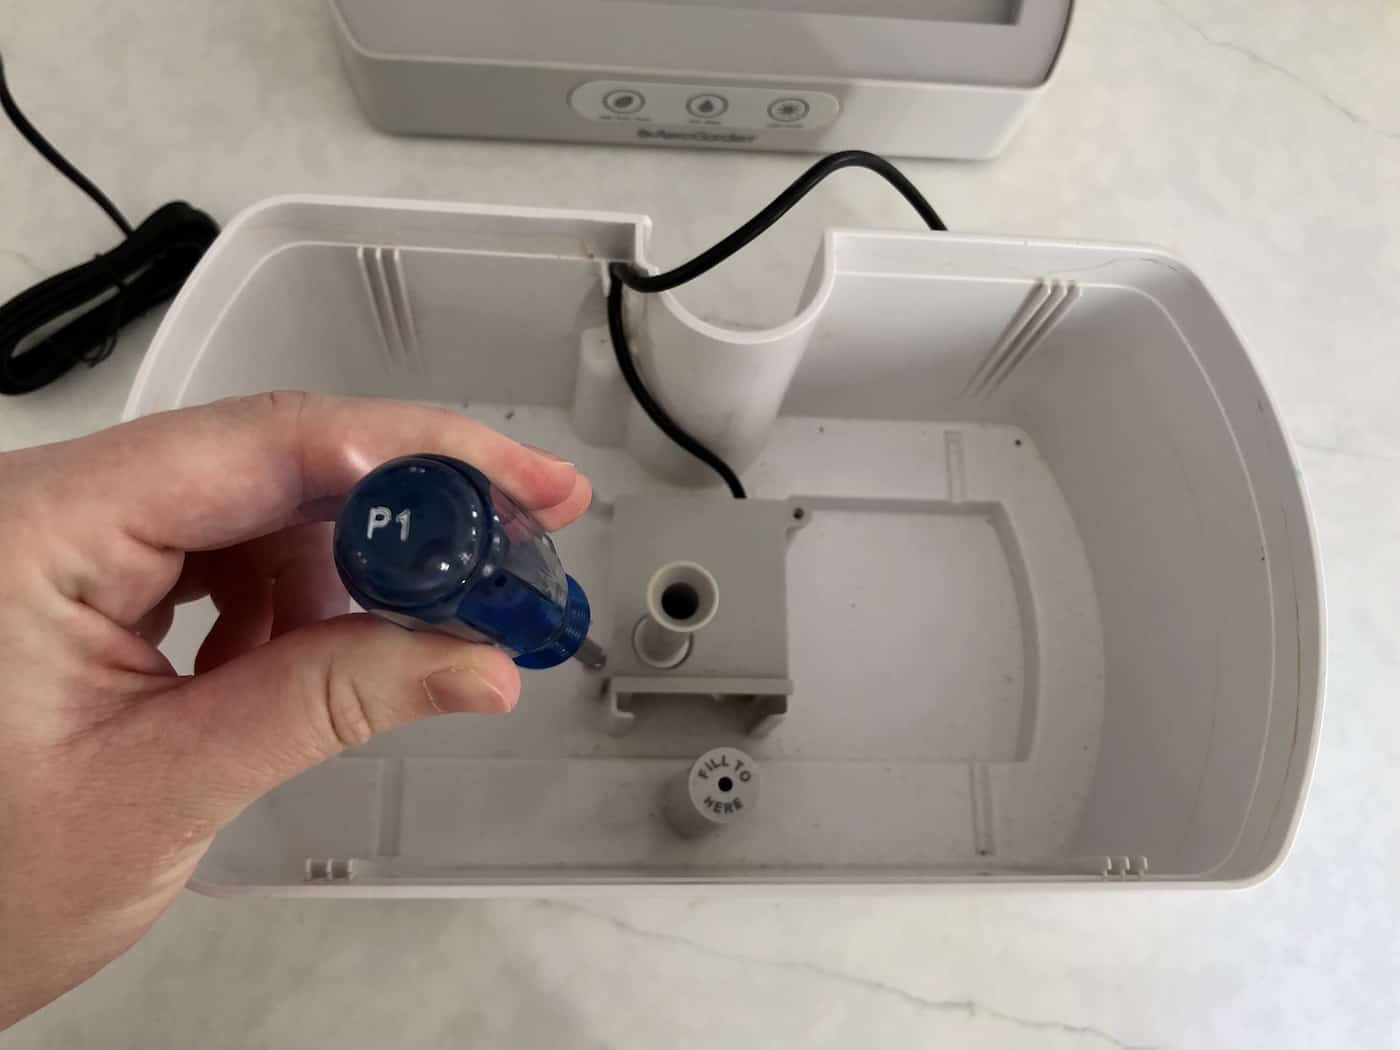
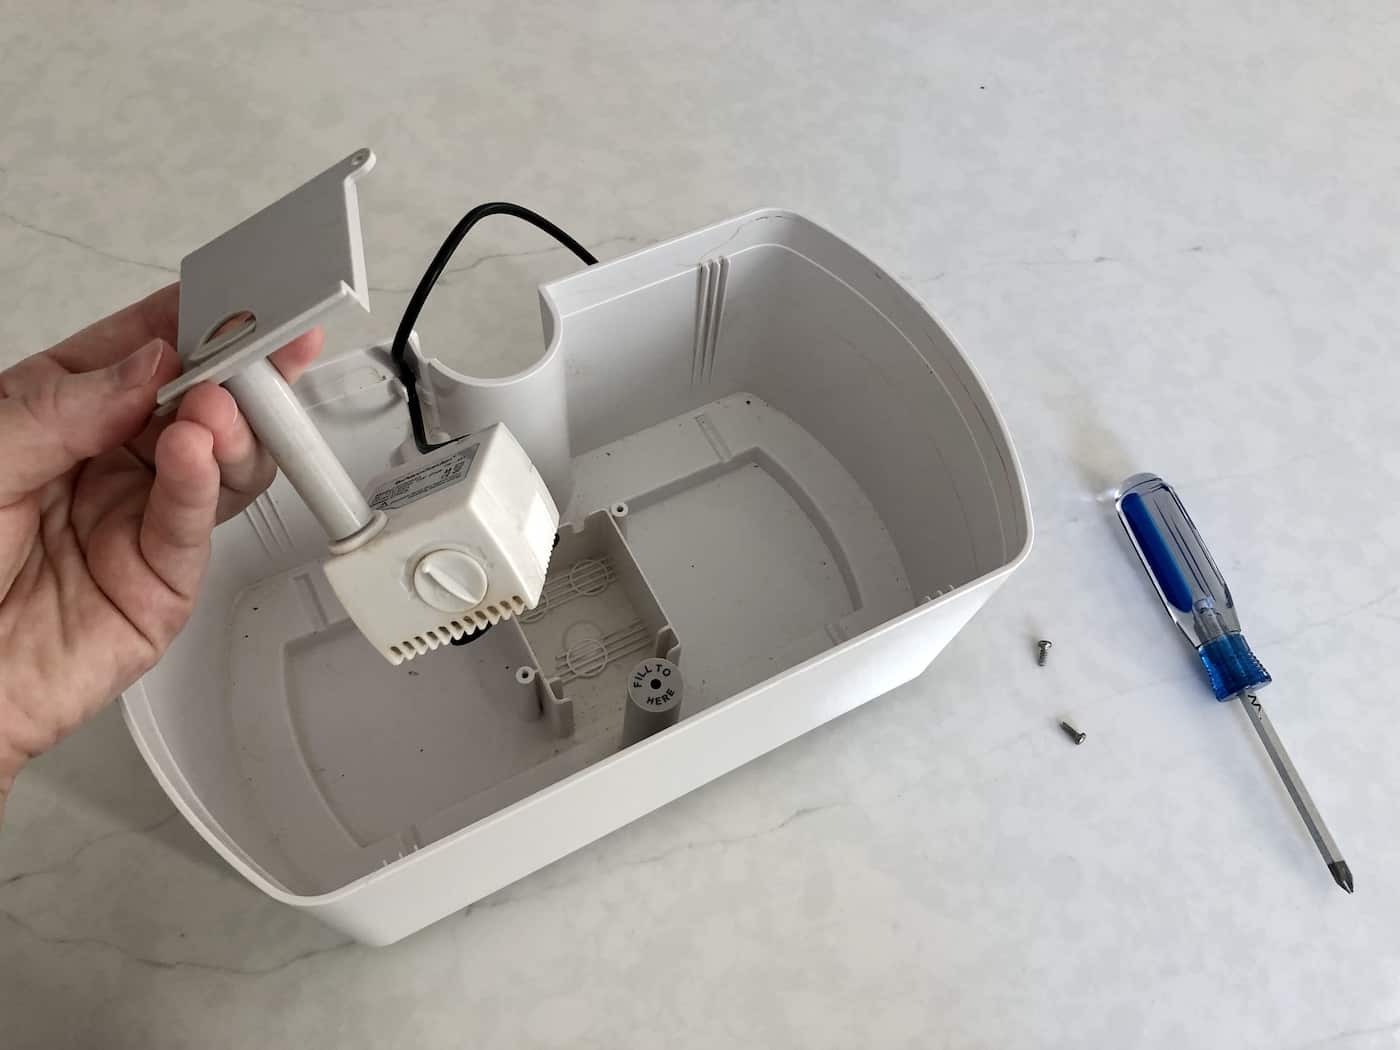
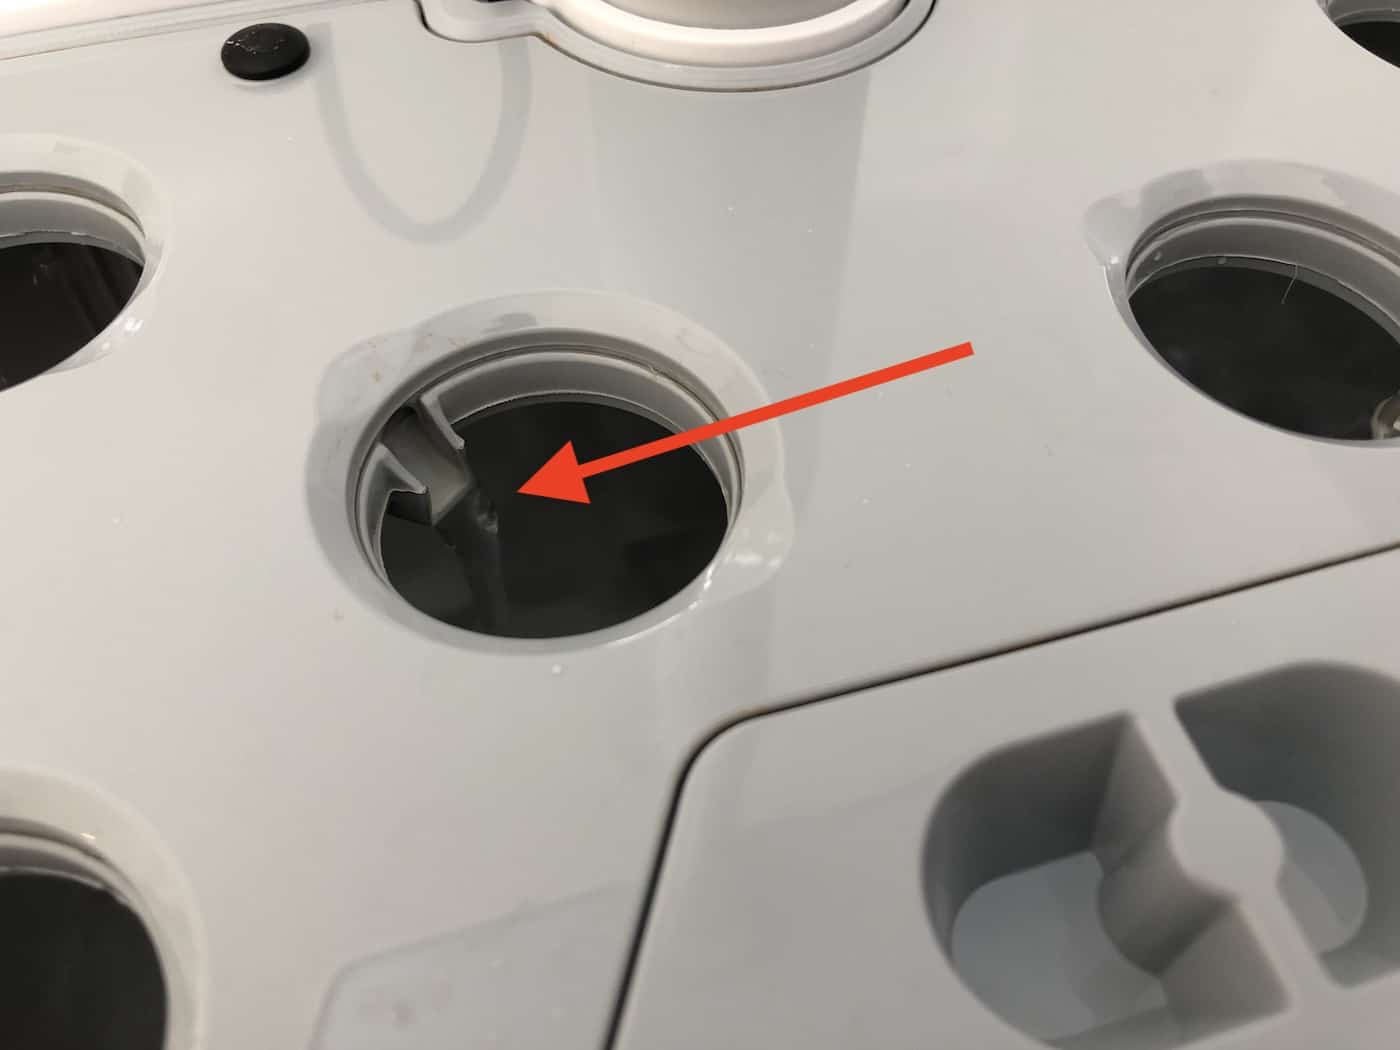
Now it’s time to remove the pump assembly from the water tank bowl. There are two small metal screws that hold the pump in its square plastic housing at the bottom of the tank. Using a Phillips #1 screwdriver, remove the screws. Then take the pump and its attached cord out of the water tank bowl and set it aside. You can also remove the water level indicator (look for the swivel tab at its base).
2. Clean each component
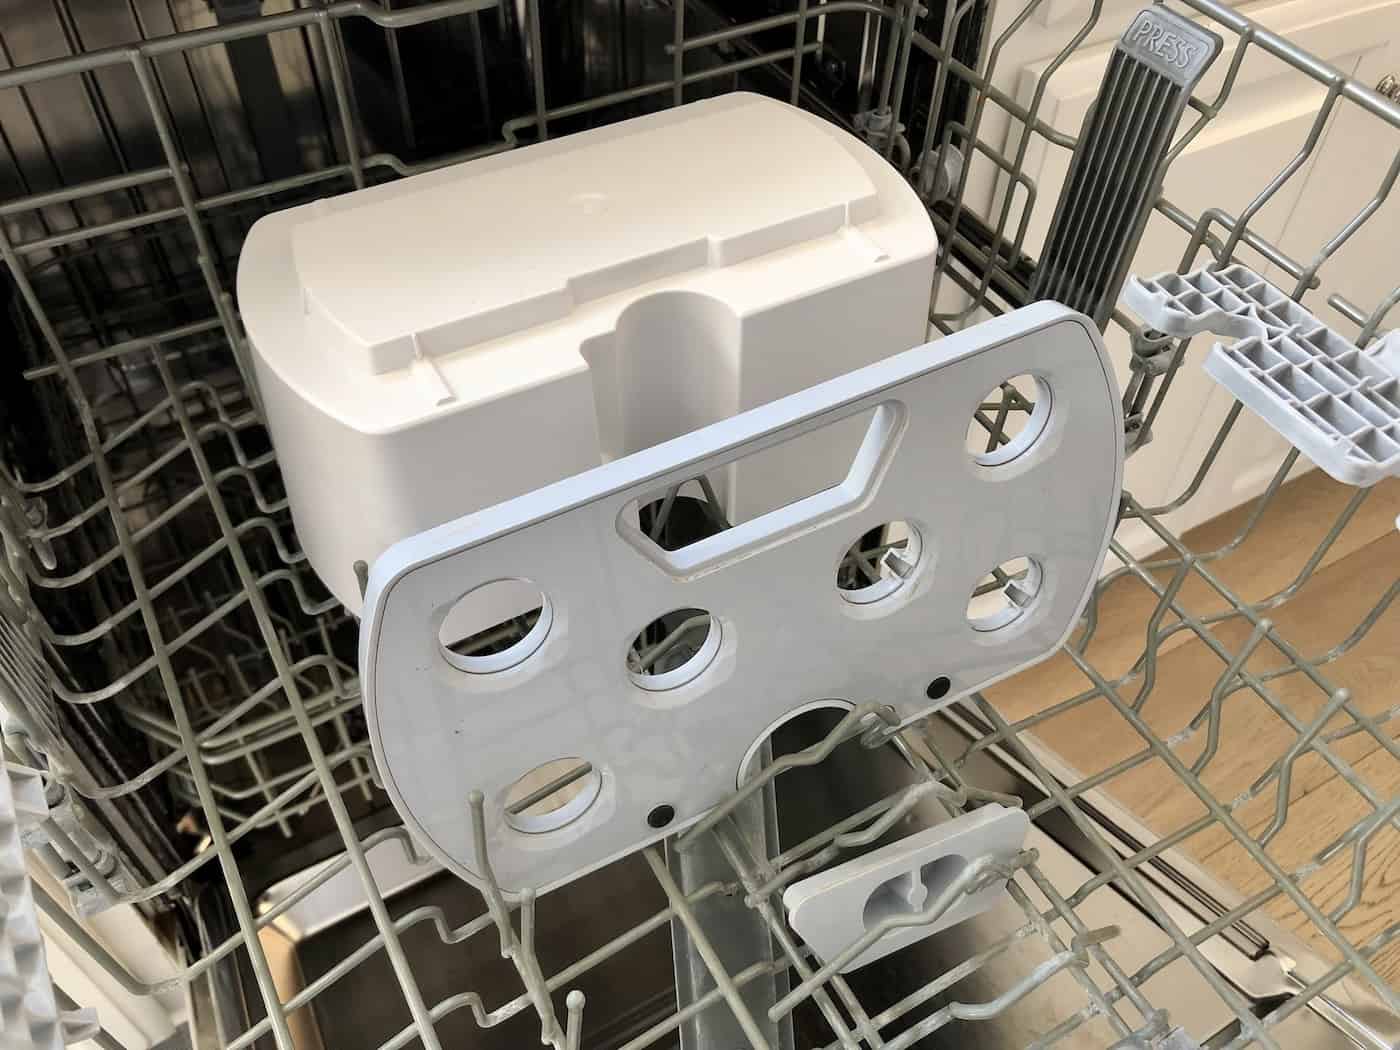
Each component can be cleaned separately now that the AeroGarden has been disassembled. Start by placing the top deck and the water reservoir bowl in the dishwasher on the top rack. Only wash the water bowl in the dishwasher if you have removed all the electric parts from the pump. Use a cold or warm cycle only, not a hot dishwasher setting.
Remove the black filter sponge from the pump assembly. Wash it under warm running water with a bit of soap. Roots often grow into the sponge, but they can usually be mostly removed under the tap. If the filter sponge is starting to rip or develop weak spots/holes, it’s time to replace it so that fibers don’t pass through it and damage the pump. The manufacturer recommends replacing the filter every other time you plant a new garden (about twice a year).
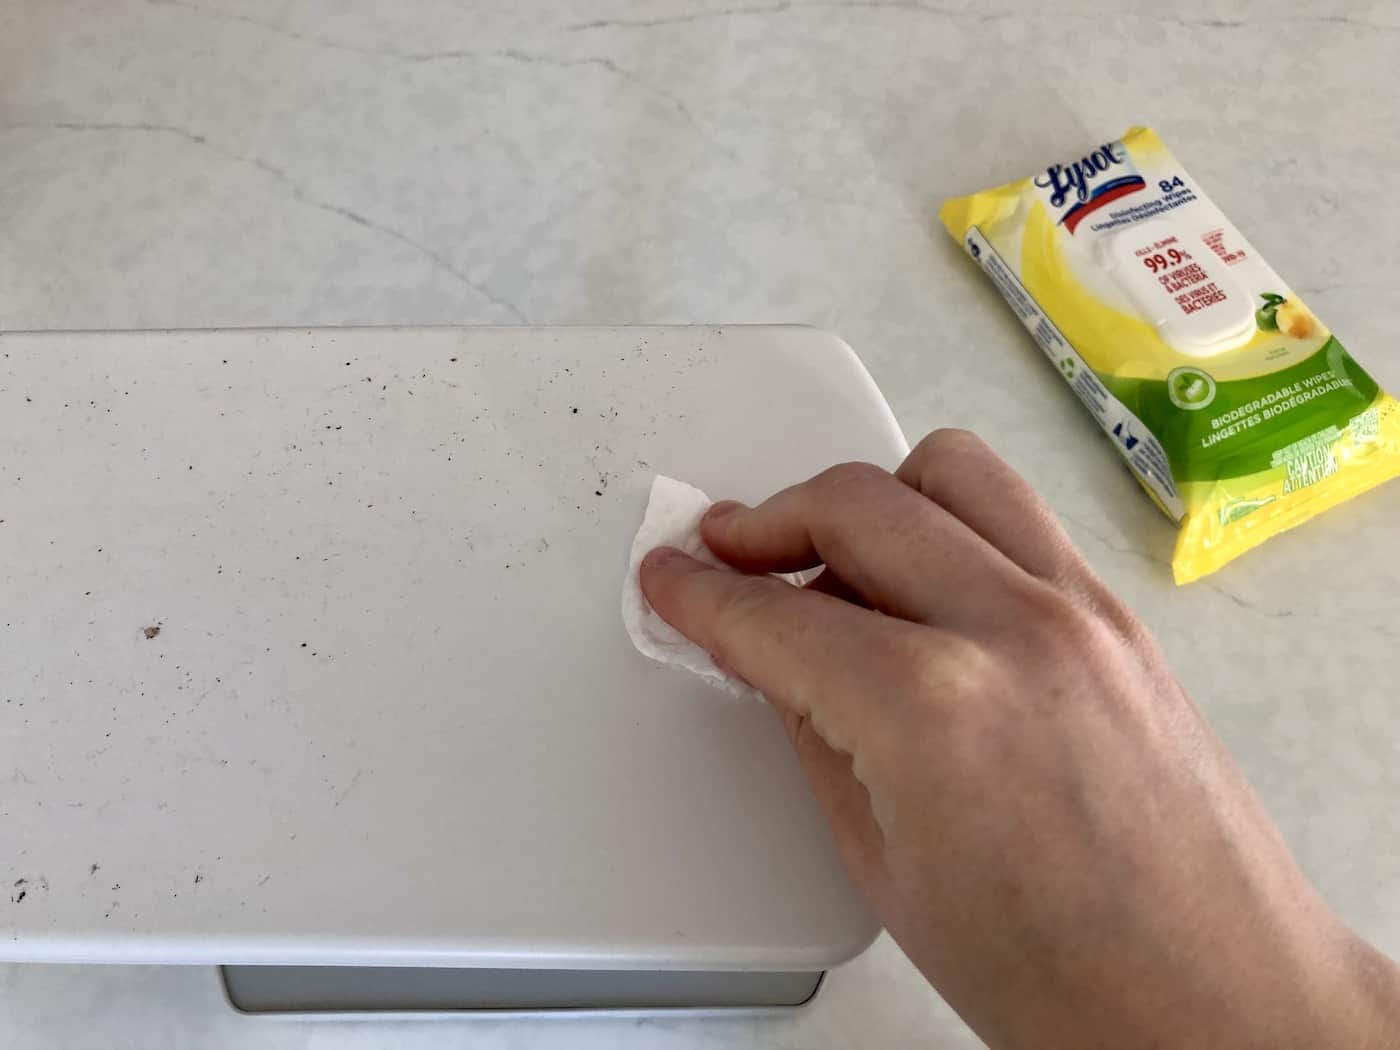
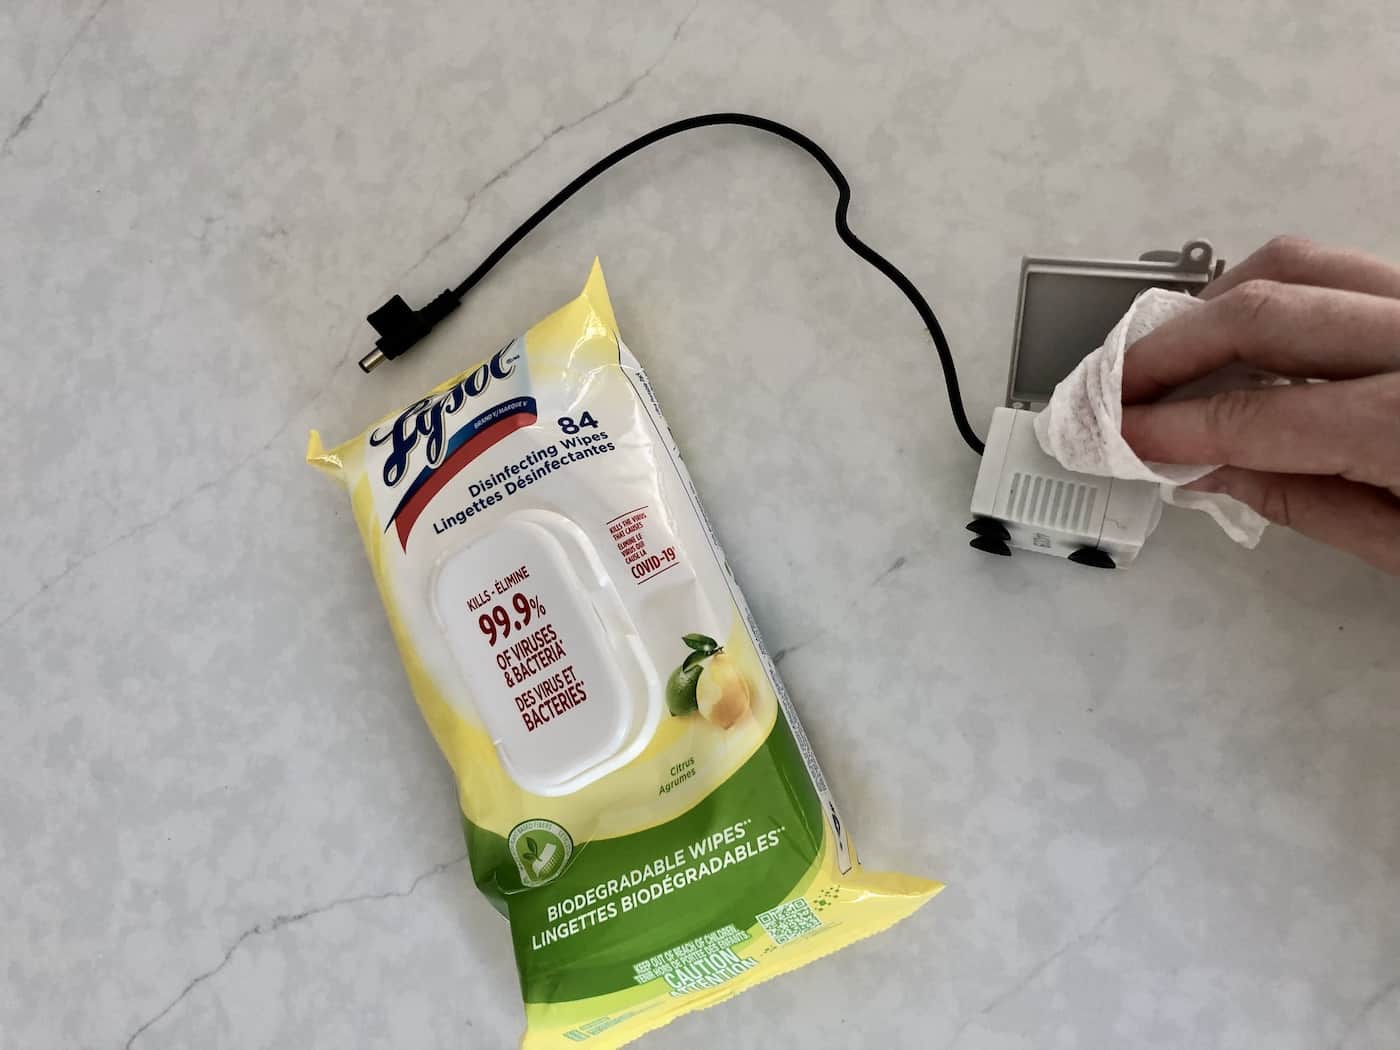
The remaining components can be wiped clean with a slightly damp cloth or a cleaning wipe. Just wipe the plastic outer area like the top of the lamp, the lamp arm, the plain surfaces on the base plate, and the plain sides of the pump assembly. Don’t wipe any electrical components, such as where any cords plug into the unit.
3. Circulate a cleaning solution
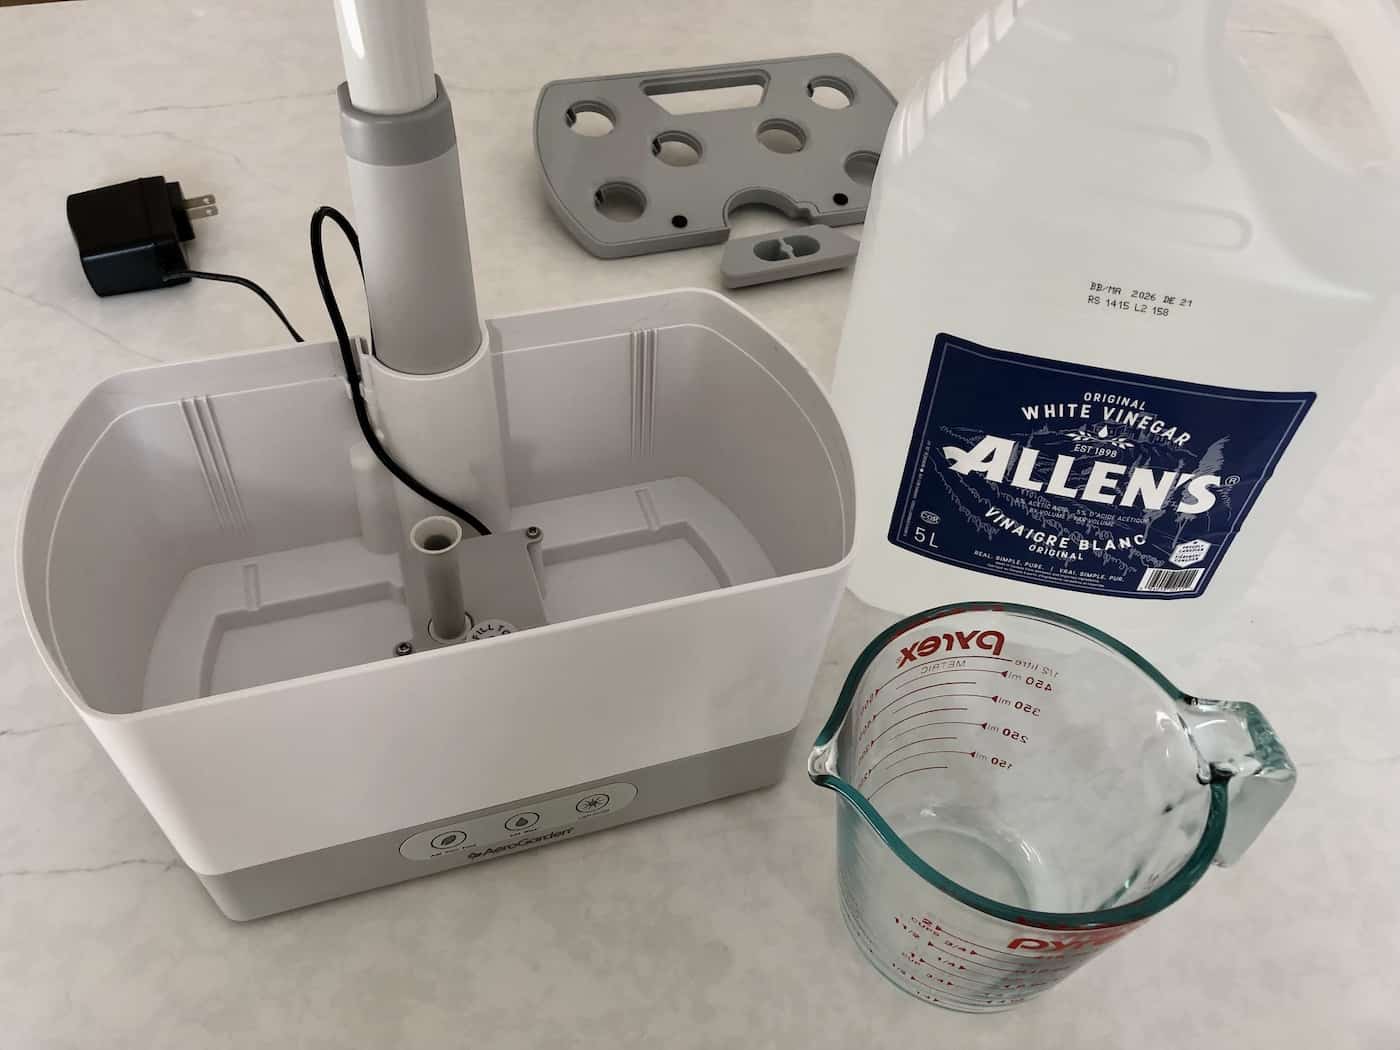
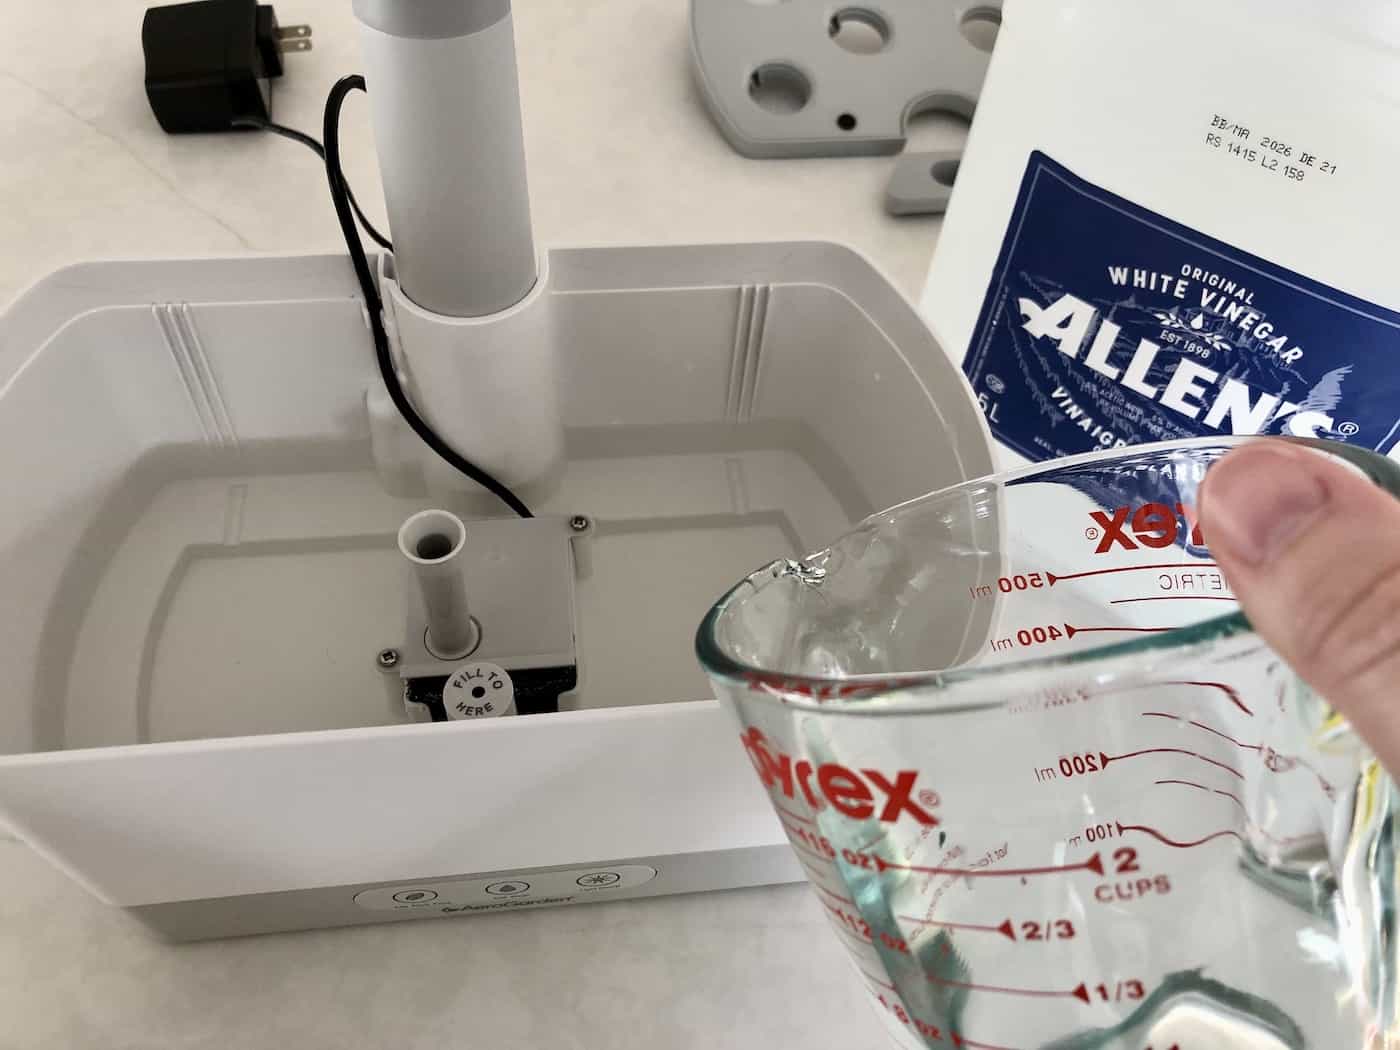
The next step is to circulate a cleaning solution through the system to clean the inner parts of the pump. Start by reassembling all the cleaned components, including replacing the pump assembly, screwing in the two small attachment screws, and plugging in the connecting cord between the pump and the base. Once the unit is fully reassembled, leave it unplugged from the electrical outlet.
There are three choices for a cleaning solution (use one type only):
- Vinegar: 5 Cups of Vinegar* (use distilled white vinegar) *also cleans mineral deposits
- Bleach: Fill the bowl with water and add ¼ cup of chlorine bleach
- AeroGarden Hydroponic No-Rinse Cleanser: oxygen-based proprietary cleaning agent
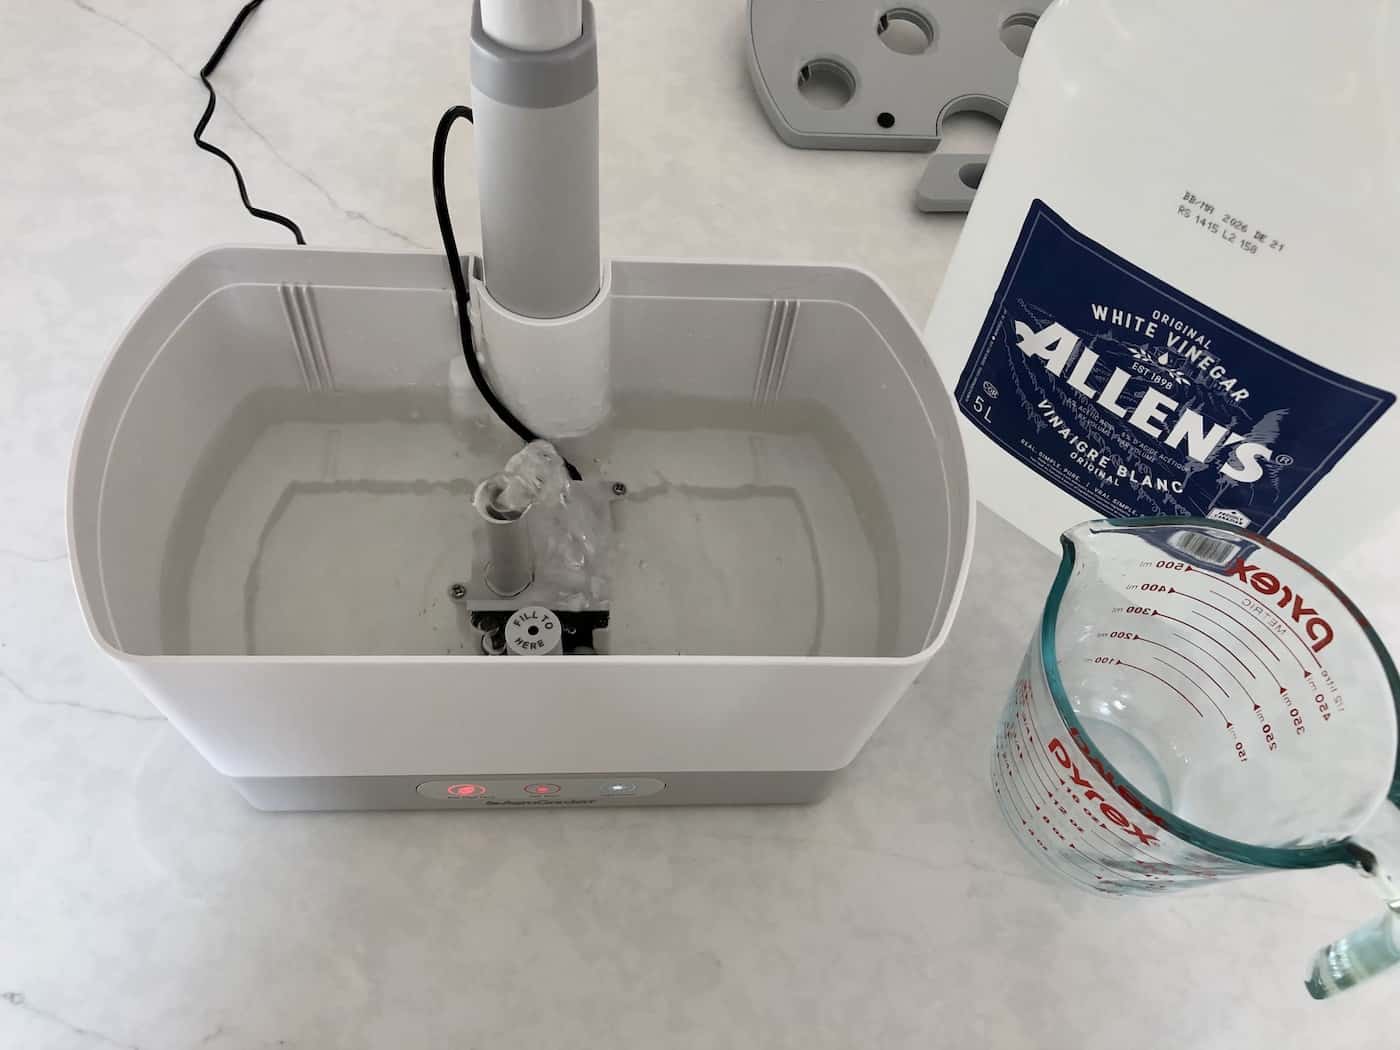
If using vinegar or a bleach solution, let the system circulate the cleaning solution for one 5-minute cycle to kill any pathogens/algae/mold inside the pump assembly. Then empty the bleach solution, rinse out the bowl, and refill the bowl with fresh, clean water. Plug the unit it and circulate the fresh water for one 5-minute cycle to rinse out the pump system. Then empty this water and give the bowl one last rinse to remove leftover traces of cleaning solution. The garden system is now clean and ready for the next planting.
If using AeroGarden’s No-Rinse Cleanser, start by adding clean, fresh water to the water tank bowl up to the fill line on the water level indicator. Then follow the instructions on the package label to add the appropriate amount of cleaner to the water. Plug the unit in and run the cleaning solution through the AeroGarden overnight (or at least for 2-3 hours). Then empty out the water bowl and discard the cleaning solution. No rinsing is required with this oxygen-based cleaner. The system is now ready for planting new seed pods.
How often to clean Aerogarden smart gardens
AeroGarden indoor garden systems should be thoroughly cleaned between every planting. This usually translates to a deep clean every 3-4 months or 3-4 times per year. You may also want to replace the pump filter sponge during every other cleaning (generally every 6-8 months or about twice per year).
How to clean Aerogarden with plants in it
While AeroGardens are generally cleaned between plantings, there may be occasions when you’d like to clean the AeroGarden with plants in it. This can happen if the system is filled with contaminated water, leading to mold or algae growth. Cleaning the AeroGarden while planting is growing is easiest if you remove the plants from the system, do your cleaning, and then replace the plants.
Start by raising up the light arm as high as possible to get the lamp out of the way. Fill a basin or sink with clean, fresh water. Remove the entire top deck with the plants still in their slots if possible. Prop the deck up in the basin (I use chopsticks) so that the roots hang in the water but the grow deck still holds the pods at the top. Then do your cleaning work, rinse the reservoir, and replace the plants with fresh clean water.