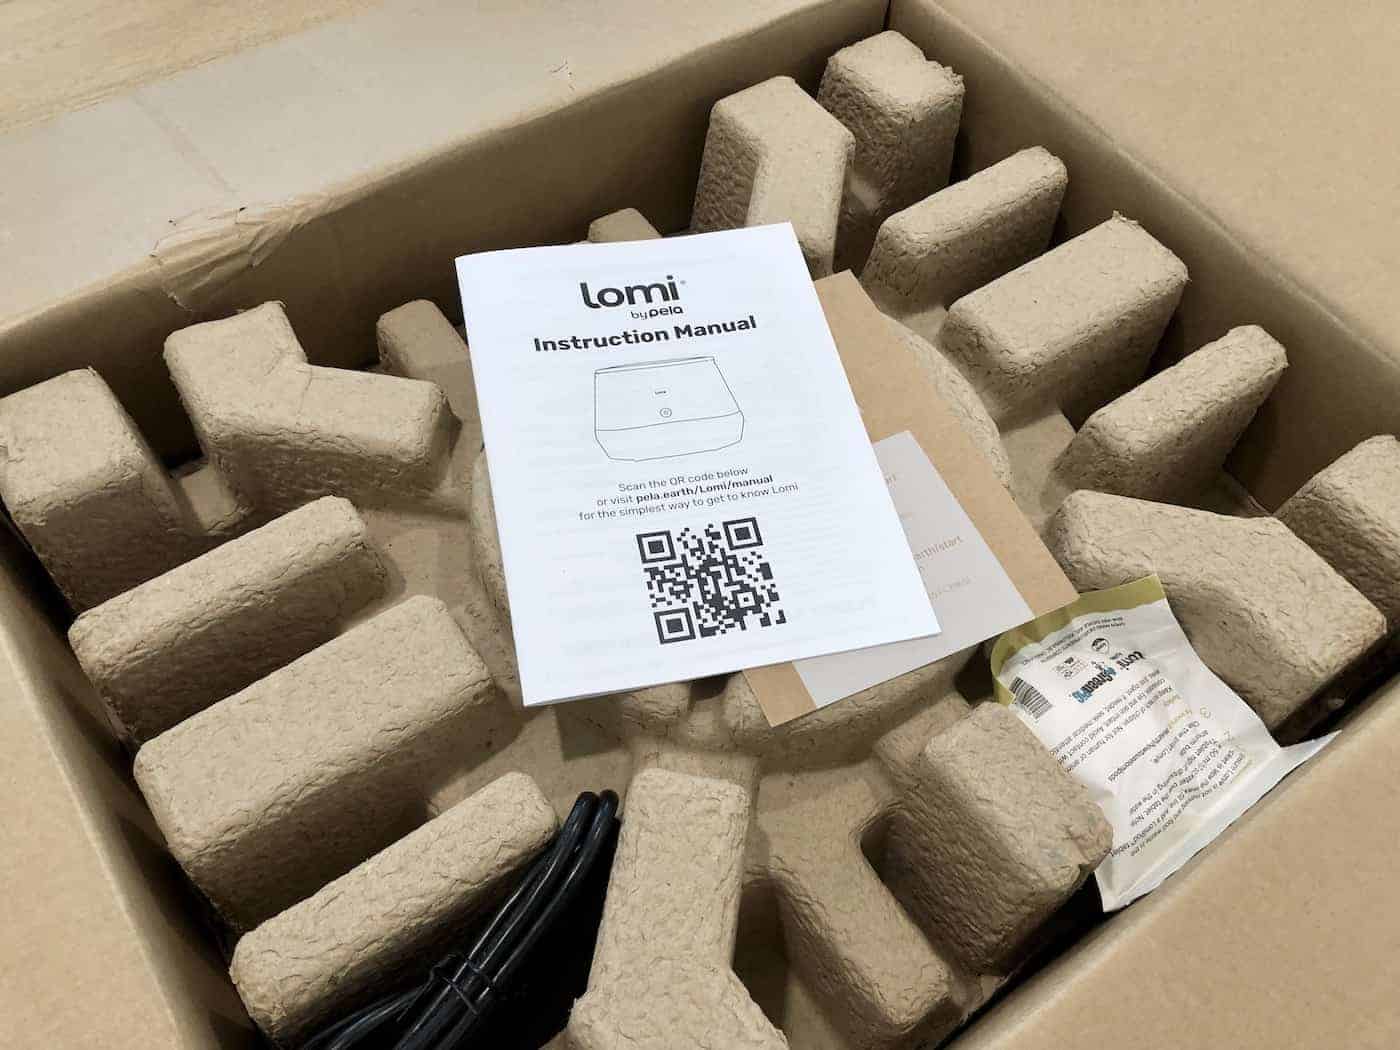
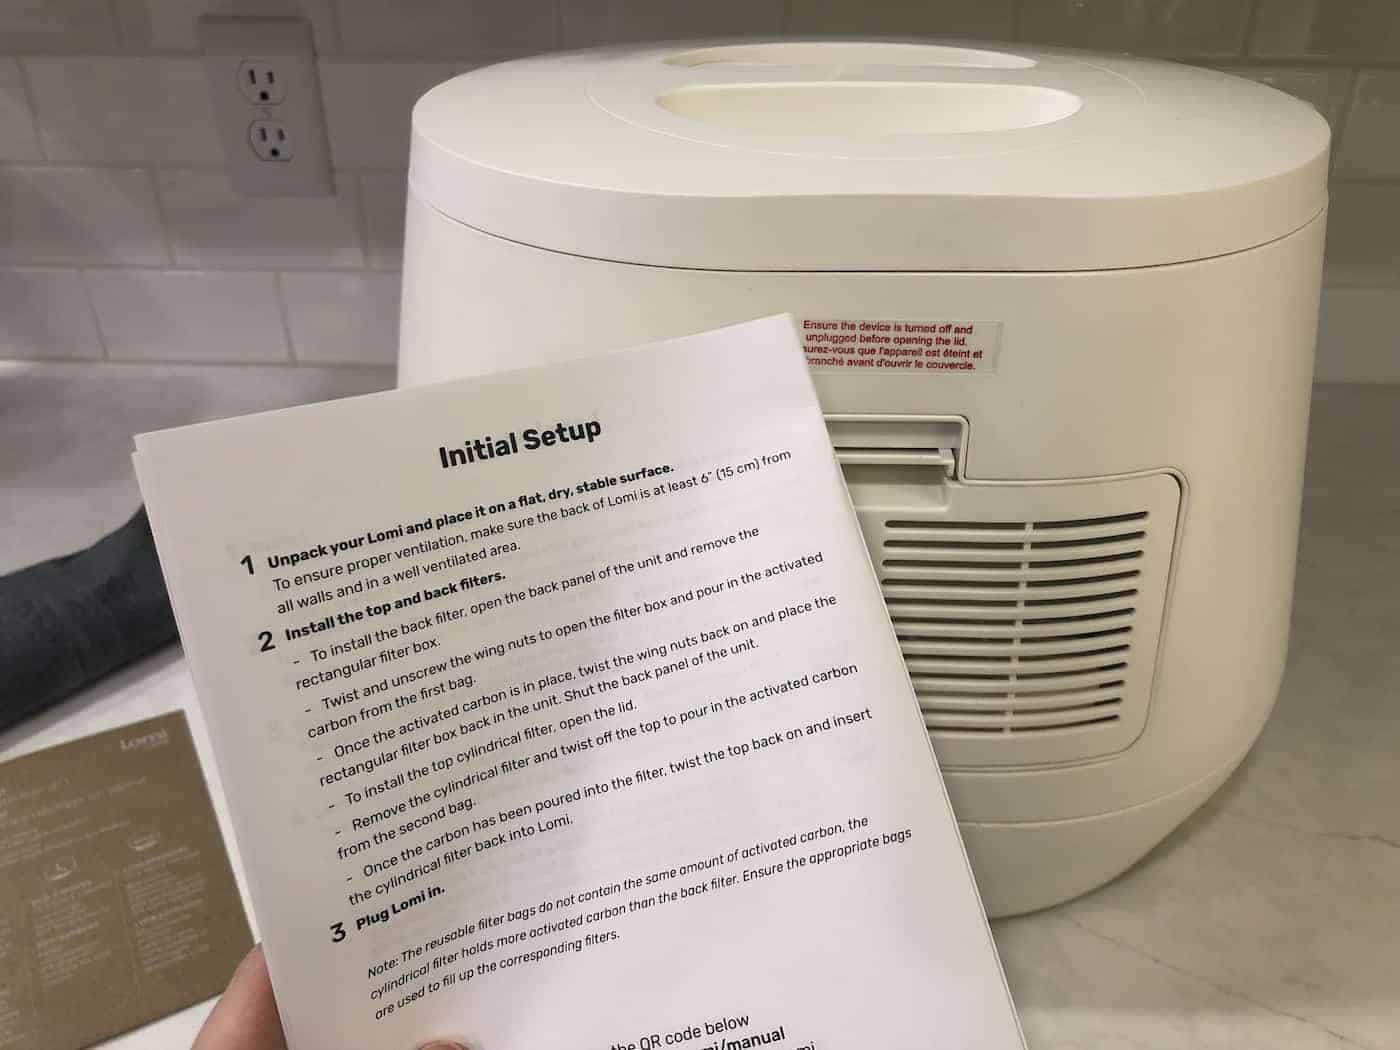
Start setting up your new Lomi by removing all the parts from the box. Place the main unit on a dry, flat, stable surface. Open the back vent of the unit, remove the rectangular filter, and fill it with the included charcoal bits. Then, take off the lid to access the top filter, which can also be removed and filled with charcoal bits.
Once both filters are back in place, attach the electrical cord. The Lomi bucket can then be filled with food waste for its first composting cycle.
Disclosure: This Lomi unit was gifted to me by Pela, the manufacturer of Lomi.
Step 1: Unbox the Lomi unit & parts
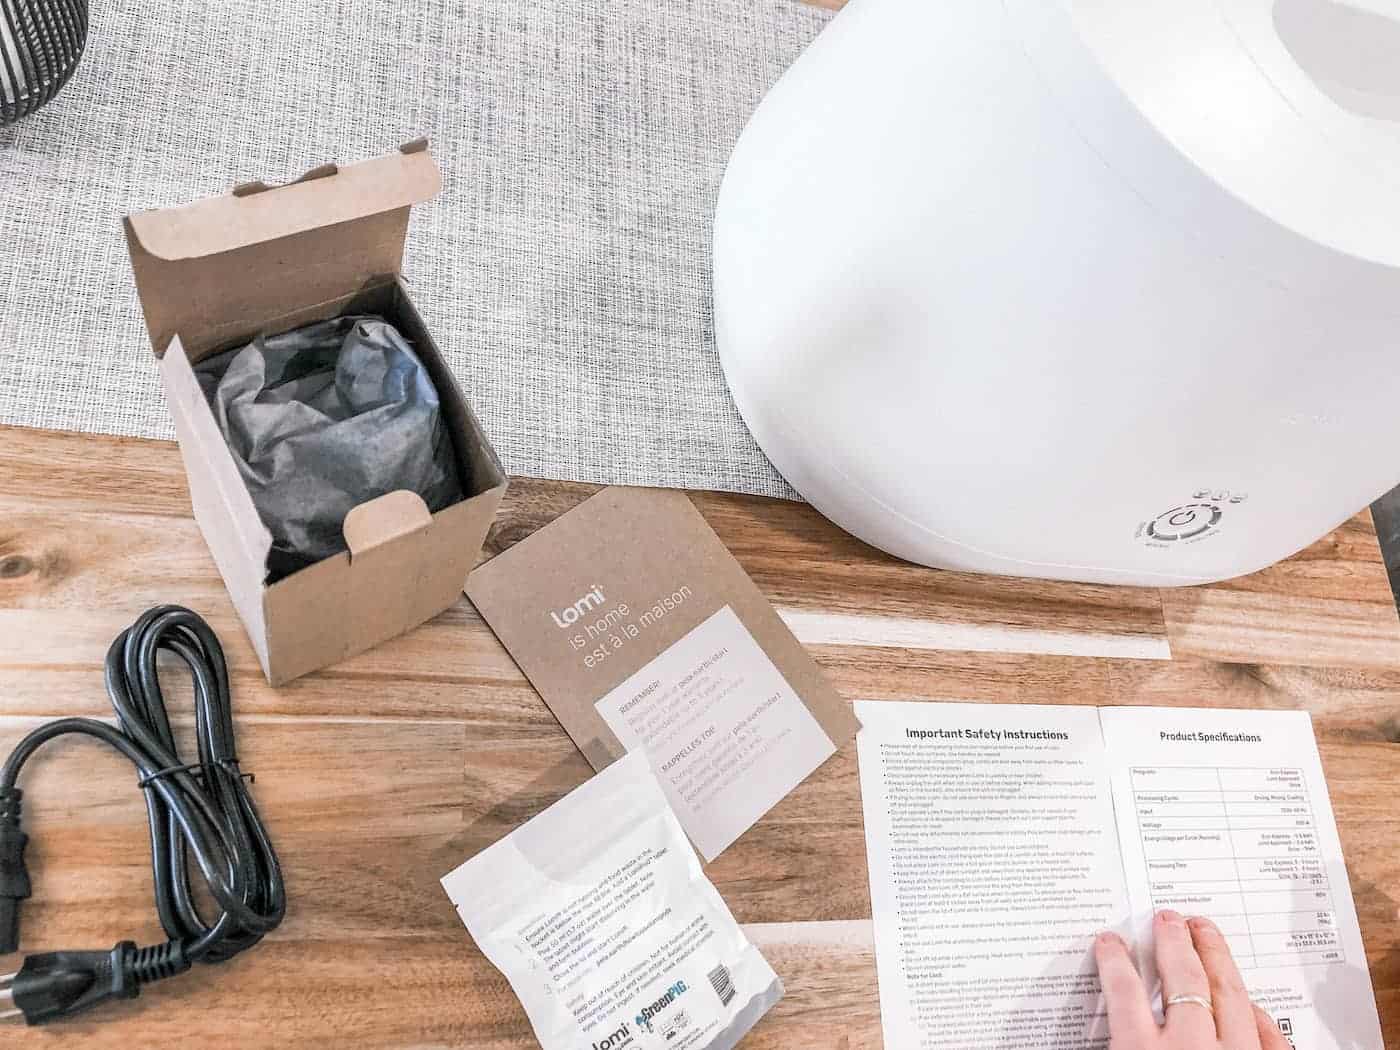
Start by unpacking the main Lomi unit and all the parts, accessories, and documentation. Right out of the box, the main Lomi unit is largely assembled. Only the electrical cord is not yet attached. Inside the unit, the air filters are in place but are not yet filled with activated charcoal.
The Lomi box includes two bags of activated charcoal bits for filling the two filters. The box also includes a package of LomiPods. The LomiPods are not part of the initial setup and are instead added one by one to the bucket prior to each cycle.
Step 2: Place the Lomi unit on a flat surface
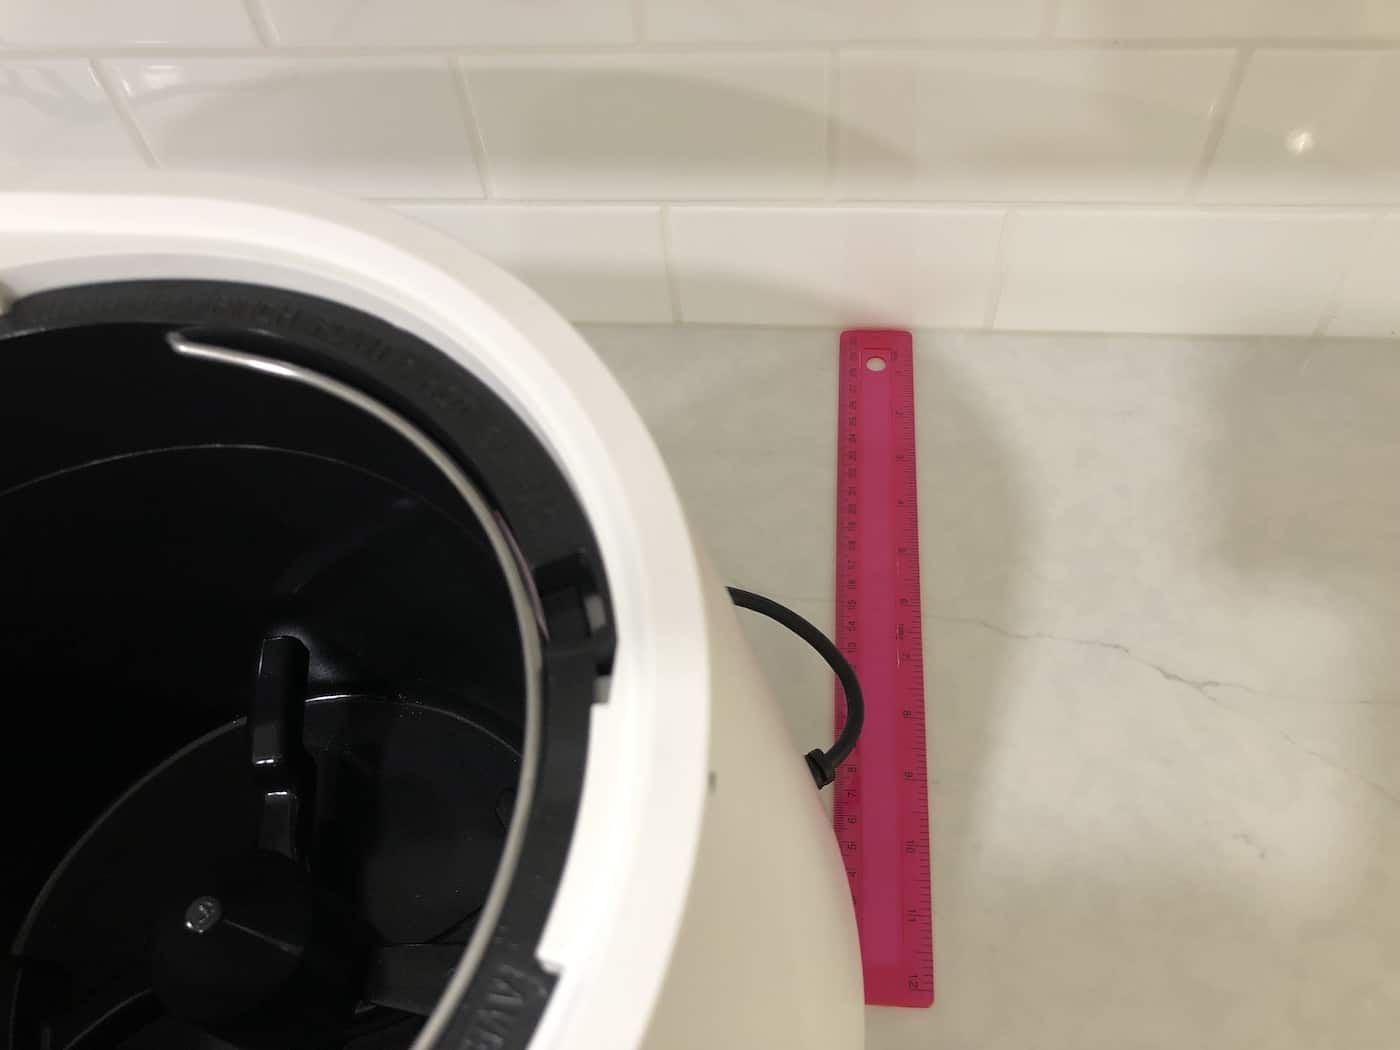
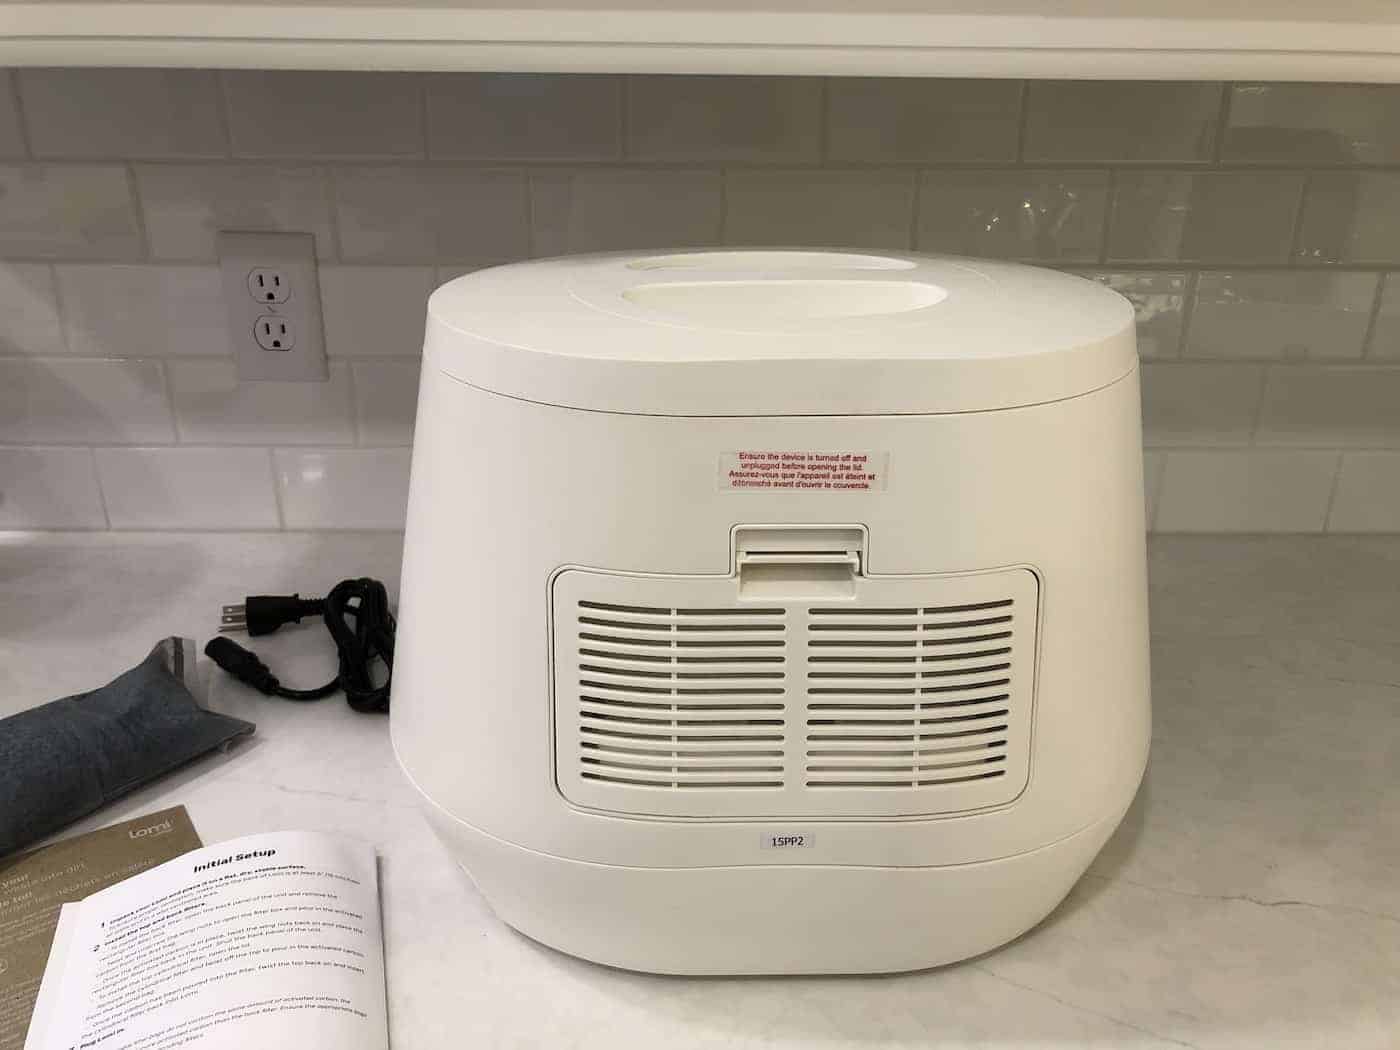
After unboxing, place the main Lomi unit on a flat, dry, stable surface near an electrical outlet. You can place it on the kitchen counter, on the counter in a laundry room or mudroom, or in another similar indoor location with a flat/dry/stable surface.
The back of the Lomi unit should not be up against a wall, as there is a vent that requires good air circulation. The back of the Lomi unit should be at least 6″ (15 cm) from walls or other hard surfaces. The unit should only be operated in an open, well-ventilated area. Do not plug in the Lomi unit yet. Read more about the unit and how it works in this Lomi Overview article.
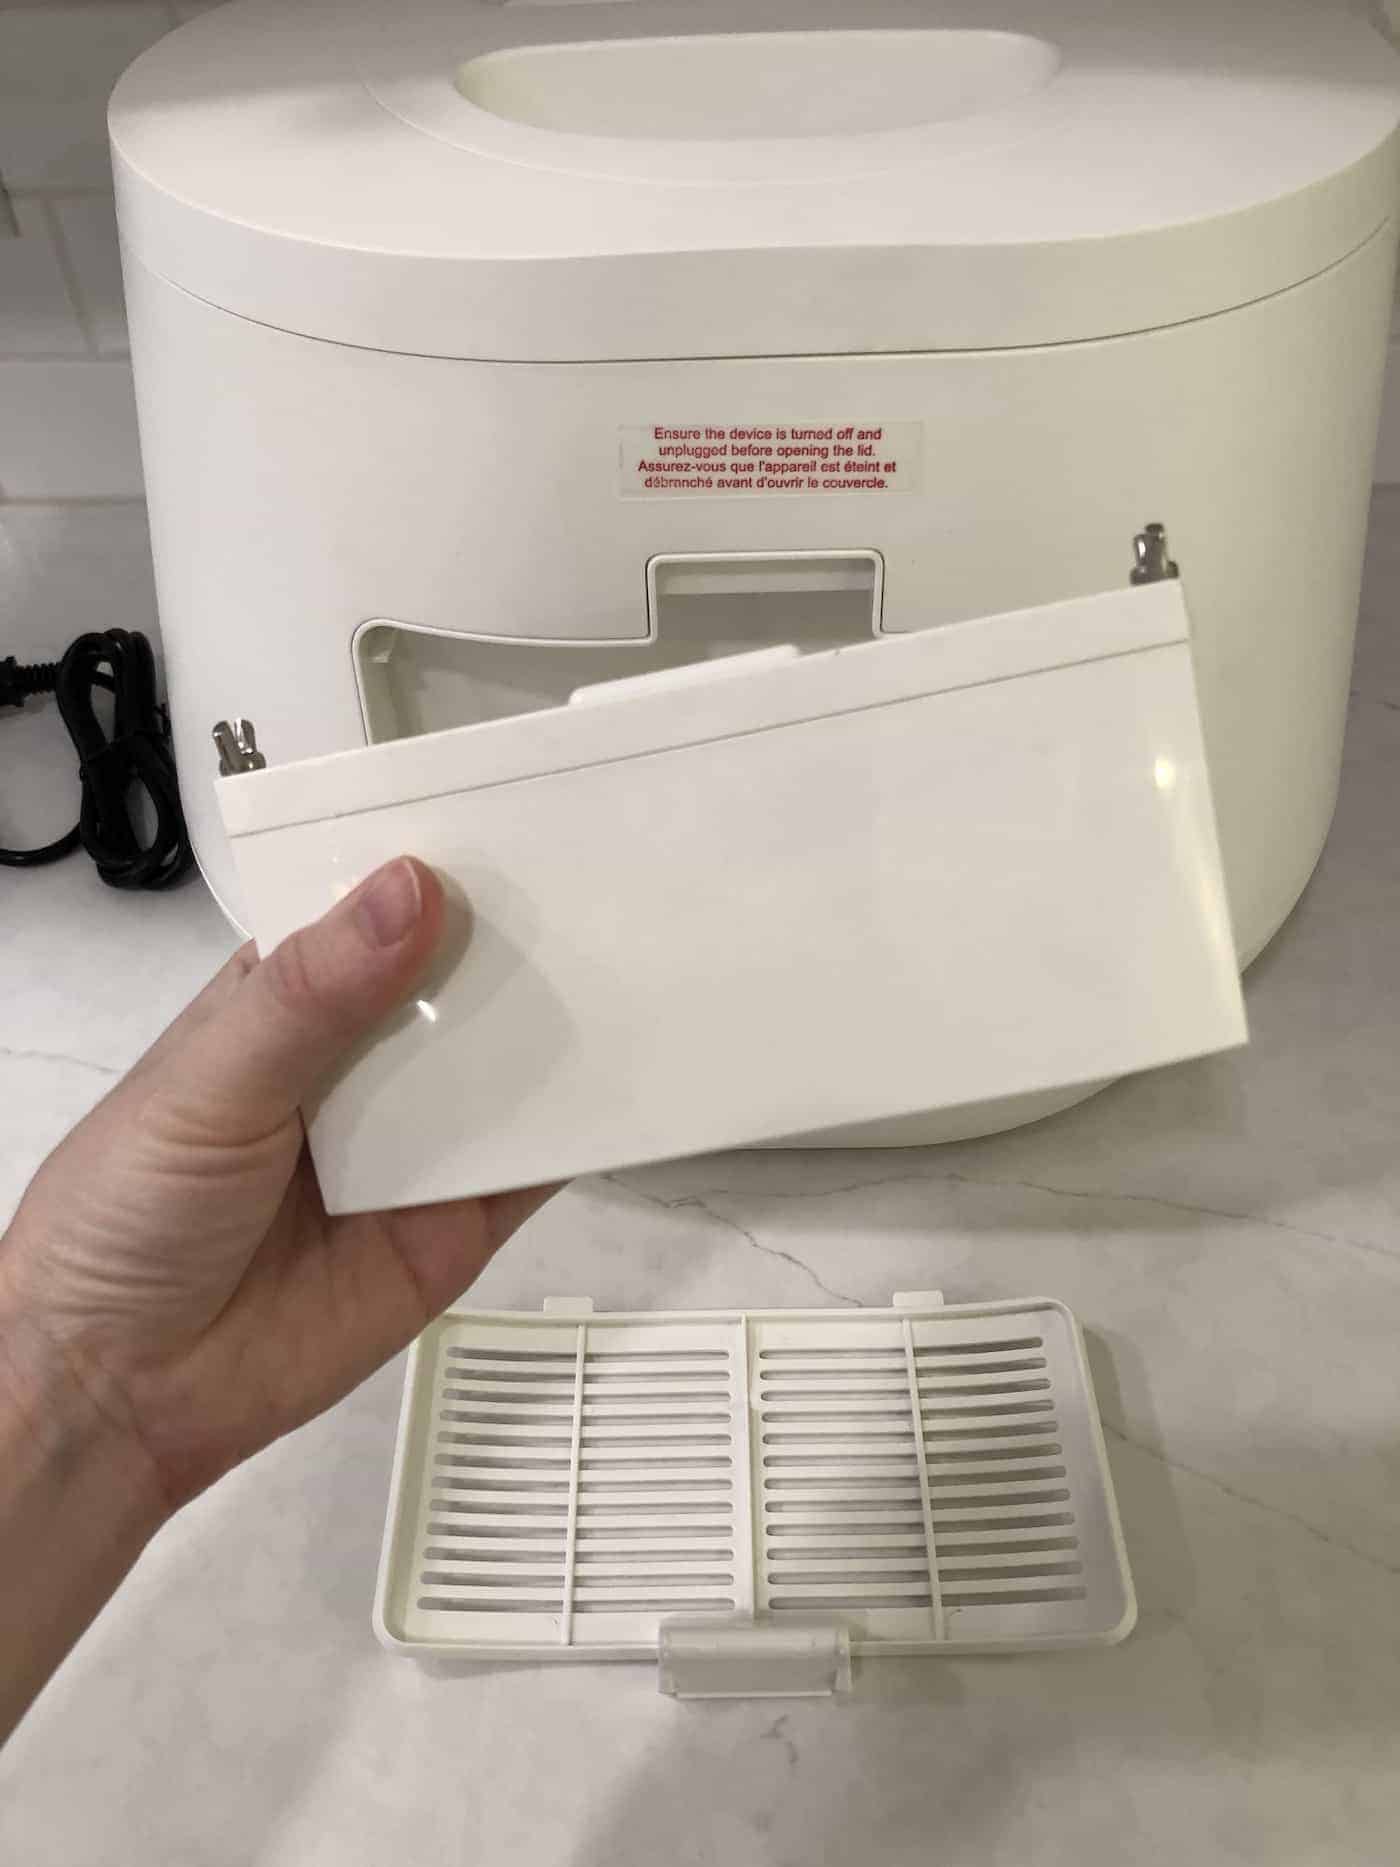
Step 3: Fill the back air filter with charcoal
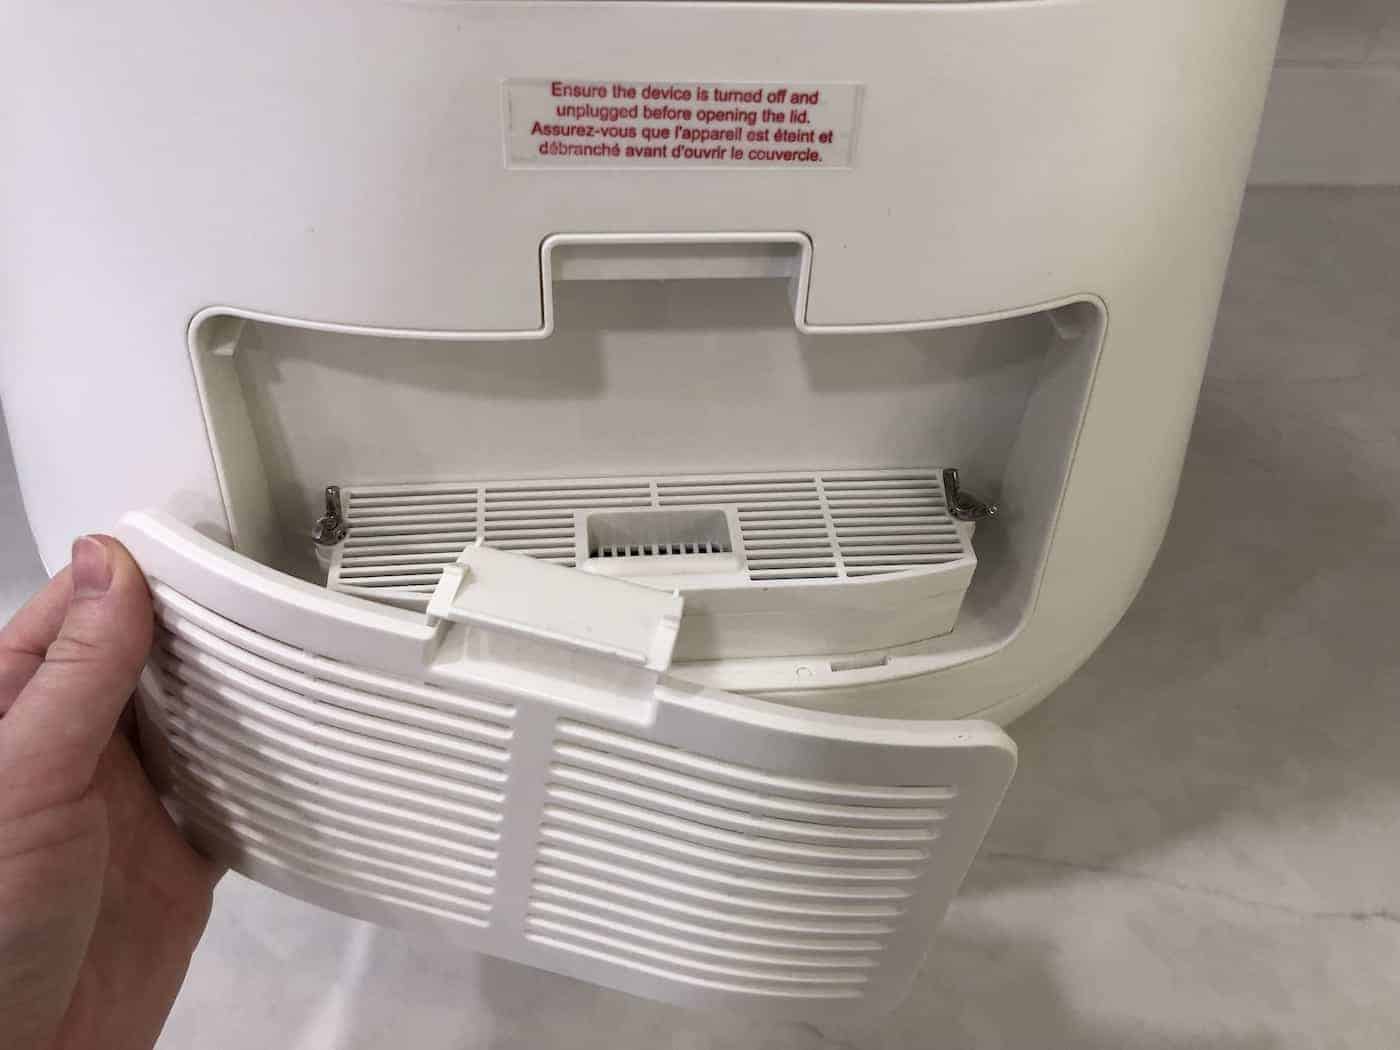
Ensure the unit is unplugged/not yet plugged in. Turn the main unit around so the back is accessible. Open the back panel using the white plastic tab on the top of the vented panel area.
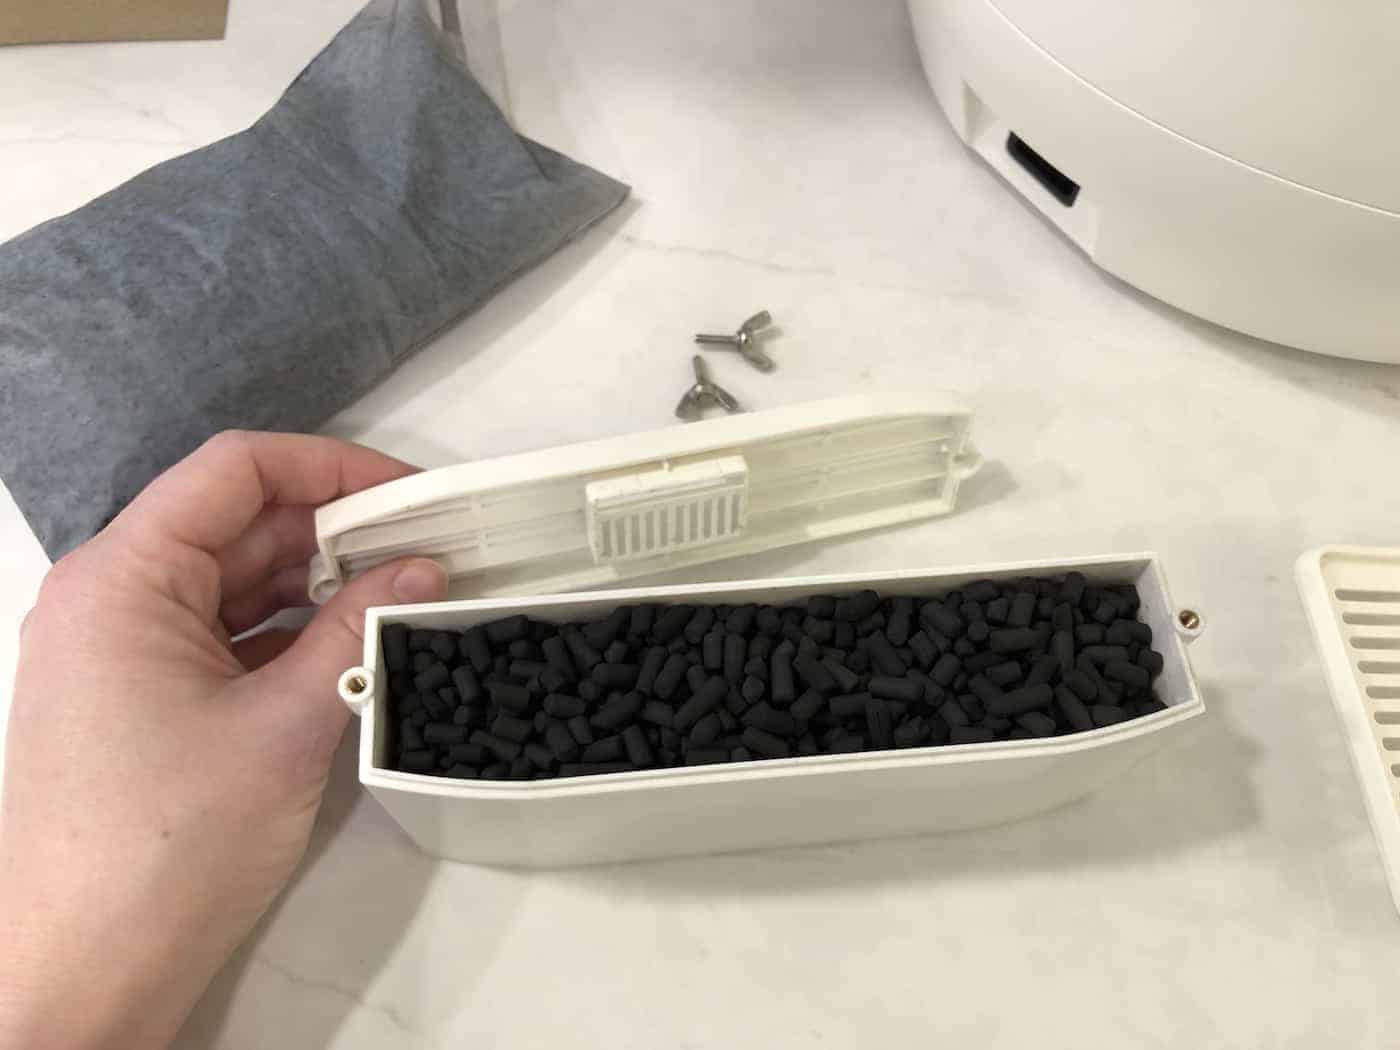
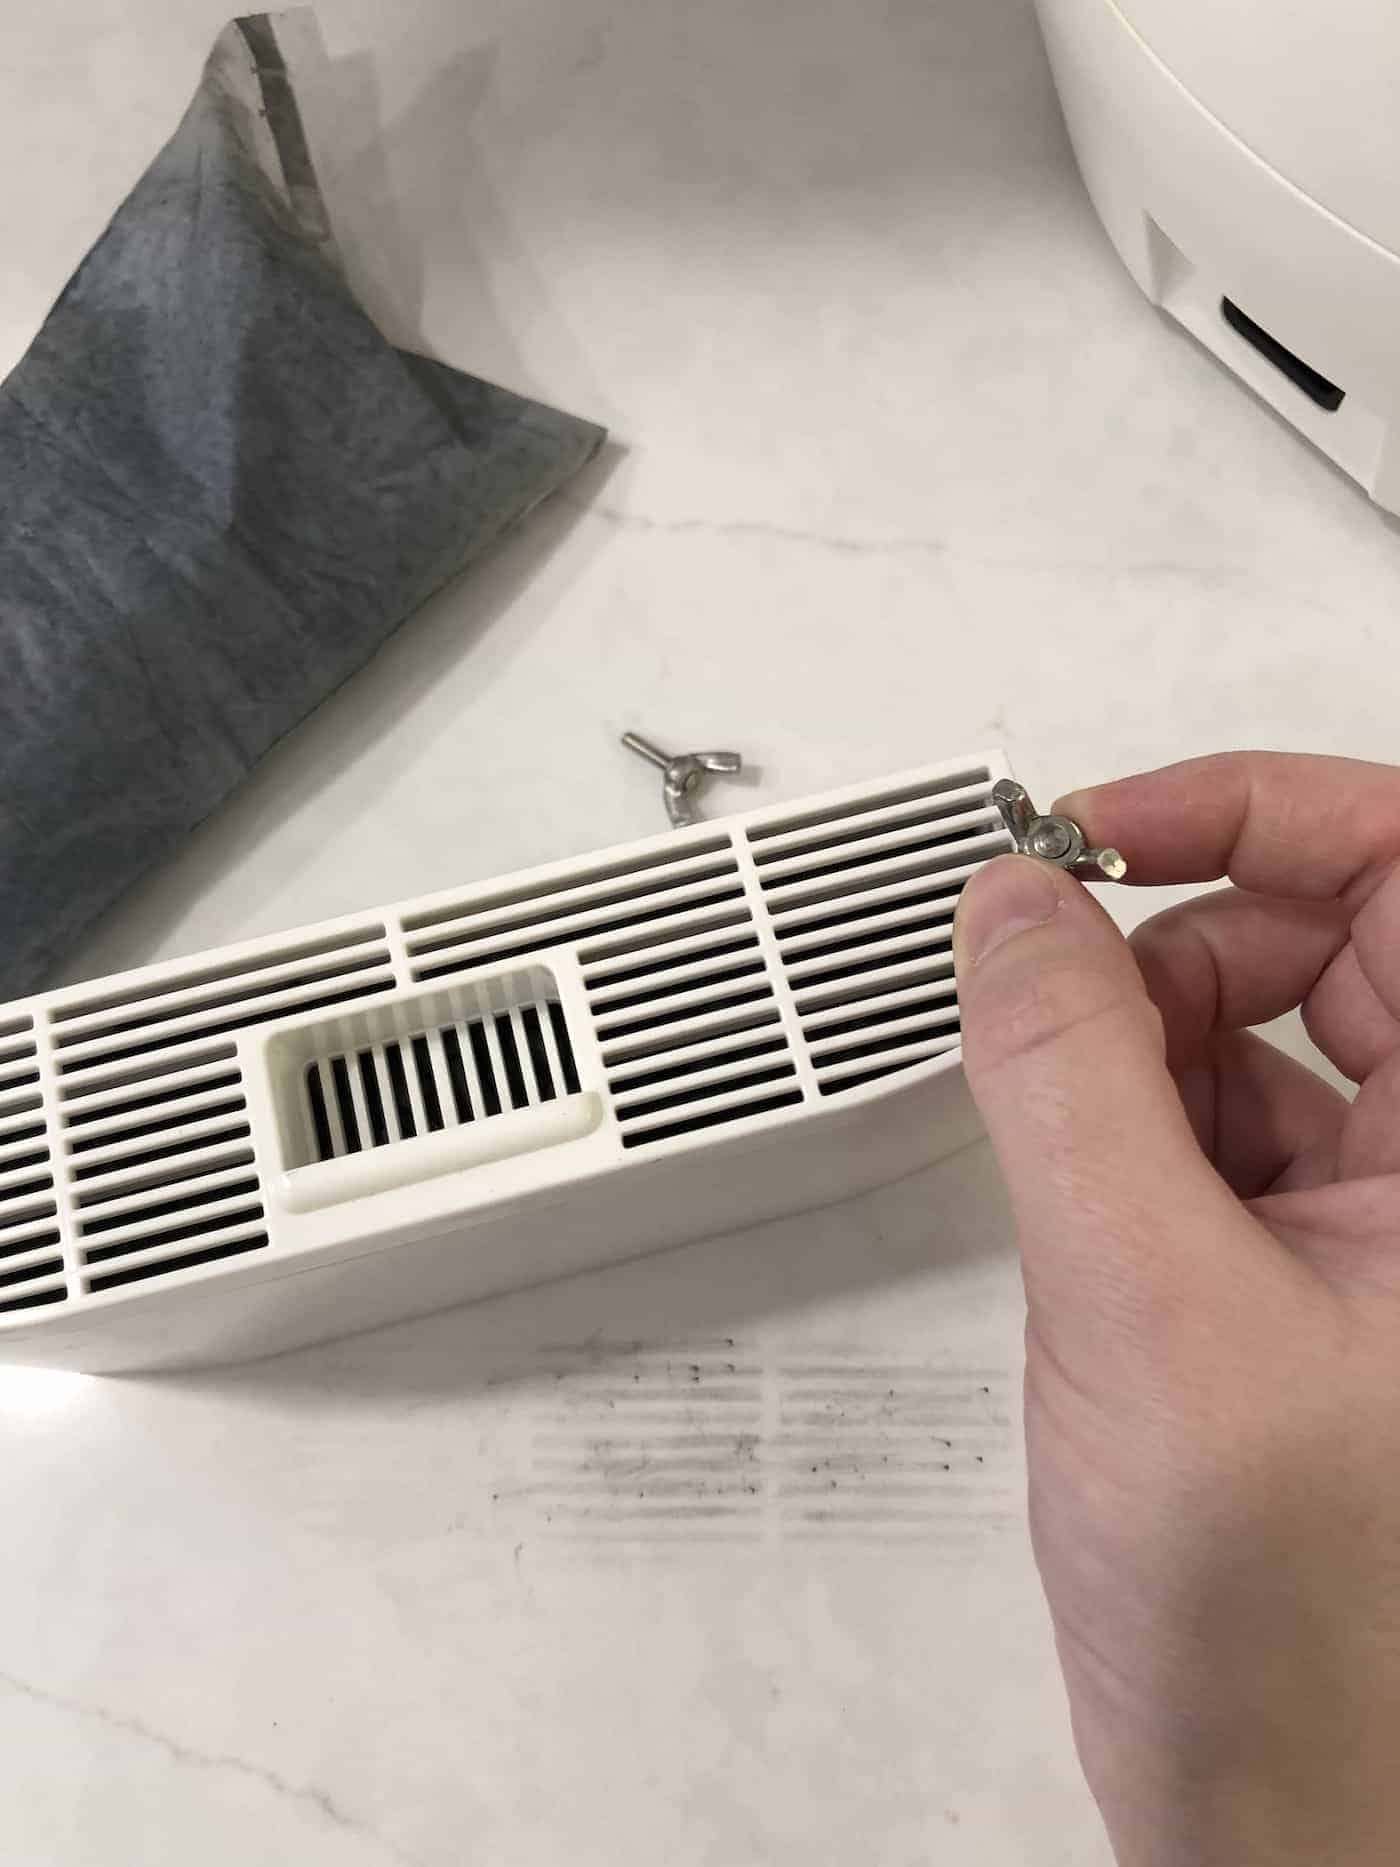
Look for the rectangular filter box near the bottom of the back vent space. Lift and pull the filter box out. Locate the two metal wingnut screws. Gently unscrew each wingnut and lift off the lid of the filter box.
Find the smaller of the two bags of activated charcoal bits. Carefully pour the charcoal bits into the filter box until it is full. Re-seal the bag and store the small amount of remaining charcoal for use during the first filter change (typically in 3-6 months).
Replace the lid of the filter box and fasten it by screwing on the two side wingnuts. Place the filter box back into the back of the Lomi unit. Replace the back ventilation panel so it clicks into place.
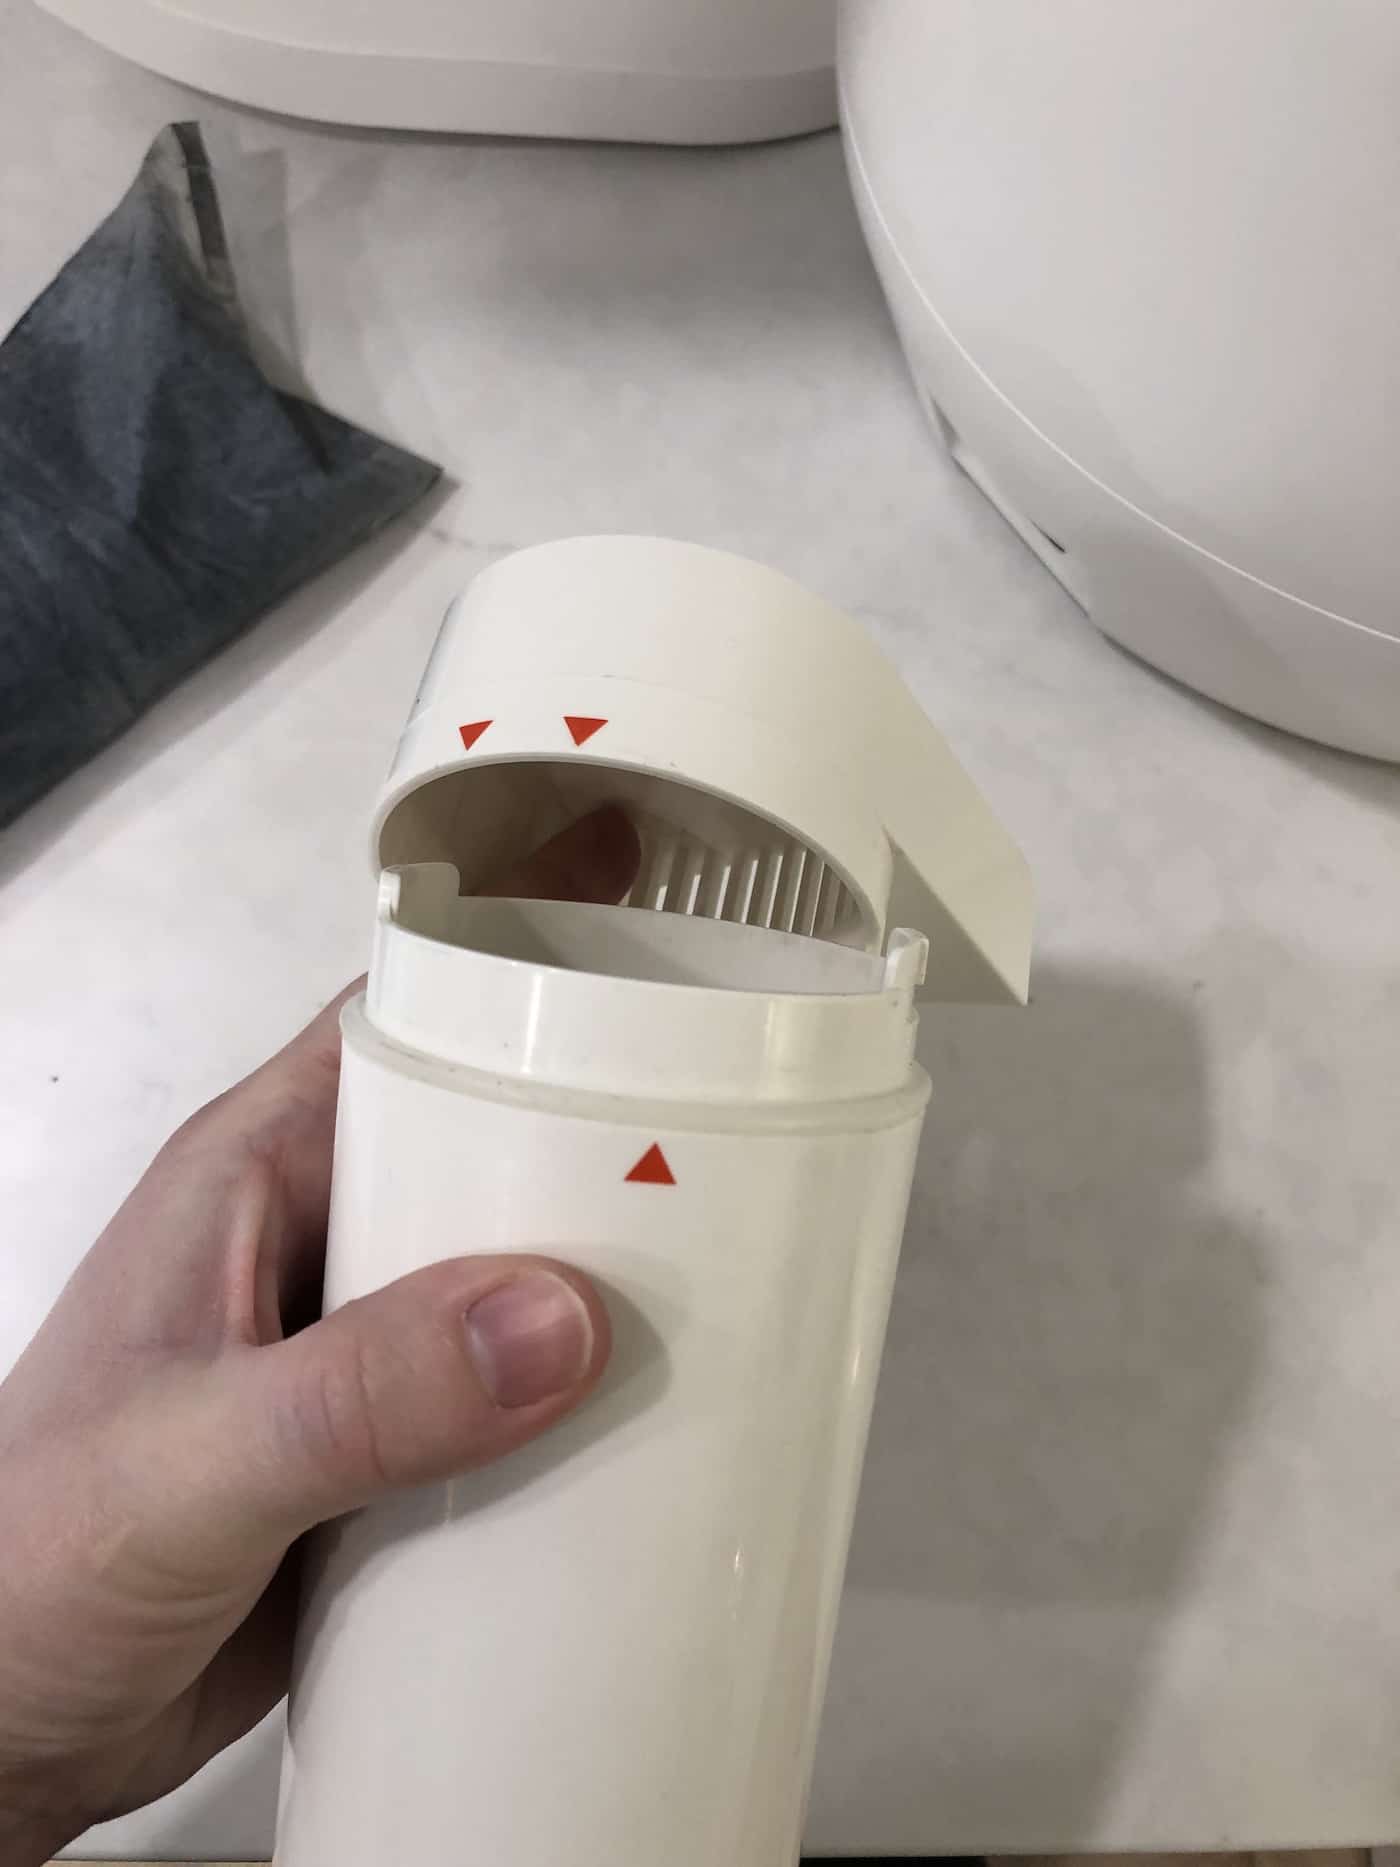
Step 4: Fill the top air filter with charcoal
Open the top lid of the Lomi unit. The top filter is located off to the side of the main chamber bucket. Using the little white tab on top of the filter, twist and lift up the filter cylinder and remove it from the unit.
Twist the lid off of the cylindrical filter. Fill the cylinder up with the activated charcoal bits with the charcoal from the second, larger bag. Twist the lid back onto the top of the filter and place the filter back into the top of the main Lomi unit.


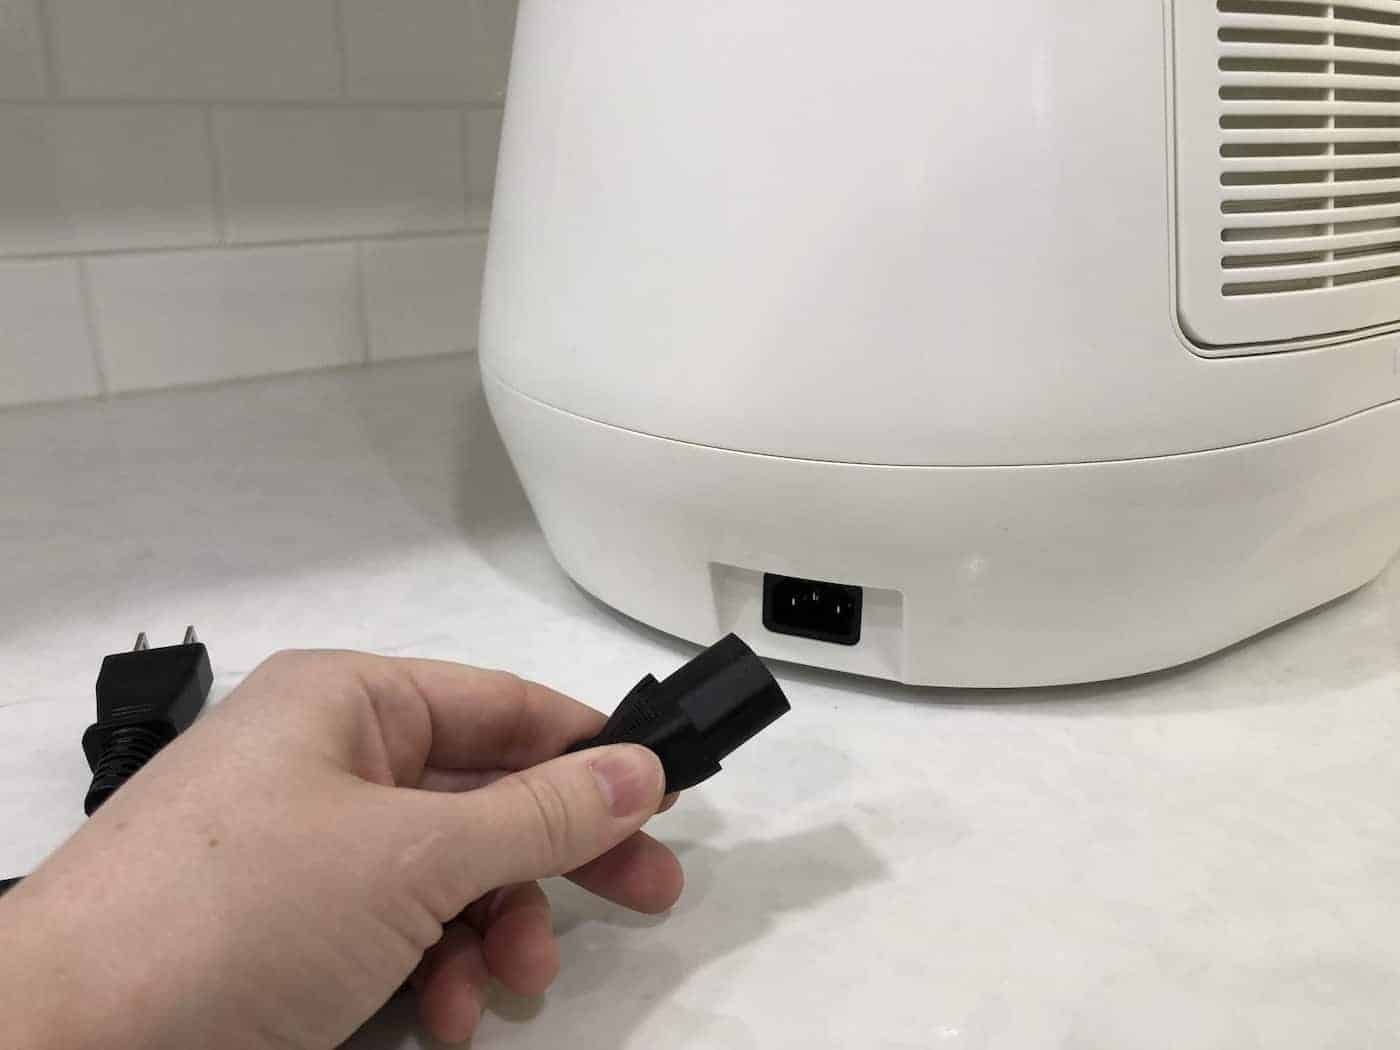
Step 5: Plug in the electrical cord
Locate the black electrical cord. Plug the female end of the cord into the Lomi unit. The cord plugs into the bottom of the unit on the right-hand side. Ensure the cord is securely plugged in.
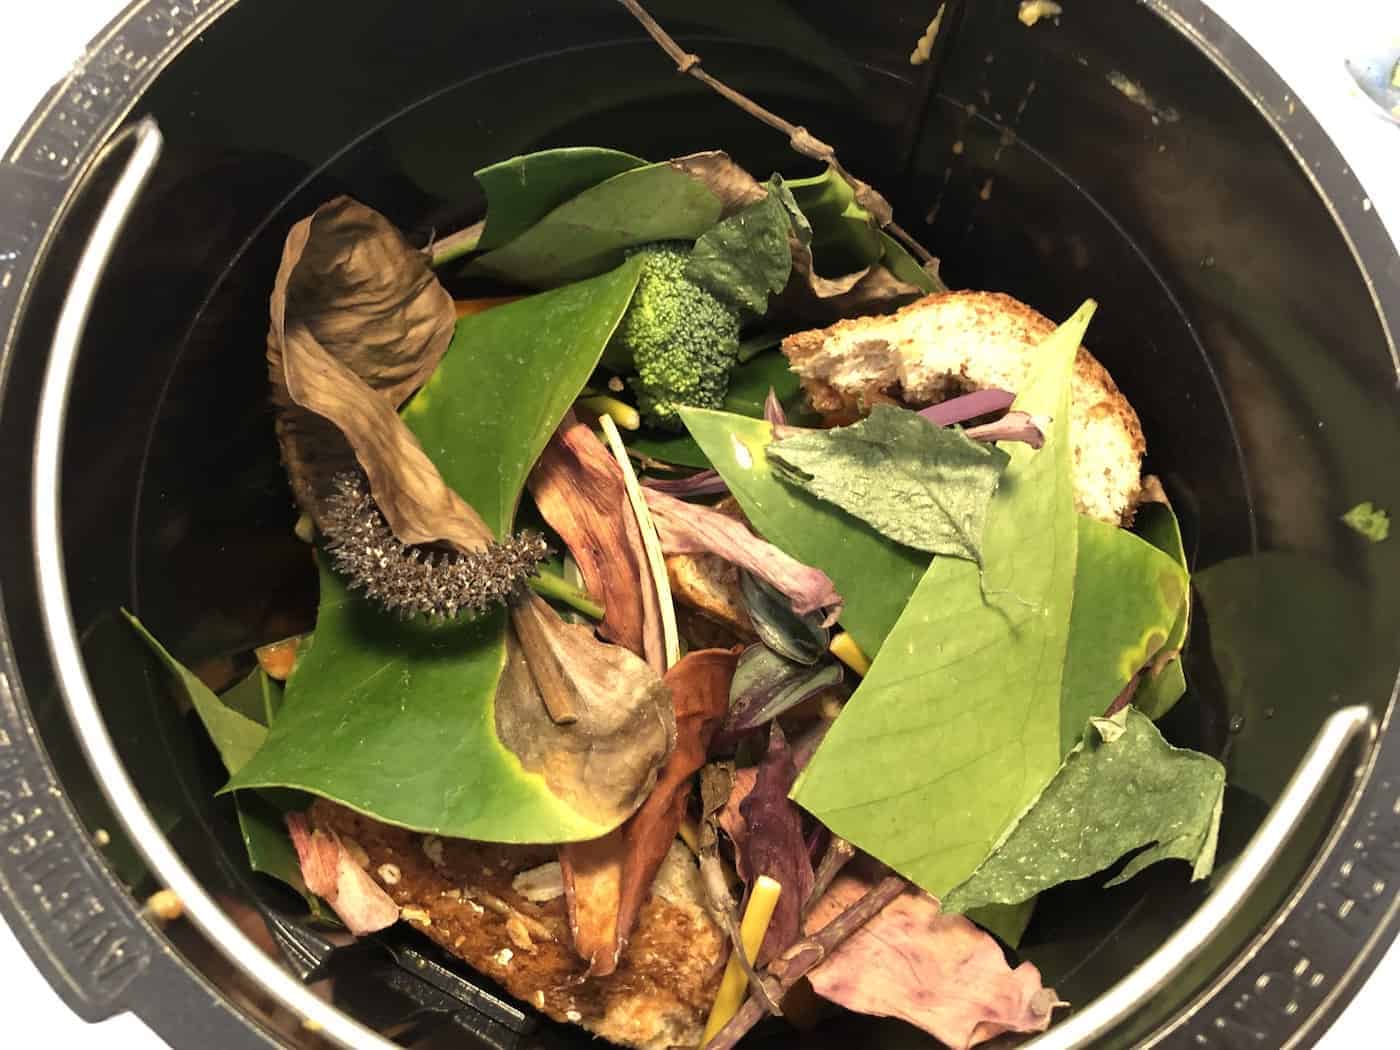
Step 6: Fill up Lomi bucket with food waste
Your Lomi unit can now be filled up with food scraps and other organic waste! Lomi units work best when the bucket is filled with a mixture of different food scraps up to a level of ¾ full for best results.
Things to put into a Lomi composter
- Vegetable & Fruit Scraps
- Meat Scraps
- Dairy Products
- Baked Goods, Cereals
- Plate Scrapings
- Leftovers
- Small, Soft Bones (fish, chicken bones from broth)
- Coffee Filters
- Teabags
- Houseplant Foliage
- Flowers
- Small Yard Waste
In addition to the above items, you can also add limited amounts of the following items:
- Soiled Kitchen Paper Products (paper towels, tissues)
- Uncoated Paper Food Packaging (plates, cups, take-out trays)
- Dense Plant Matter, Chopped (coconut shells, corn cobs)
- Liquid Food Waste (soups, smoothies)
Things not to put into a Lomi composter
- Fruit Pits (avocado, peach, mango)
- Hard or Large Bones (beef, pork, chicken)
- Cooking Oils (vegetable oil, bacon grease)
- Sugary Liquids (juice, soda, alcohol)
- Cardboard
- Bathroom Waste (diapers, wipes, hygiene products)
- Pet Waste
- Petroleum Products (styrofoam, regular plastics, lined packaging)
- Metal
- Glass
See my Lomi Review for more tips on using Lomi in your household.
Step 7: Add LomiPod and water
Add a LomiPod into the bucket, preferably on top of the waste. Then add 50 mL of water (just less than a quarter cup). Pour the water right on top of the pod to start dissolving it. The LomiPod may start to bubble a bit after pouring on the water.
LomiPod use is optional during the 4-hour Eco-Express Mode but should be used each cycle on the other two modes (Lomi-Approved Mode and Grow Mode). For the Lomi Approved Mode, the LomiPod helps to degrade the bioplastic as much as possible. For Grow Mode, the LomiPod is important for creating the highest-quality compost end product.
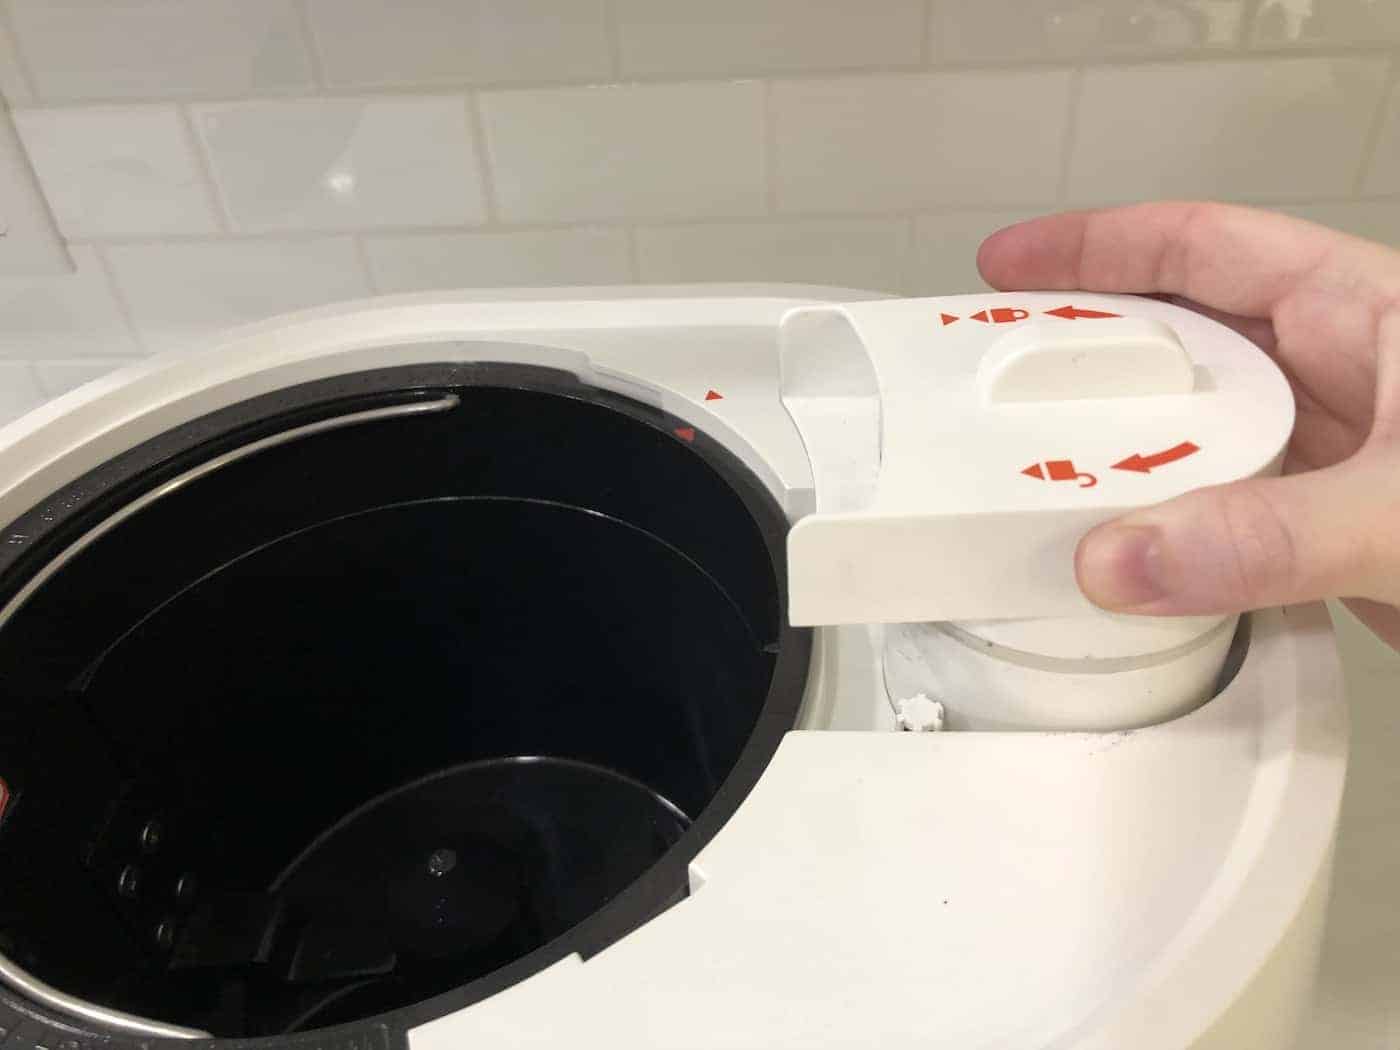
Step 8: Place the bucket into the Lomi unit
Place the full bucket into the main decomposition chamber space. The top rim of the bucket twists into the chamber with a gentle click. Look for the red triangle markings and line them up once the bucket is seated in the chamber.
Step 9: Replace the lid
Once the bucket is in place, replace the lid. Look for the red markings on the side of the lid and line the unlock icon up. The lid should be slightly askew. Then twist on the lid so that it lines up with the locked icon. Look around the sides of the Lomi unit to ensure that the lid is properly aligned and closed.
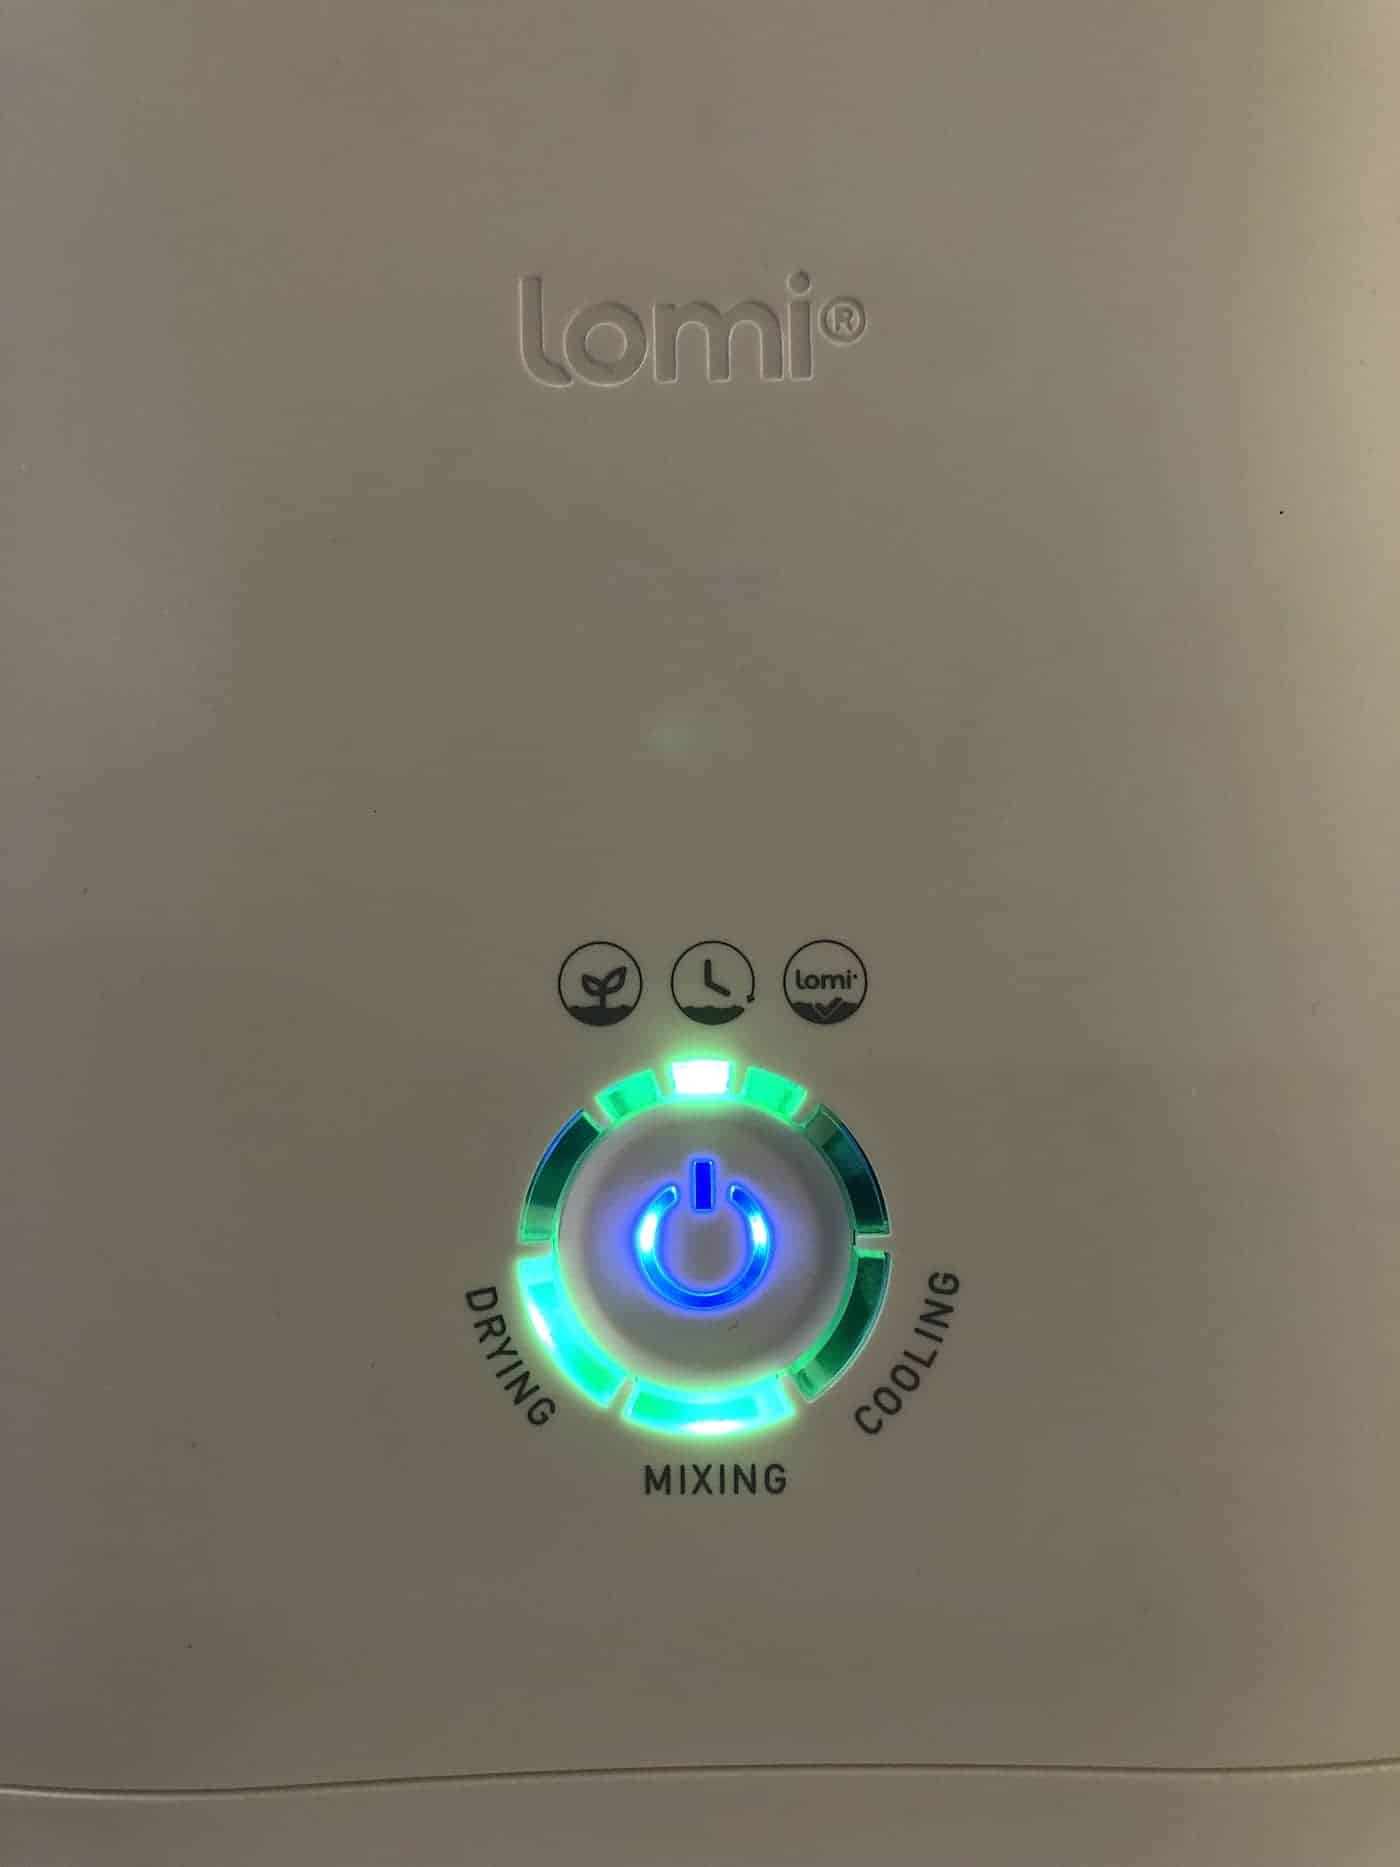
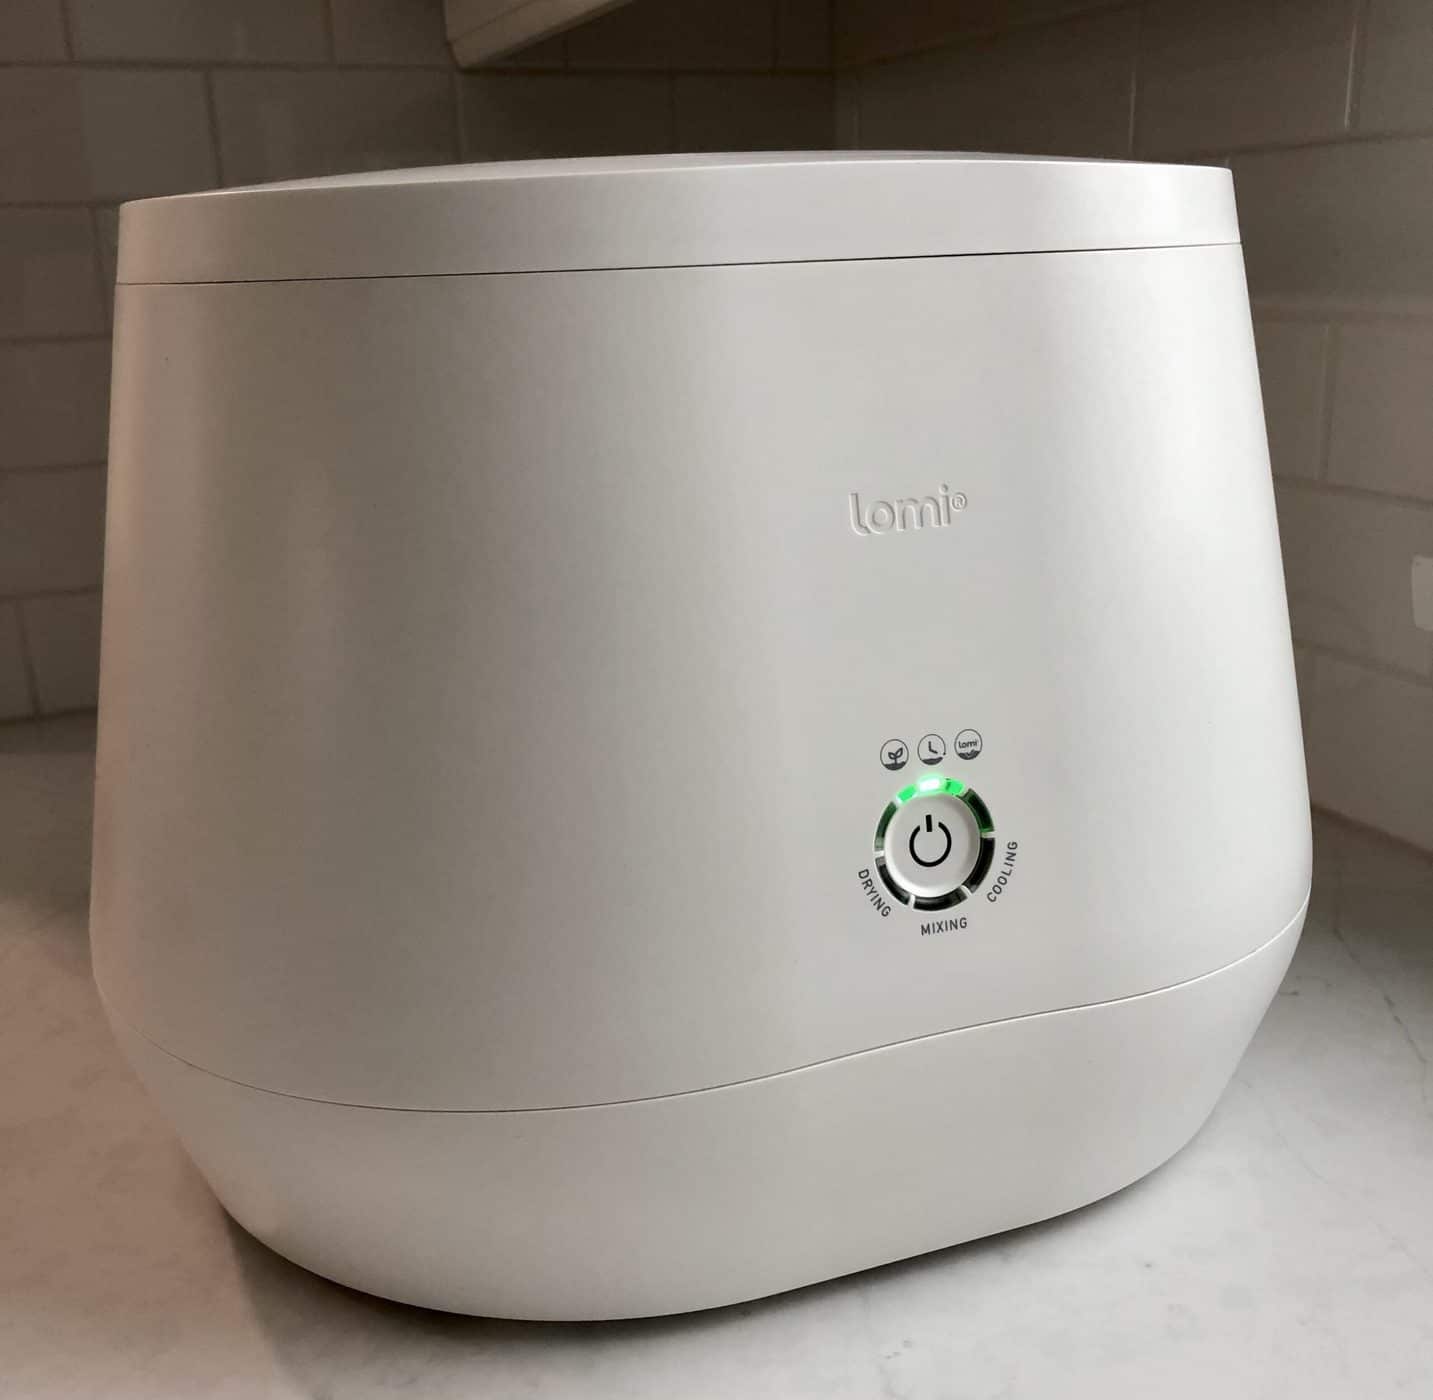
Step 10: Select the desired Lomi mode & start the cycle
Lomi units have three different cycle modes: Eco-Express Mode, Lomi Approved Mode, and Grow Mode. The Eco-Express mode is perfect for quick waste volume reduction, Lomi Approved Mode is for decomposing bioplastics, and Grow Mode is a longer cycle that produces ready-to-use compost for plants.
Lomi has three modes but only one button. A quick press of the button starts the cycle, while a longer 2-3 second hold of the button changes the mode.
The default mode is set to Eco-Express Mode. This mode has a little clock icon. To use Eco-Express Mode, simply press the big button once. Press the button firmly but do not hold it for over 1 second. This will start the 3-5 hour Eco-Express Mode cycle.
To switch the mode, the button must be held down for 2-3 seconds. Holding the button down for 2-3 seconds will cause the LED light icon to move to the right, under the icon for Lomi Approved Mode. The icon for Lomi Approved mode says “Lomi” and has a little check mark. To use Lomi Approved Mode (bioplastics digestion), give the button a quick press to start the cycle.
Grow Mode is the third cycle mode that can be selected with the main button. This is the mode to use if you’d like to make Lomi Compost for your plants. You’ll need to hold down the button for another 2-3 second long hold for the LED light indicator to move over to the left-hand side under the Grow Mode icon. The Grow Mode icon is a little picture of a plant sprout with leaves. Once the LED light indicates “Grow Mode”, give the button a quick press to start the cycle.
The Lomi unit will beep at the start of the cycle and will beep again when the cycle is complete.