Wondering how to store seeds? Whether it’s for next season or years down the road, store your seeds properly and they’ll stay viable longer.
Most seeds need to be dried before they are stored. The seeds should then be placed in an airtight and moisture-proof container (generally glass or metal). This container should be kept in a cool, dry area free from fluctuations in temperature or humidity. Most seeds stay viable for 3-10 years in home storage conditions.
From cleaning before storing to choosing containers and labeling them correctly – follow this guide and watch your garden flourish.
How to store seeds
Properly storing seeds is an important part of gardening. If done correctly, you can save your own seeds from year to year and have a steady supply for future planting. It’s also a great way to share with friends and family who are looking to start their own gardens.
Here are the best conditions for storing most types of seeds:
- Air dried to a low moisture content of 5%-8% (often with the help of silica gel)
- Labeled to include the date, type, variety, and notable characteristics
- Placed inside an airtight, moisture-proof glass or metal storage container
- Stored in a dark location under 40°F (5°C) and under 40 percent humidity
That said, most seeds being saved by home gardeners will store just fine at room temperature for a couple of years. Just try to find a dry, dark, cool spot for them where temperature and humidity don’t fluctuate too much.
When it comes to storage containers, airtight and moisture-proof materials like glass or metal are best. Make sure that whatever container you use has a tight lid so no moisture can get in or out. Avoid plastic baggies, which aren’t necessarily airtight/moisture-proof enough for long-term storage.
Drying your seeds before storing them is essential if you want them to last more than one season. To do this, spread the seed on paper towels in a single layer until they reach 5%-8% moisture content. If you don’t have a moisture meter and want to make sure they are dry, you can use small blue silica gel beads in a jar for a week or two to dry out the seeds even more.
Labeling your containers is key when it comes to organizing multiple types of stored seeds over time – especially if you plan on saving different varieties each season. Include information such as the variety name, date collected/purchased, germination rate (if known), and type of plant (annual/perennial). This will make things much easier when it comes time to replant next season.
Finally, store all your dried and labeled containers in cool places away from direct sunlight. Opt for areas where temperatures remain constant throughout the year; avoid placing up high in rooms where warm air accumulates near ceilings during winter months or any other locations prone to drastic temperature changes which could detrimentally affect delicate seed structures over time.
By following the steps outlined in this guide, you can store your seeds safely and easily to ensure they remain viable for future use. Now let’s look at what you need to get started.

Supplies you need to store seeds well
When it comes to storing seeds, there are a few items you need to have on hand. Silica gel can help dry the seeds down below 10% moisture content. The easiest kind to use is the color-changing blue beads that are dark blue when they are dry and turn pale blue when they are full of absorbed moisture.
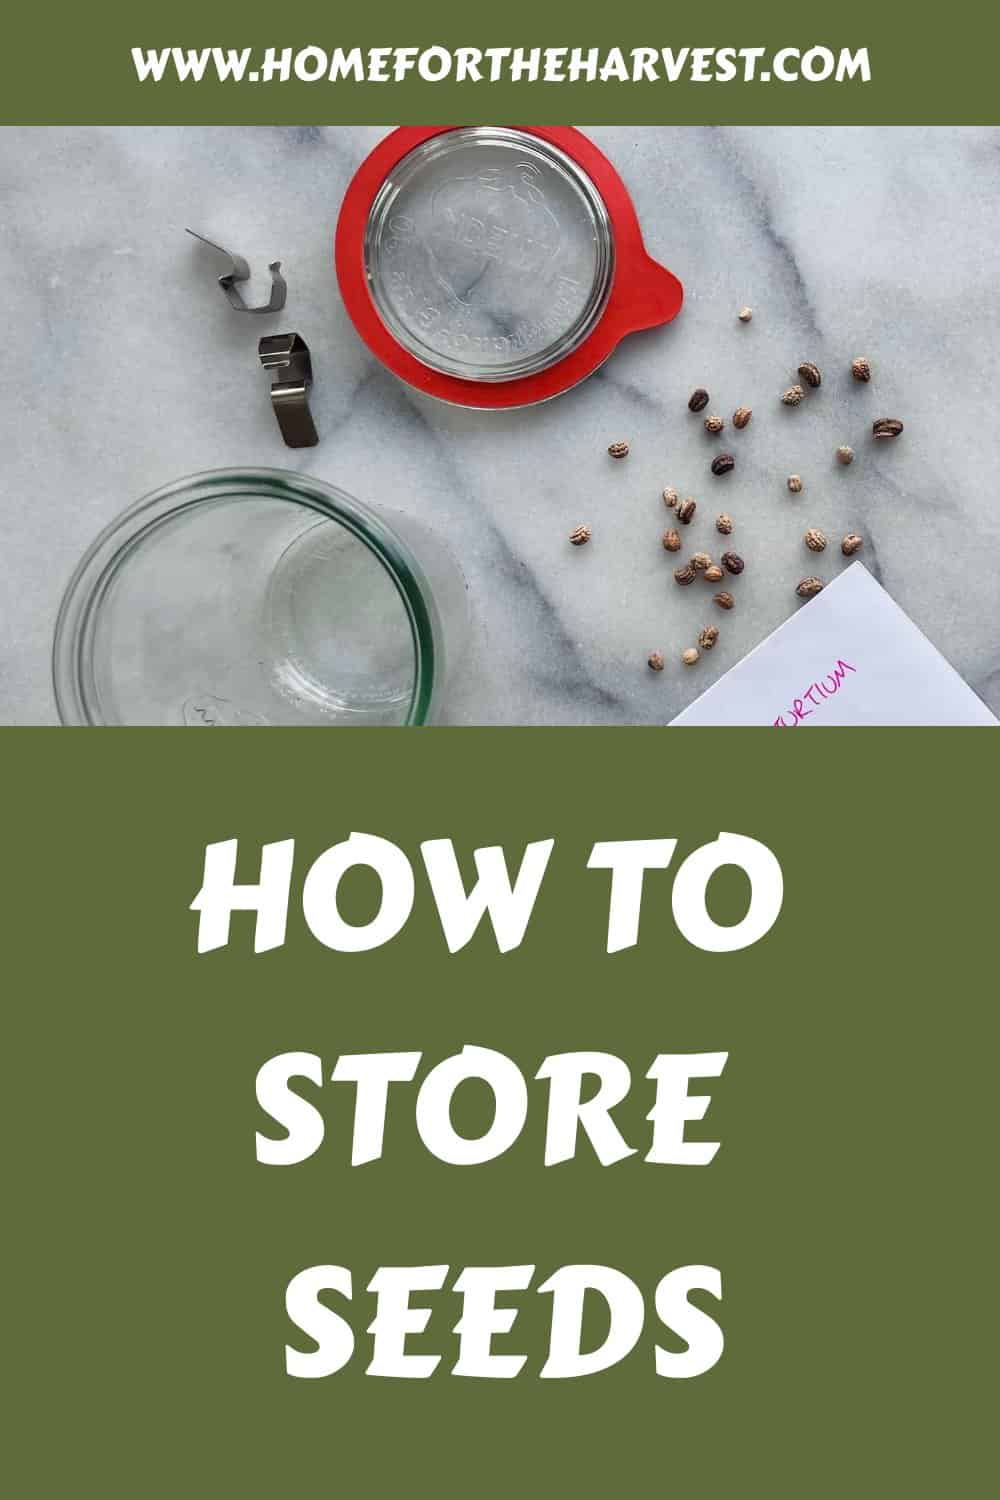
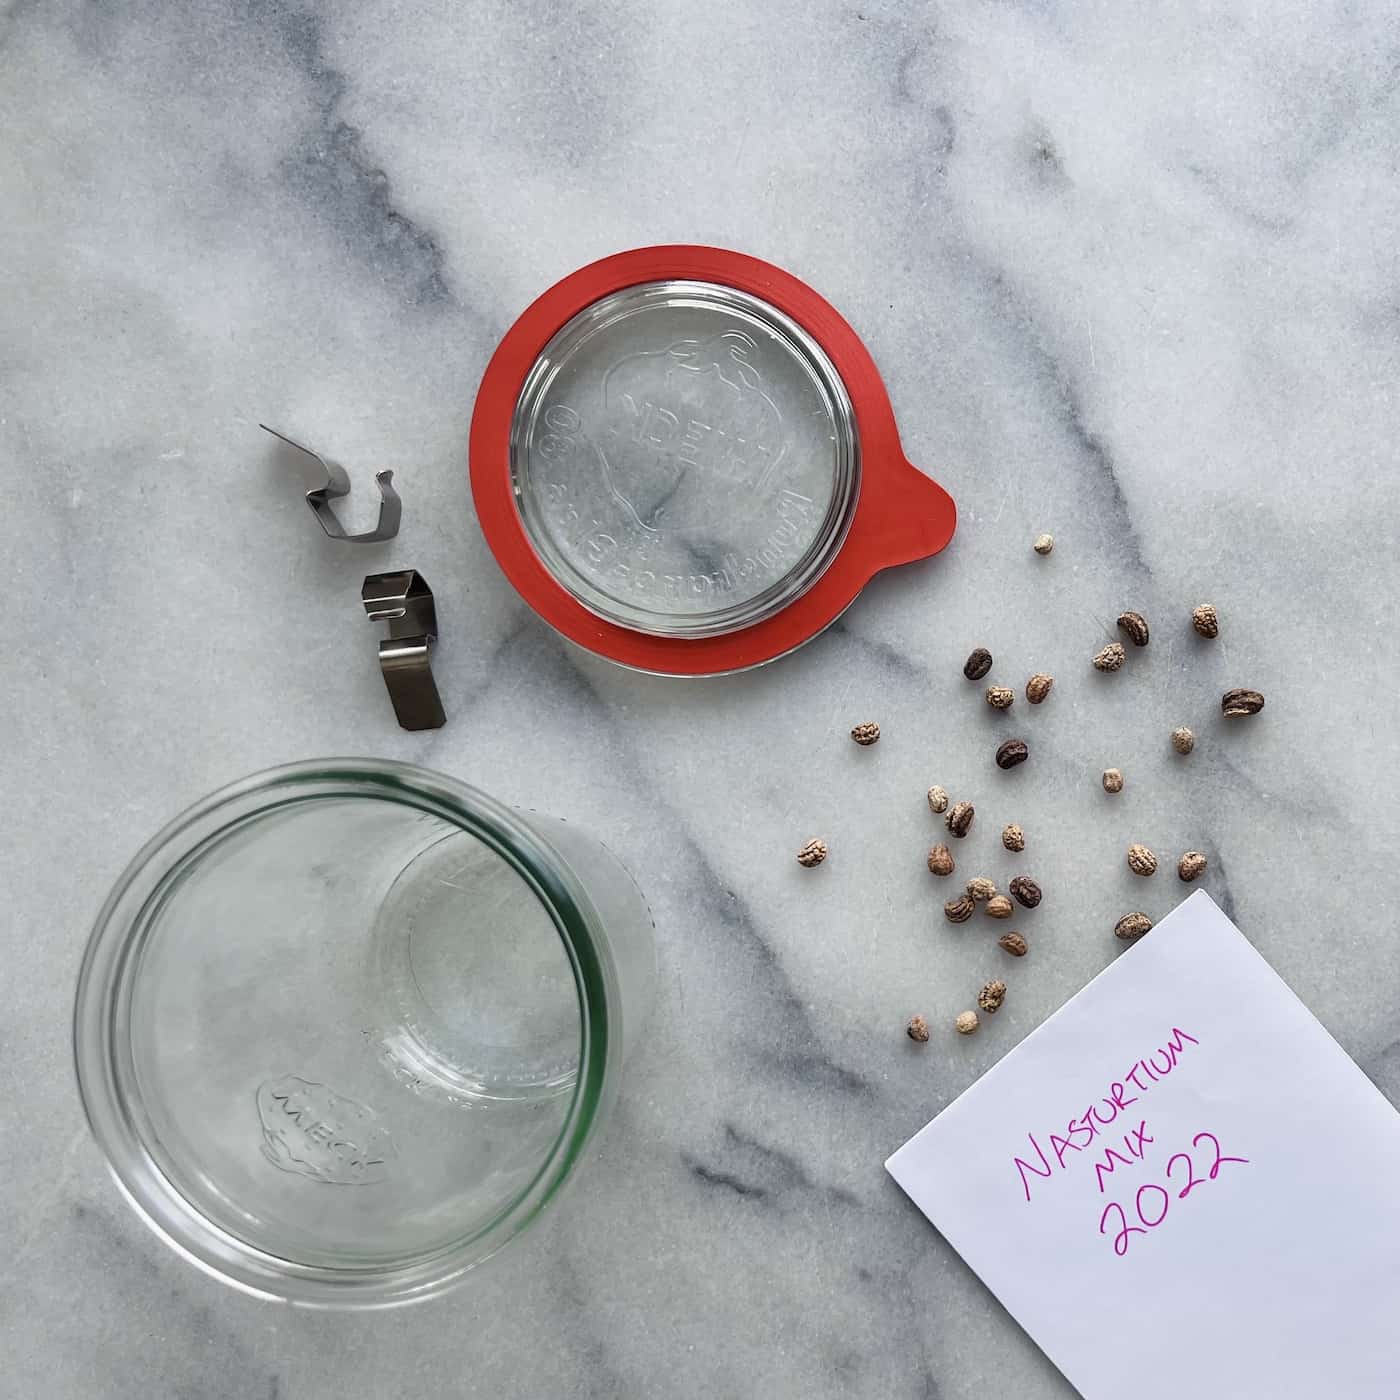
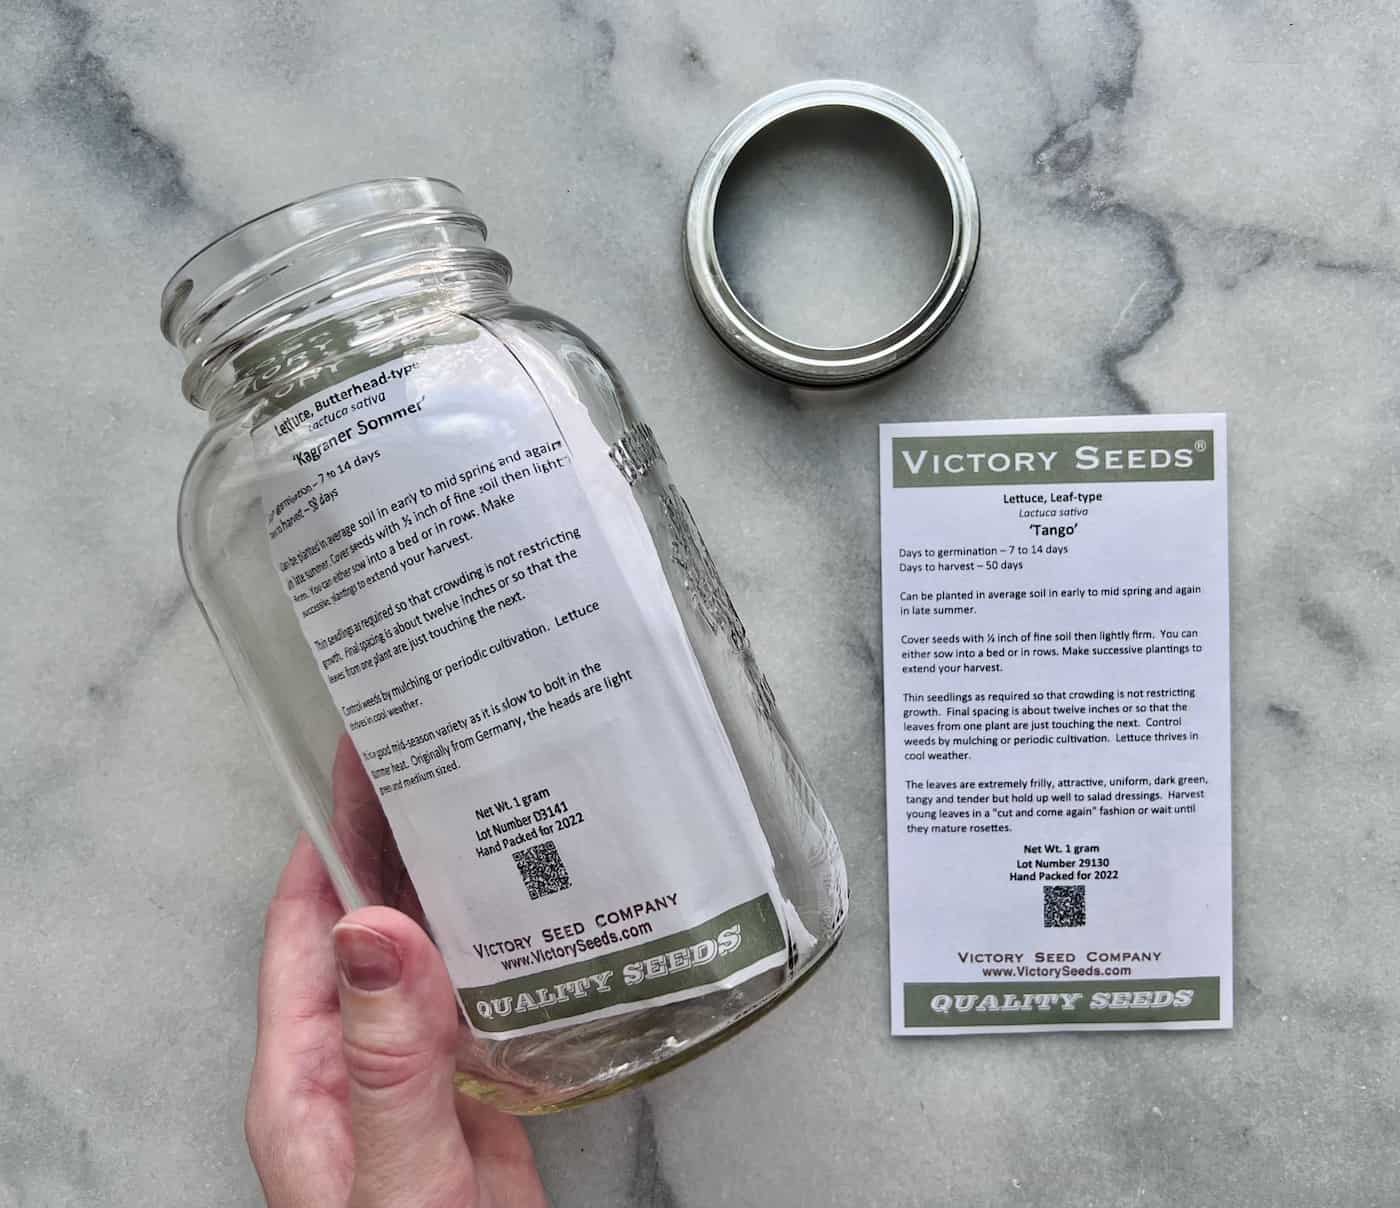
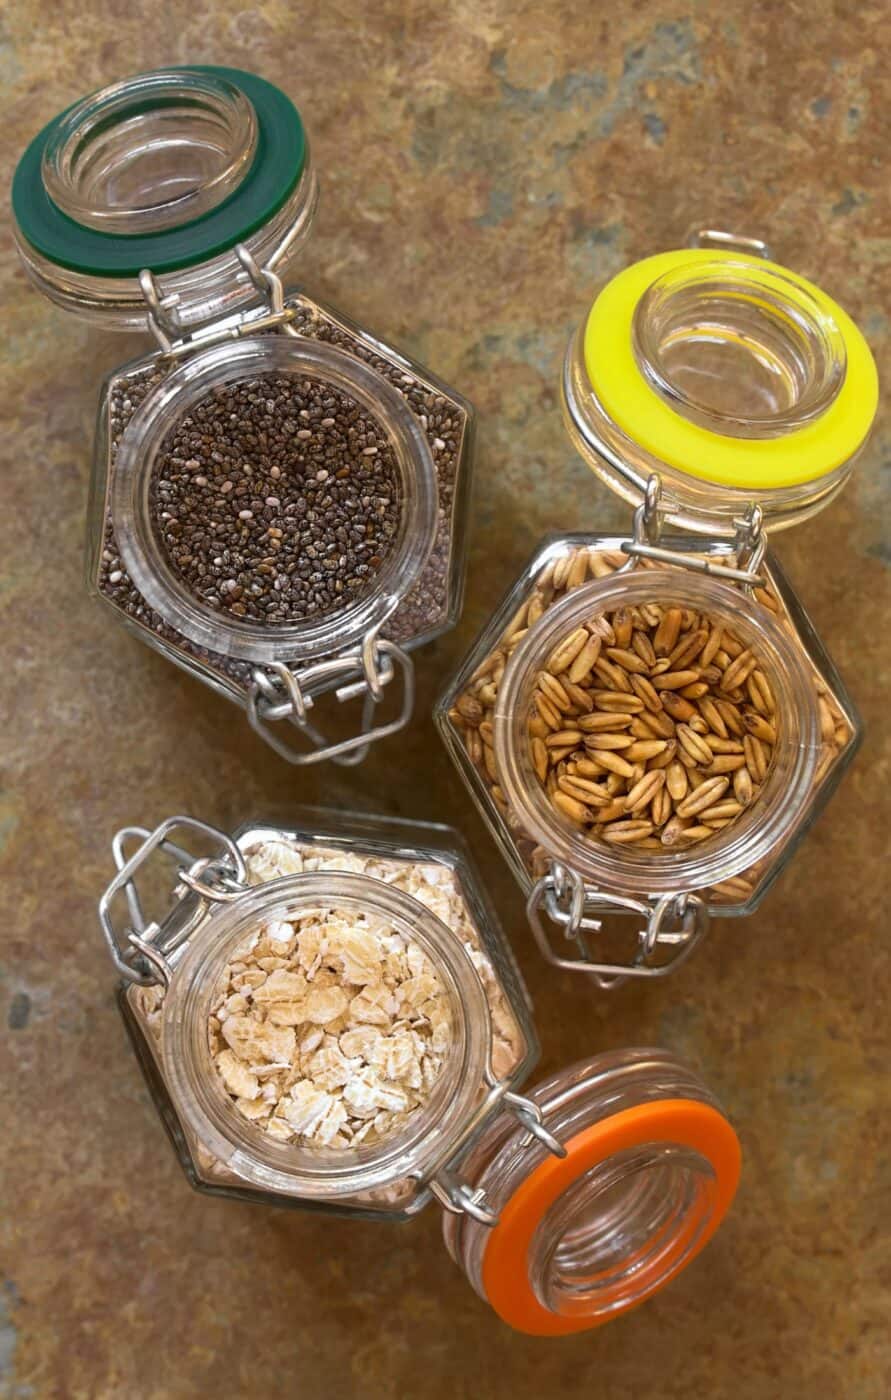
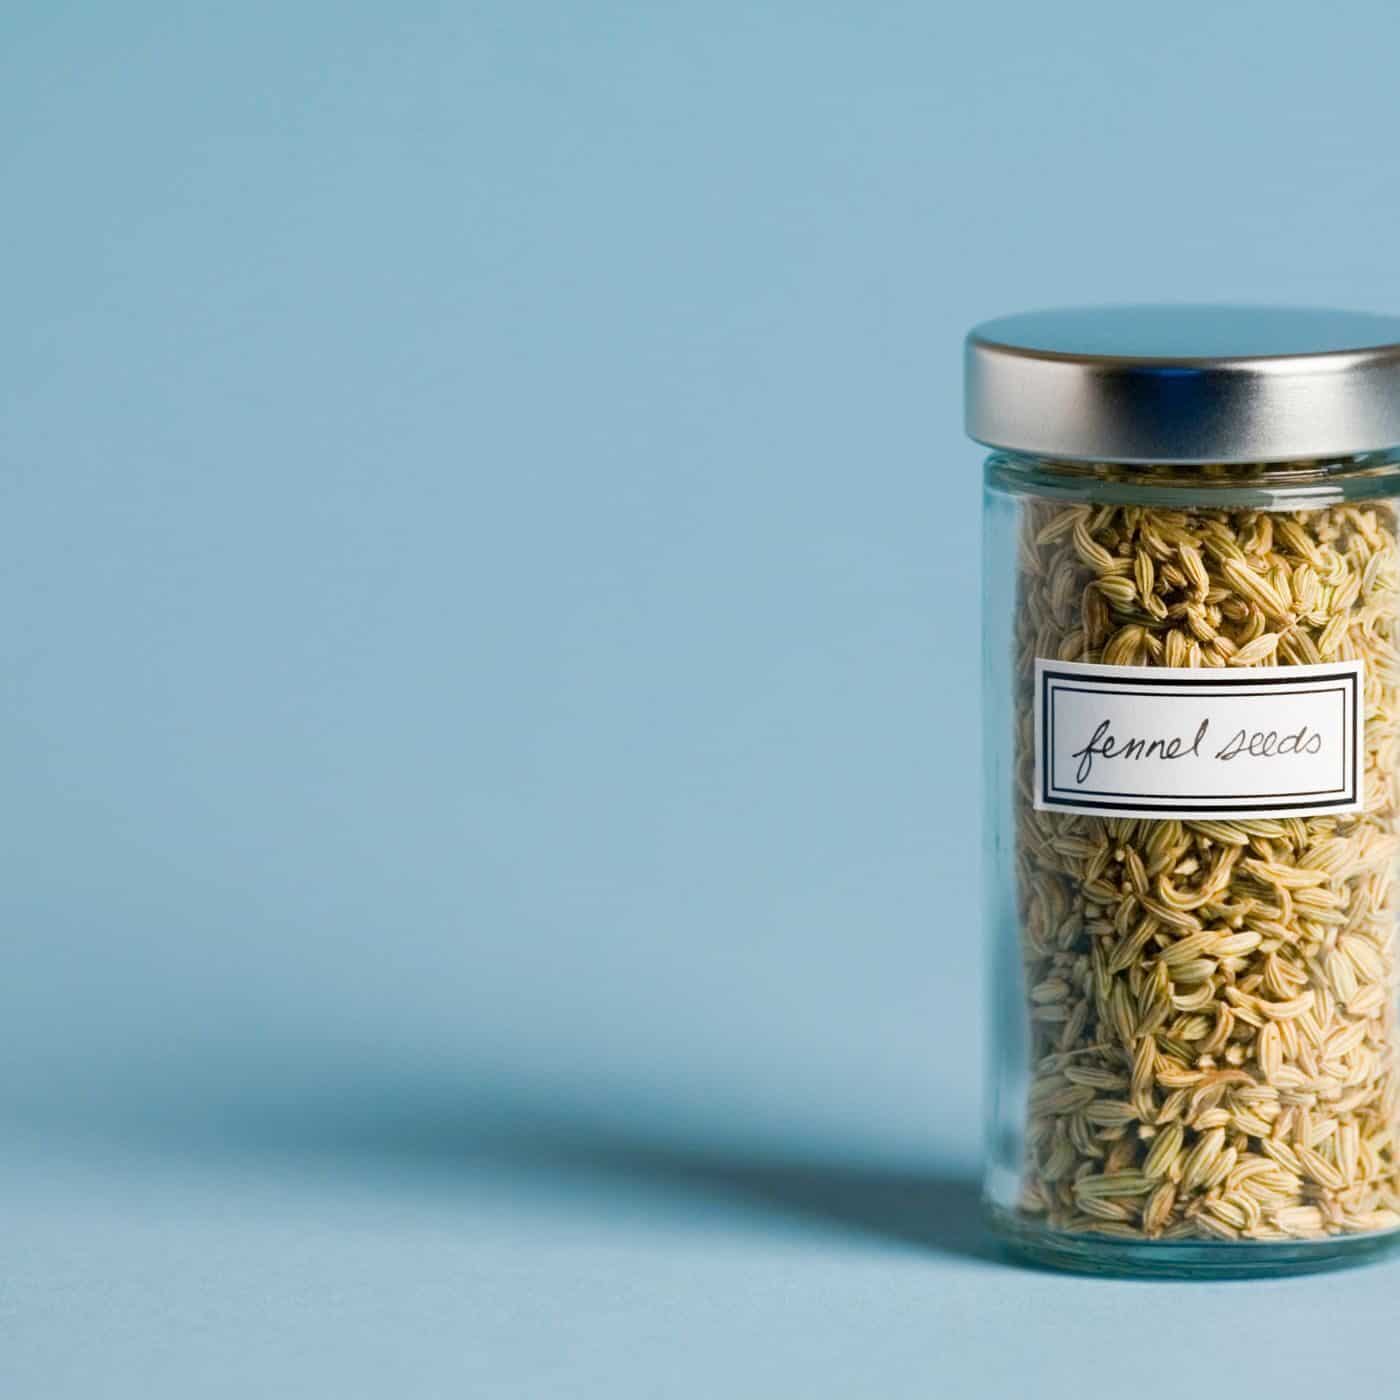
Air-tight and moisture-proof containers are essential for keeping your seeds safe and secure from moisture, pests, and other environmental factors. Mason jars with tight-fitting lids work well for this purpose.
Labels are also important when storing seeds so that you can easily identify them in the future. You can label your seeds in packets and then pop the packets into mason jars. You can also use seed packets lined with metal foil. You may want to use permanent markers or labels specifically designed for seed storage containers.
You’ll also need a cool, dry place to store your seeds where they won’t be exposed to extreme temperatures or humidity levels that could damage them over time. A basement or garage is usually an ideal spot as long as it doesn’t get too hot during the summer months or too cold during the winter months.
How to clean seeds before storing them
Cleaning seeds before storing them is an important step in the process of preserving your garden’s bounty. Not only does it help to ensure that you have viable, healthy plants next season, but it also helps to prevent diseases from spreading throughout your garden.
The first step in cleaning seeds is removing debris or foreign material such as dirt and plant matter. This can be done by gently rubbing the seed between two fingers or using a fine mesh strainer. Be sure not to rub too hard as this could damage the seed coat and reduce its viability.
Next, rinse the seeds with clean water until all debris has been removed. You may need to use a small brush if there are stubborn bits of dirt stuck on the seed coat. Once rinsed, spread out the seeds on a paper towel and allow them to air dry completely before storing them away for future use.
If you want extra assurance that your stored seeds will remain viable for years down the road, consider treating them with fungicide or insecticide prior to storage. These treatments will help protect against pests and disease-causing organisms that could potentially harm your stored seeds over time. Follow label instructions carefully when applying these products, as some require dilution prior to application while others should be applied directly onto dry seed coats without diluting beforehand.
Finally, store cleaned and treated (if applicable) seeds in an airtight container at room temperature away from direct sunlight or extreme temperature fluctuations which can cause moisture buildup inside containers leading to mold growth on stored materials including valuable saved seed stocks. Make sure each container is labeled clearly so you know what type of seed it contains along with when they were harvested, cleaned, treated, etc. Check periodically for signs of spoilage such as discoloration or moldy spots on individual containers; discard any spoiled items immediately.
Once the seeds have been properly cleaned, it’s time to move on to the next step: drying them for storage. With careful attention and proper techniques, you can ensure your seeds are kept in optimal condition.
Drying seeds before storing them
Drying seeds before storage is an important step in the seed-saving process. It helps to ensure that the seeds remain viable and can be used for future planting. The goal of drying is to reduce the moisture content of the seed, which prevents mold or fungus from damaging them. A moisture content of 5%-8% is ideal for seed storage.
The best way to dry your seeds is by air-drying them on a screen or paper towel. Place your freshly harvested seeds onto a clean surface such as a paper towel or window screen, making sure they are spread out evenly so that air can circulate around them. Keep them out of direct sunlight.
Leave them in a warm, dry place with good airflow until they feel completely dry to the touch (usually 1–2 weeks). If you live in a humid climate, dry seeds in a room with a dehumidifier. Make sure you check on them every few days and stir/flip over any clumps that form during this time.
If you need to speed up the drying process, you can also use an oven set at its lowest temperature setting (hopefully around 100°F) until all of your seeds are dried through. Be careful not to leave it in too long though – excessive heat will damage delicate seed coats.
You may also want to consider using silica gel packets if you’re storing large amounts of seed; these absorb moisture from their environment and help keep stored items dry without you worrying about temperatures getting too high.
“Most orthodox seeds will dry to an ideal 6 to 8 percent moisture if they’re held at 38 to 40°F (3.5 to 4.5°C) and a 30 to 35 percent relative humidity.”
The Complete Guide to Seed Saving, by Robert Gough and Cheryl Moore-Gough
Finally, label everything clearly so you know what is what when it comes time for planting season again next year. This will help protect against accidental loss due to fire or flooding, as well as provide backup should anything happen during transport between locations.
Once your seeds are completely dry, it’s time to find the right containers for storing them. By selecting appropriate materials and ensuring proper air flow, you can ensure that your seeds remain viable for many years to come.
Choosing containers for storing seeds
There are a variety of containers available for seed storage, each with its own advantages and disadvantages.
Glass jars are an excellent choice for storing seeds as they provide airtight seals that keep out moisture and pests. They also come in various sizes so you can find one that’s just right for your needs. The downside is that glass jars can be heavy and breakable, making them difficult to transport or store away safely.
Plastic bags are lightweight and easy to carry around but they don’t offer as much protection from moisture or pests. If you choose this option, make sure you use high-quality plastic freezer bags. These will usually have special features like double zippers or zip locks which help keep out moisture and insects better than regular plastic bags do.
Paper envelopes are another popular choice when it comes to storing seeds because they allow air circulation while still providing some protection from humidity and pests. However, paper envelopes tend to be less durable than other types of containers so if you go this route, make sure you check on your stored seeds regularly in order to ensure their quality hasn’t been compromised by wear-and-tear over time.
Tin cans are great options if you need something more durable than paper envelopes but lighter than glass jars – plus they look nice too. Tin cans come in different sizes so again there should be one that fits your needs perfectly; however bear in mind that tin cans may not protect against humidity as well as other types of containers do since metal tends to conduct heat quickly.
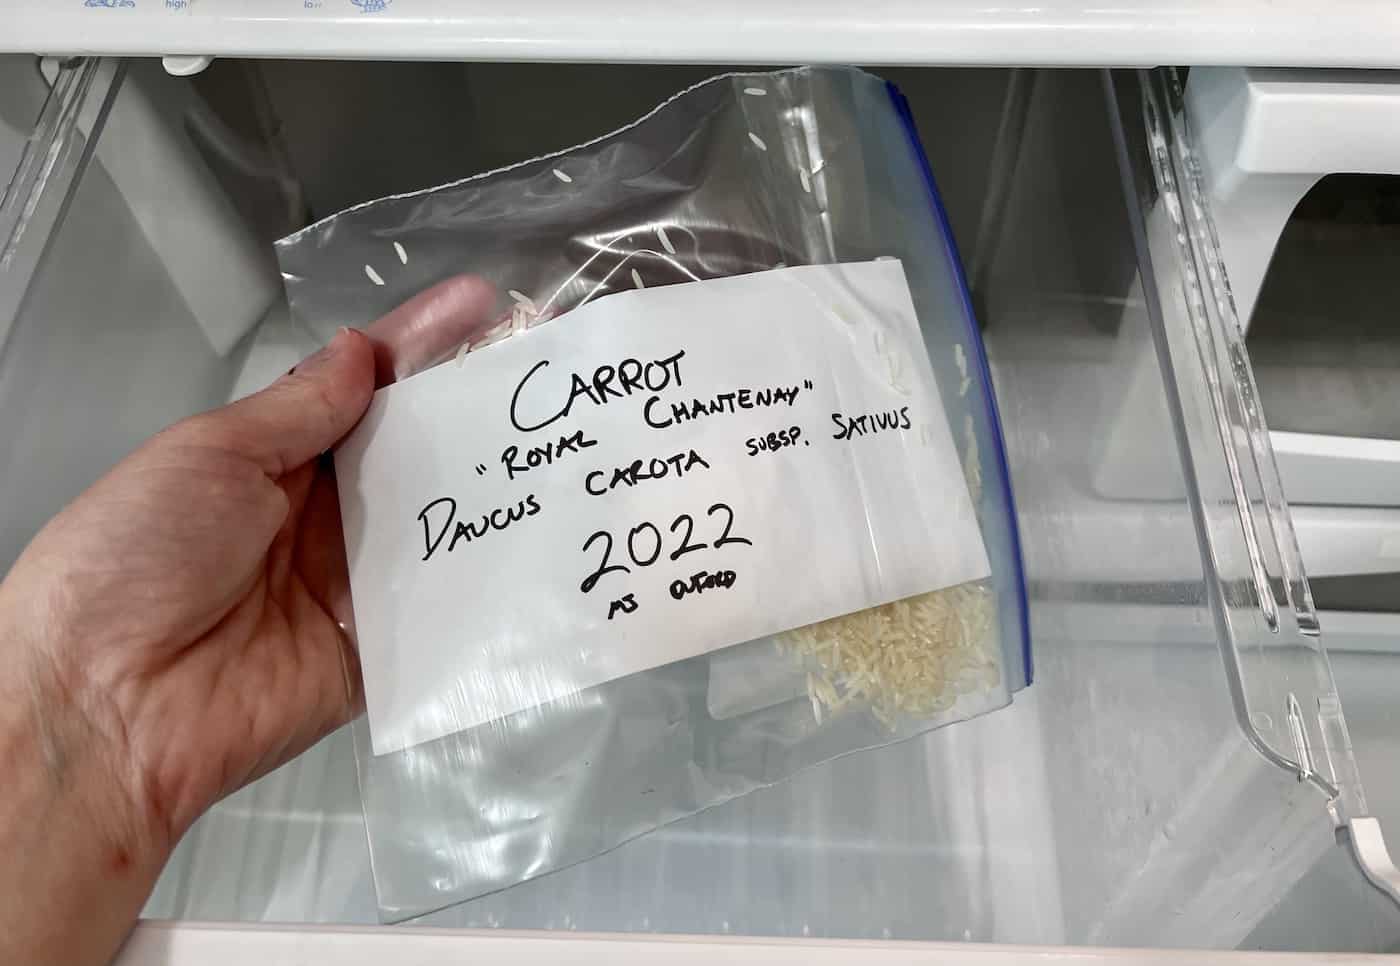
No matter what type of container you choose for storing your seeds, labeling is key: clearly mark each container with the name of the plant species along with its date collected/purchased so that when planting season rolls around again next year, everything will already be organized neatly.
Labeling your seed containers
Labeling your seed containers is an important step in the gardening process. It ensures that you can easily identify what type of seeds are stored in each container and how old they are. This helps to prevent the accidental mixing of different types of seeds, which could lead to a failed crop or worse.
When labeling your seed containers, it’s important to include the name of the plant variety as well as when you harvested or purchased them. You should also note any special instructions for planting such as depth and spacing requirements if applicable. Additionally, consider including a date on the label so that you know when it’s time to replace older seeds with fresh ones.
For optimal results, utilize waterproof labels or write directly onto plastic bags with permanent markers made for outdoor use. If utilizing paper labels, make sure they are sealed with clear tape before being placed into storage containers to prevent moisture from deteriorating them over time. For added protection against water damage, store all labeled seed containers inside larger resealable plastic bags or airtight jars/containers such as mason jars prior to placing them into long-term storage locations like freezers or cool dark places like basements and garages where temperatures remain consistent throughout the year (ideally between 40-50°F).
Finally, remember to check on your stored seeds regularly – at least once every 6 months – in case there have been any changes in temperature/humidity levels during storage which could affect their viability over time.
Labeling your seed containers is an important step to ensure you know what type of seed is stored and when it was planted. Now that the basics are taken care of, let’s move on to storing seeds in a cool, dry place for optimal preservation.
Storing seeds in a cool, dry, dark place
Storing seeds in a cool, dry place is essential for preserving their viability and ensuring that they will germinate when planted. To create the ideal environment for storing your seeds, you’ll need to keep them away from moisture, heat, light, and oxygen.
The best way to store your seeds is in an airtight container or bag with a desiccant packet inside. Airtight containers help protect against moisture, while desiccants absorb any excess humidity that may be present. If you don’t have access to an airtight container or desiccant packet, then use something like a sealed glass jar instead. This will still provide some protection against moisture but won’t be as effective as using an airtight container with a desiccant packet inside.
When it comes to temperature, try to keep your stored seeds below room temperature, if possible. For short-term storage, it’s best if the temperature stays between 40°F (4°C) and 60°F (15°C) if you don’t know how dry your seeds are. If you do know that your seeds are very dry (between 5-8% moisture content), then you can freeze them without much risk of damage. Dried and frozen seeds typically last longer than seeds held above freezing.
Light should also be avoided when storing your seeds since this can lead to premature aging of the seed and reduce its ability to germinate once planted out into the garden bed later on. The best way around this is by keeping your stored seeds in dark-colored containers such as black plastic bags or jars so that no light gets through and damages the seed’s internal structure over time due to its exposure levels being too high for extended periods of time.
Storing seeds in a cool, dry, dark place is essential for preserving their viability and germination potential. To ensure your stored seeds remain viable, it’s important to check them regularly; the next heading will provide guidance on how to do this.
Checking on your stored seeds
Checking your stored seeds regularly is an important part of gardening. If you want to ensure that the seeds you’ve saved are viable and ready for planting, it’s essential to inspect them periodically. Here are some tips on how to check your stored seeds effectively:
Inspect the seeds visually
Take a look at each seed before storing it or when checking them later on. Look for any signs of damage, discoloration, or mold growth which can indicate spoilage or poor storage conditions.
Float test
Put a few of the seeds in water and wait for 24 hours to see if they sink or float; those that sink are likely still viable while those that float have probably gone bad and should be discarded immediately. You can also try germinating a few of the seeds in damp paper towels; if they sprout within 5-7 days then they’re still good.
Smell test
Give each seed packet a sniff test; if there is an unpleasant odor coming from the packet then it may be time to toss out the contents as this could indicate fungal growth inside which will render them useless for planting purposes.
Orthodox and recalcitrant seeds
The majority of seeds saved by home gardeners are true”orthodox” seeds in terms of their storage requirements. Orthodox seeds store well when frozen, as long as they are quite dry before you freeze them. Most vegetables, herbs, flowers, and temperate plants have orthodox seeds.
There are, however, three other categories of seeds in terms of storage requirements:
- Suborthodox seeds: like true orthodox, but with a shorter storage life. Examples include some softwood trees like poplar and hickory.
- Temperate-recalcitrant seeds: Need high moisture content and can’t be stored at overly cold freezing temperatures. Examples include some nut trees like hazelnut, chestnut, and oak.
- Tropical-recalcitrant seeds: Need high moisture content and can’t even be stored at cool temperatures (below about 50°F (10°C)) for long periods. Examples include tropical woody plants like coconut and coffee.
So, while most seeds are best dried and stored in a cool/cold spot, there are always exceptions to the rule. Take care of tropical and/or woody plants, as they may have specific storage requirements.
FAQs about how to store seeds
Can I store seeds in Ziploc bags?
Yes, you can store seeds in Ziploc bags. It is a great way to keep them dry and safe from pests or other environmental factors that could damage the seed. The plastic material of the bag will help protect against moisture, light, and temperature changes which are all important for successful seed storage.
Ziplocs work best for short-term seed storage (1-2 years). Be sure to label each bag with the type of seed inside as well as the date it was stored so you know when it should be used by. Finally, make sure to check on your seeds periodically to ensure they remain viable for use in your garden.
Should I store seeds in the fridge?
Storing seeds in the fridge is certainly possible but its important to make sure the seeds are fully dried before putting them in a refrigerator. Make sure they are sealed tightly in an airtight container or bag and that they remain dry at all times. Be aware that some seed types (like many tropicals) may not survive even these conditions. It’s best to keep your seeds stored at room temperature unless you know they are well dried for optimal results.
Is it better to freeze or refrigerate seeds?
It is generally recommended to freeze seeds rather than refrigerate them. Freezing temperatures are more consistent and provide a longer-term storage option for the seeds while fluctuating temperatures in a refrigerator can cause damage to the delicate seed structure. Additionally, freezing helps protect against mold growth and other contaminants that may be present in a refrigerator environment. Properly sealed and stored in an airtight container, frozen seeds can remain viable for up to five years or more.
How long can seeds be stored?
Seeds can be stored for a surprisingly long time if kept in the right conditions. If done correctly, some types of seeds can remain viable for up to five years or more. In climate-controlled laboratories, it may be possible to store seeds for decades while maintaining viability.
Proper storage involves keeping them dry, cool, and away from direct sunlight. For most seeds, this means storing them in an airtight container at temperatures between 32-41°F (0-5°C). It is important to check the viability of your seed stock periodically as they may lose their ability to germinate over time.
Before you go…
Storing seeds is an important part of gardening, and it doesn’t have to be difficult. With the right supplies, a bit of cleaning and drying, proper labeling, and storage in a cool dry place you can store your seeds safely for future use. Doing this will ensure that when you are ready to plant again, you’ll have healthy seedlings with strong roots. So don’t forget to take the time to properly store your seeds so they’re ready when you need them – after all, it’s worth it.
Resources
- How to save tomato seeds?
- How to save sunflower seeds?
- The best seed catalogs (and tips for ordering)
- The best garden catalogs for seeds, live plants, tools, and supplies
- Seed starting guide for beginner gardeners
References
- Roberts, E. (2012). Viability of Seeds. Springer Science & Business Media.
- Toole, W. H. (1942). Storage of Vegetable Seeds. U.S. Department of Agriculture.
- Seed Saving 101: Everything You Need to Know
Need more info?
Are you interested in learning more about how to store seeds? Here are our best articles about it!