Direct sowing seeds is the process of planting seeds straight into your outdoor garden soil. It is an easy, cost-effective, and low-maintenance alternative to indoor seed starting. Some crops grow best when direct seeded, including corn, pumpkins, zucchini, and beans.

Introduction to direct sowing seeds
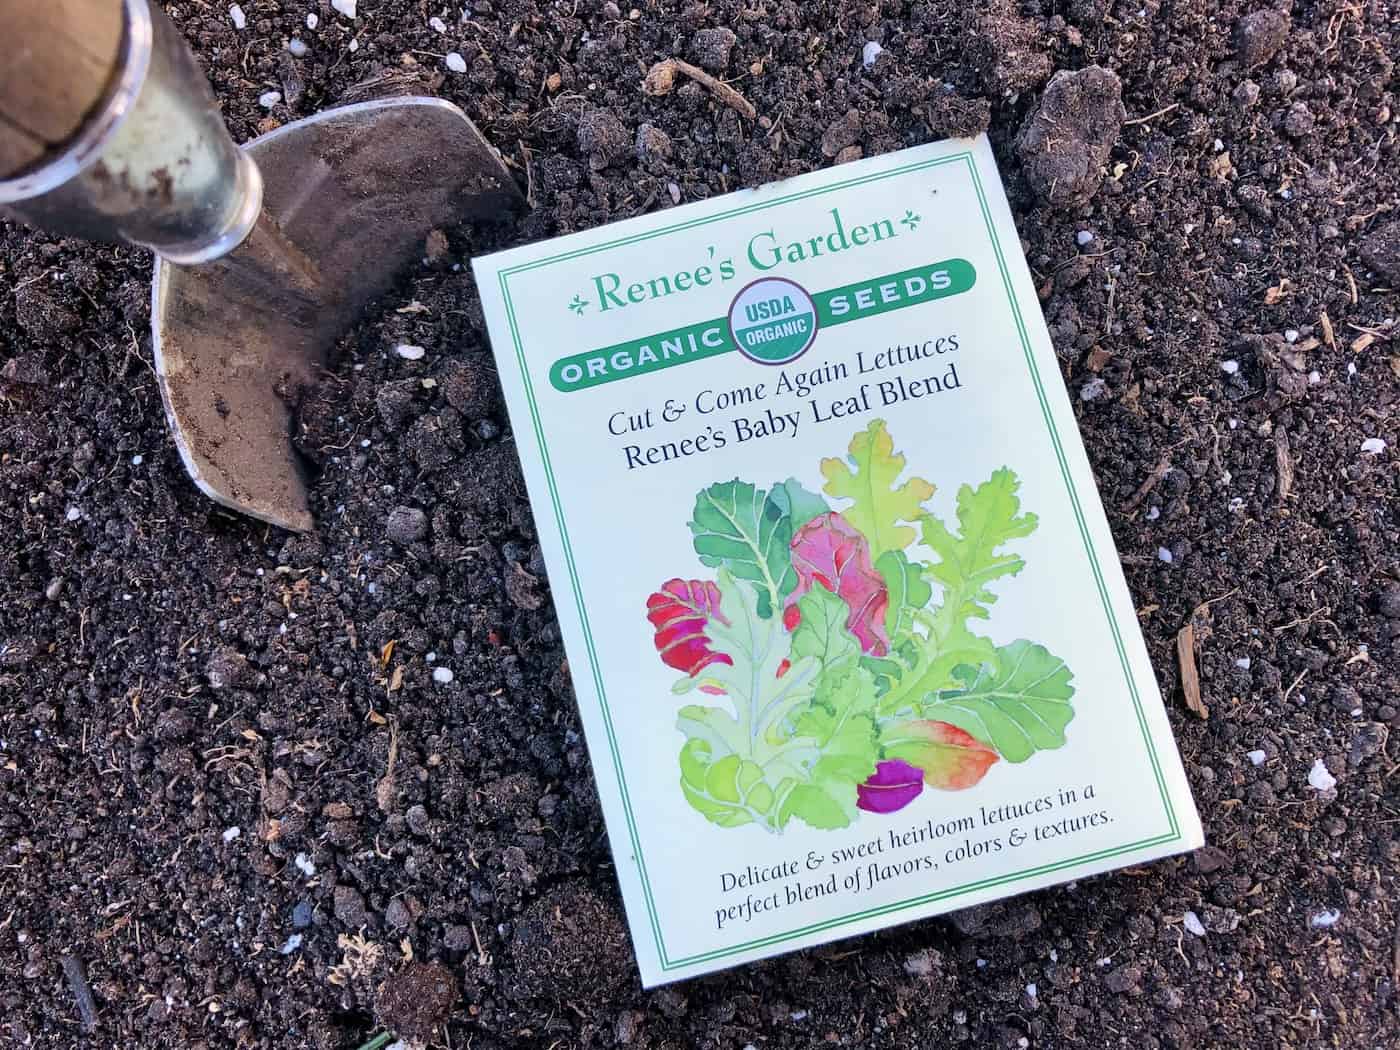
Direct sowing is the process of planting seeds directly into the soil without pre-planting them in a seed tray or small planter pot.
There are many benefits to direct sowing, including saving time and money. You don’t have to worry about buying pots or trays, as you can just sow the seeds straight into the ground. Plus, there’s no need to wait for germination since you’re planting directly into the soil. Additionally, direct sowing allows you to create larger patches of flowers or vegetables than if you were using containers or trays.
Most types of vegetable and flower seeds prefer to be direct sown outdoors. Some examples include carrots, peas, sunflowers, and marigolds.
Direct sowing is usually the best way to plant seeds of plants that have big leafy seedlings. These plants usually suffer after being transplanted as the roots struggle to bring enough water and nutrients up to the broad leaves. Plants like this that don’t love to be transplanted include pumpkins, beans, corn, okra, and squash.
The best time to direct sow depends on what type of plant you’re growing and where you live – different climates have different optimal times for planting various crops. Generally speaking though most cool-season crops like broccoli should be planted in early spring while warm-season crops like tomatoes should be planted in late spring/early summer when temperatures are warmer and more consistent throughout the day/night cycle
Before planting your seeds, it is essential to prepare the soil correctly. This includes removing weeds from the area where you plan on planting and tilling up any hard-packed areas with a shovel or rake until it is loose enough for roots to penetrate easily once they start growing outwards from their initial location within each seed casing. Additionally, adding organic matter such as composted manure will help ensure that nutrients are readily available when needed by these young plants during their growth stages.
Once your soil has been prepared then it’s time to actually plant those little guys. Depending on what kind of crop(s) are being grown spacing between individual seed casings should generally range anywhere from 4 inches apart all the way up to 24+ inches apart (for larger ones). After placing each one down lightly cover them over with dirt & water thoroughly afterward – doing this helps protect against birds & other critters potentially snacking away at them before they even had a chance to sprout upwards toward sunlight again
Keeping an eye out regularly checking moisture levels and weeds whenever necessary is essential. Try not to use overhead sprinklers but instead opt for drip irrigation systems that allow water droplets to go right onto ground level without the risk of disrupting and moving the seeds before they root in.
Direct sowing is a great way to get your garden started quickly and easily, so let’s take a look at the benefits of this gardening technique.
Benefits of direct sowing your seeds
Direct sowing is an easy and cost-effective way to plant larger areas with fewer resources. Plus, it allows you to create a more natural environment for your plants to grow in. There’s no need for costly plant lights or artificial germination techniques.
One of the biggest benefits of direct sowing is that it saves time and money. You don’t have to buy or maintain seed trays or pots, which can be costly and time-consuming. All you need are some seeds, soil, and water. This makes direct sowing much more affordable than buying pre-grown plants from a nursery or garden center.
Direct sowing is an excellent way to promote biodiversity in your garden, as it allows different species of plants to coexist together naturally. Additionally, the natural elements such as wind and rain that seeds are exposed to when directly sown outdoors can help them germinate faster than if they were planted indoors under controlled conditions. This makes direct sowing a more cost-effective and time-saving method compared to buying pre-grown plants from a nursery or garden center.
Directly sown seeds tend to establish better root systems, as their roots are not restricted by the confines of a pot or tray like those grown indoors typically are. This leads to plants that can thrive on their own without needing extra care from you beyond regular watering and weeding throughout the season; making them ideal for busy homeowners who don’t have time for intensive gardening maintenance yet still desire stunning results.
Direct sowing also allows for succession planting, which is the practice of planting multiple crops at different times throughout the season. This ensures that there are always blooms in your garden regardless of when it is and provides a variety of food options both for yourself and any wildlife visitors. It helps to keep things interesting while still providing plenty of sustenance.
What seeds to direct sow outdoors
When it comes to direct sowing, the possibilities are endless. You can choose from a variety of vegetables, herbs, and flowers that will thrive in your garden. Before you decide which seeds to plant directly into the ground, consider what type of soil you have and how much sun or shade your garden receives.
When it comes to what type of seeds should be direct sown outdoors, there are no hard-and-fast rules; however, some species do tend to perform better with this method than others due mainly because they have evolved over time specifically suited for outdoor conditions such as fluctuating temperatures and moisture levels throughout different seasons of the year.
Examples include:
- Beans
- Carrots
- Corn
- Cosmos
- Marigolds
- Peas
- Pumpkins
- Squash
- Sunflowers
- Zinnias
When to direct sow seeds outdoors?
The best time to direct sow depends on the type of plant you are growing and the climate where you live. Generally speaking, most plants should be direct sown when the soil temperature reaches at least 60°F (15°C). This usually occurs in late spring or early summer depending on your location. If you’re not sure what temperature it needs to be, check out this handy chart from The Old Farmer’s Almanac that shows average last frost dates for different regions in North America.
If you want to get an even more accurate reading of your soil temperature, invest in a digital thermometer specifically designed for gardening purposes – they’re relatively inexpensive and will give you peace of mind knowing that your seeds have been planted at the right time.
When planting vegetables like tomatoes or peppers outdoors directly into the ground, wait until after all danger of frost has passed before planting them outside as these types of plants are particularly sensitive to cold temperatures. You may also need to start some vegetable varieties indoors first before transplanting them outdoors later on – so make sure to read up on each individual variety before getting started.
For flowers such as marigolds or zinnias which prefer warmer climates, wait until mid-summer once temperatures have risen significantly enough for them to thrive without any issues. These types of flowers tend not to do well if exposed to too much cold weather so it’s important that they are planted during optimal conditions otherwise their growth could suffer greatly.
Finally, it is important to keep in mind that certain areas may experience longer periods between frosts than others. Therefore, always double check with local sources such as nurseries or farmers markets if possible, just in case there is still a chance for frost despite what other charts say about average last frost dates in your area.
By following these tips and taking into account both regional climate differences as well as specific requirements needed by each individual plant species, you can ensure successful germination rates and ultimately reap the rewards come harvest season.
Now that you know when to direct sow, it’s time to prepare your soil for planting success.
Preparing soil for planting seeds
Preparing your soil is an important step when direct sowing. Before you begin, make sure to remove any weeds or debris from the area where you will be planting your seeds. This will help ensure that your plants have plenty of room to grow and thrive.
Next, use a rake or hoe to loosen up the soil so that it’s easy for roots to penetrate and water can drain easily. Loosening the soil also helps air get in, which is essential for healthy plant growth. If needed, add some compost or other organic matter such as manure or peat moss to improve drainage and nutrient levels in the soil.
When preparing your soil for direct sowing, consider its pH level as well. Most vegetables prefer slightly acidic soils with a pH between 6-7; however, some crops like potatoes require more alkaline soils (pH 7-8). You can test your soil’s pH with a simple home testing kit available at most garden centers and nurseries.
If necessary, adjust the pH of your soil by adding lime if it’s too acidic or sulfur if it’s too alkaline; both are readily available at garden stores and online retailers alike. Make sure not to overdo it though – too much lime can cause problems just like too much acidity.
Finally, once you’ve prepared your bedding area properly by removing weeds and loosening up the dirt while adjusting its pH level accordingly – you’re ready for direct sowing. Planting directly into prepped beds saves time since there’s no need for starting seedlings indoors first before transplanting them outside later on in springtime; plus they tend to do better than transplants because their root systems aren’t disturbed during transplantation.
Once your soil is prepped and ready to go, it’s time to plant those seeds. With a little bit of patience and effort, you’ll be able to watch as your garden comes alive with new growth.
Planting your seeds
Planting your seeds is the first step to a successful garden. Depending on what type of seed you are planting, there are different methods for doing this correctly. For example, some seeds should be planted shallowly while others should be planted deeper into the soil.
When planting small or fine-seeded plants like lettuce and carrots, it’s best to mix them with sand or coffee grounds before sowing in order to ensure even distribution across the bed. Simply combine equal parts of each material in a bucket and then sprinkle over the area where you want to plant your seeds. This will help create an even spread when sowing as well as make it easier for smaller seeds to take root once they have been placed in the ground.
For larger-seeded plants such as beans and squash, it’s important that you give them enough space between each seed so that they can grow properly without competing for resources from their neighbors. To do this, use your finger or a trowel to dig individual holes at whatever depth is recommended by the seed packet, and at least six inches apart from one another before dropping in one single seed per hole. Then cover up with soil and lightly tamp down around each hole so that everything is secure and ready for germination.
Large seeds can also be pre-sprouted before you plant them to help them germinate more quickly. Soak the seeds for a few hours and place them on moist fabric, a paper towel, or even potting soil. Keep them at ideal temperatures until the seed coat starts to open and the sprout is barely visible. Transplant them into the soil before the sprout gets long enough to be damaged.
If you don’t know what depth to plant the seeds at, it is usually better to plant them a little more shallow than too deep. The little seedling stalk needs to push up through all that soil to get to the sun, so don’t make the process too difficult! Plant the seeds a bit shallowly and keep them moist.
In general, seeds are planted 1-2 times as deep as the distance across their widest point (either length or width). So, a seed that is 1/4″ long would be placed in a hole that was between 1/4″ and 1/2″ deep. Cover the seeds lightly with soil and keep them moist until they germinate and sprout.
Once all of your seeds have been planted, water gently but thoroughly until moisture has reached all levels of soil depth – especially if conditions are dry outside – making sure not to overwater which can cause drowning roots or disease issues later on down the line. You may also want to consider adding mulch around newly seeded areas too; this helps keep moisture locked inside while preventing weeds from sprouting up near delicate young plants just starting out life outdoors.
Finally, don’t forget about protecting those precious little sprouts from hungry birds or other critters who might find them tasty snacks. Covering beds with netting or row covers can help deter animals away while allowing light through so that new growth isn’t hindered during its most vulnerable stages of development. If you’re growing specialty seeds like woody plants or otherwise, you may also want to mulch them with perlite.
Once your seeds are planted, it’s time to give them the attention they need to thrive; from providing proper watering and sunlight to keeping an eye out for weeds and pests. Let’s move on to learn more about how we can care for our seeds.
Caring for seeds to support good germination
Here are the basics of caring for your seeds once they have been planted in the soil outside.
Water
Seeds need to be kept moist until they germinate. Germination of some veggies can happen in under a week when soil is warm and seeds are ready to sprout, while germination of ornamental plants like trees, shrubs, and grasses can take 3+ weeks (even when conditions are ideal).
Mulch
Covering your newly planted seeds with a thin layer of mulch or straw can help retain moisture in the soil while protecting them from extreme temperatures or heavy rainfalls. Mulching helps keep weeds away from your plants by blocking their access to light, air, and nutrients; it also adds organic matter into the soil, which improves its fertility over time.
The best types of mulches for vegetable gardens include shredded leaves, grass clippings, composted manure, wood chips, pine needles, and bark chips. If you choose straw as a covering material instead of mulch then make sure it is free from weed seeds so that you don’t end up with an unwanted crop. The best mulches for woody plant seeds are usually either perlite or vermiculite.
Fertilizer
If you want your plants to grow strong and healthy then adding fertilizer will provide essential nutrients such as nitrogen (N), phosphorus (P), and potassium (K). These elements are needed for photosynthesis – without them, plants won’t be able to produce energy through this process – so it is important that they have access to these nutrients when starting out life in their new home. Fertilizers come in different forms such as liquid concentrates or granules; whichever one you choose just remember not to over-fertilize because this can burn delicate root systems leading ultimately to lead the death of young seedlings.
Weeding
Weeds compete with our desired crops for space, water, and nutrition, so removing any weeds before planting will ensure that our chosen vegetables get all the resources they need during their growth period. Hand weeding works well on small areas but if there are large patches then using a hoe may be more effective at keeping those pesky intruders away. Additionally, some gardeners like to use black plastic sheeting around their vegetable beds prior to the planting season; this acts as a barrier between weeds below ground level, stopping them from coming up altogether.
Once you’ve taken the time to properly care for your seeds, it’s time to reap the rewards of a beautiful garden and move on to the next step: understanding how best to plant them.
Reaping the rewards with your own homegrown seedlings
There’s nothing quite like seeing the fruits of your labor bloom in all their glory. Whether it’s colorful flowers or delicious vegetables, you’ll be amazed at how quickly they appear after planting the seeds.
The first reward from direct sowing is watching your plants grow from tiny seedlings into full-grown specimens with vibrant blooms or tasty produce. It’s truly amazing how much life can spring forth from such small beginnings. Plus, if you’ve chosen varieties that are well suited for your climate and soil type, then you’ll get even better results as they thrive in their natural environment.
Another benefit of direct sowing is that it saves money on starter plants since most seeds are much cheaper than buying pre-grown plants at a nursery or garden center. You also don’t need any special equipment – just some basic gardening tools like trowels and hoes will do the trick. Plus, once established, many perennials will reseed themselves each year so you won’t have to buy new seeds every season either.
Finally, one of the best rewards from direct sowing is getting out into nature and enjoying its beauty while tending to your garden beds. Gardening has been proven to reduce stress levels by providing an opportunity for relaxation away from everyday worries and concerns – plus its great exercise too. So take some time each day (or week) to enjoy being outdoors among nature’s wonders while reaping the benefits of direct sowing in your own backyard oasis.
Reaping the rewards of direct sowing is an incredibly rewarding experience. Not only will you be able to enjoy the beauty of your garden, but you’ll also get to reap the benefits of delicious vegetables and flowers that have been grown with your own two hands.
Direct sowing is a great way for novice gardeners to get started in their gardening journey. It requires minimal effort and supplies, so it’s perfect for those who don’t want to invest too much time or money into their hobby. Plus, since you’re planting directly into the soil instead of using containers or raised beds, there’s no need for extra equipment like trowels or hoses – just grab some seeds and start planting.
When selecting what seeds to direct sow outdoors, it’s important to consider which plants are best suited for your climate zone. Some plants may require more sun than others while some may thrive better in cooler temperatures; doing research on which types of plants work best in your area can help ensure success when direct sowing. Additionally, make sure that whatever type of seed you choose has been certified as safe for organic growing practices if that’s something important to you.
The timing of when you plant can also affect how successful your direct sowing efforts will be. Depending on where you live and what type of plant it is, certain times during the year might be better than others for planting; again doing research on this beforehand can save a lot of headaches down the line. Generally speaking though most vegetables should be planted either early spring or late summer/early fall depending on whether they are cold-weather crops (like kale) or warm-weather crops (like tomatoes).
Once everything has been decided upon – what type(s)of seed(s), when they should go in – then comes preparing your soil before actually getting down and dirty with planting them. Make sure that any weeds have been removed from the area first; then use a rake or shovel to loosen up compacted dirt so water can penetrate deeper roots easier once things begin sprouting up above ground level later on down the road. You’ll also want to add compost material such as leaves and grass clippings at this stage if possible as well – this helps create rich nutrients within topsoil layers which aids healthy growth further along in the development stages post-germination period too.
FAQs about direct sowing seeds
Is it best to direct sow seeds?
It depends on the type of seed and the desired outcome. Generally, direct sowing is best for larger seeds like beans, peas, squash, and corn as they need to be planted deep in order to germinate properly. Smaller seeds such as tomatoes and peppers should usually be started indoors first and then transplanted outdoors when the weather warms up.
If you are looking for a quick harvest, direct sowing may not be ideal since some plants take longer to mature when planted directly into the ground. However, if you have patience and time on your side it can be an effective way to get your garden going.
How do you direct sow seeds outside?
First, choose an area of your garden with well-draining soil and plenty of sunlight. Then, prepare the soil by loosening it up with a rake or hoe to ensure good seed-to-soil contact. Next, spread the seeds evenly over the surface and cover them lightly with compost or soil. Finally, water thoroughly to help germination and keep the soil moist until the plants are established.
Can I put seeds directly in the ground?
Yes, you can put seeds directly in the ground. However, it is important to consider a few factors before doing so. The soil should be well-drained and have enough nutrients for the plants to grow properly. Additionally, it is important to check the weather forecast as some seeds require specific temperatures or moisture levels for successful germination.
Finally, make sure that you are planting at the right time of year; many vegetables need warm soil temperatures and long days of sunlight in order to thrive. Following these steps will help ensure your success when planting seeds directly into the ground.
Before you go…
Direct sowing is easy, cost-effective, and can yield amazing results with minimal effort. With the right preparation and care, you can reap the rewards of direct sowing seeds in no time. Whether you’re just starting out or an experienced gardener, direct sowing is a great way to get your garden growing quickly and easily.
Resources
- The best garden catalogs for seeds, live plants, tools, and supplies
- Types of seeds: Open-pollinated, heirloom, organic, hybrid, & non-GMO
- Best seeds for winter sowing
- Winter sowing guide for planting seeds outdoors in cold climates
References
- Mortimer, P., Wade, L., Tuong, T., Lopez, K., & Hardy, B. (2002). Direct Seeding: Research Strategies and Opportunities. Int. Rice Res. Inst,.st
- Turner, C. B. (1998). Seed Sowing and Saving: Step-by-Step Techniques for Collecting and Growing More Than 100 Vegetables, Flowers, and Herbs. Storey Communications.
Need more info?
Are you interested in learning more about direct sowing seeds? Here are our best articles about it!